
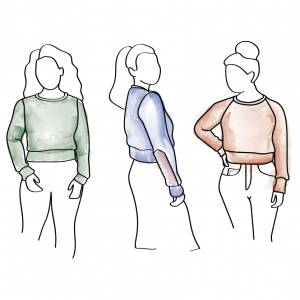
Cedar Sweater Crew View Friends! Let’s sew up this sweater! One of the things I loved hearing from the first people who sewed up the Cedar Sweater is how fast and satisfying it is! Some mentioned they were able to cut and sew it up in a matter of a couple of hours, and they wouldn’t call themselves speedy either! Whether you sew up your Cedar Sweater Crew in one sitting or multiple sessions, these steps will guide you from start to finish! So grab your cut out pattern pieces and your Cedar Instructions and let’s roll. If you are looking for info on how to get prepared before you start sewing, pop over to this intro article here.
If you are sewing the Raglan View, check out the sewalong here!
If you don’t have the Cedar Sweater Pattern yet, shop for it here (instant download)!
-
 Cedar Sweater PDF Pattern$13.00
The sections of this article correspond to the steps of the Cedar Sweater Sewing Instructions booklet, starting on page 8.
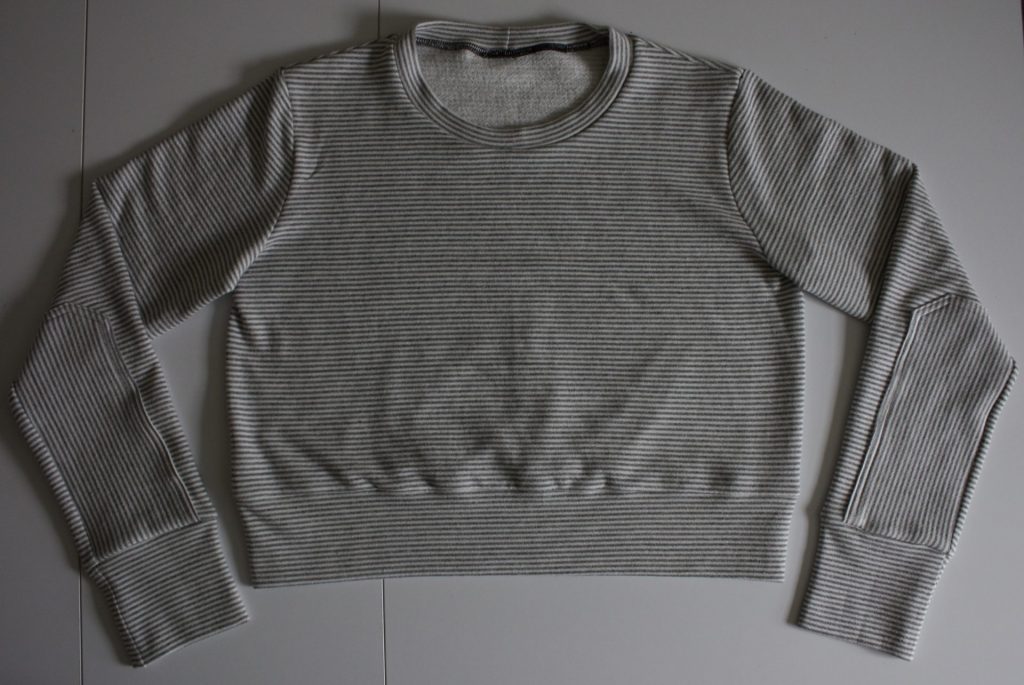
I’m sewing my Cedar Sweater Crew View in size 8 in a striped French Terry fabric with my serger using black thread so you can clearly see the seams.
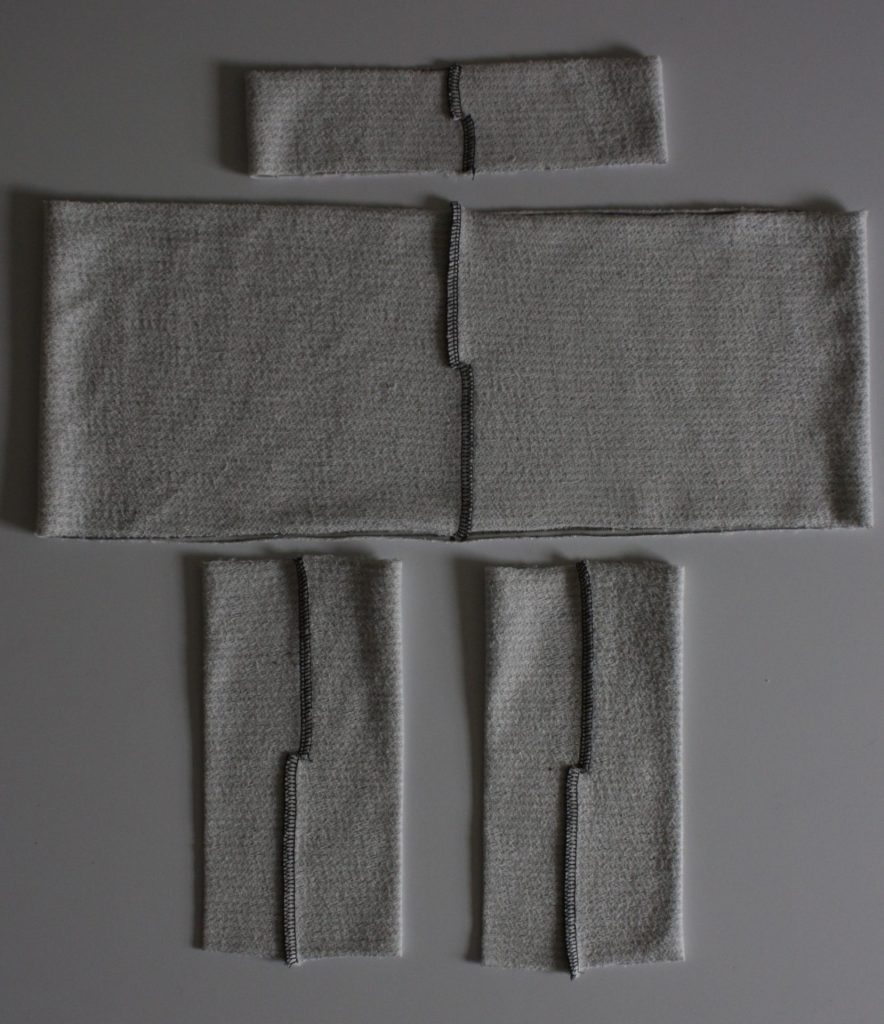
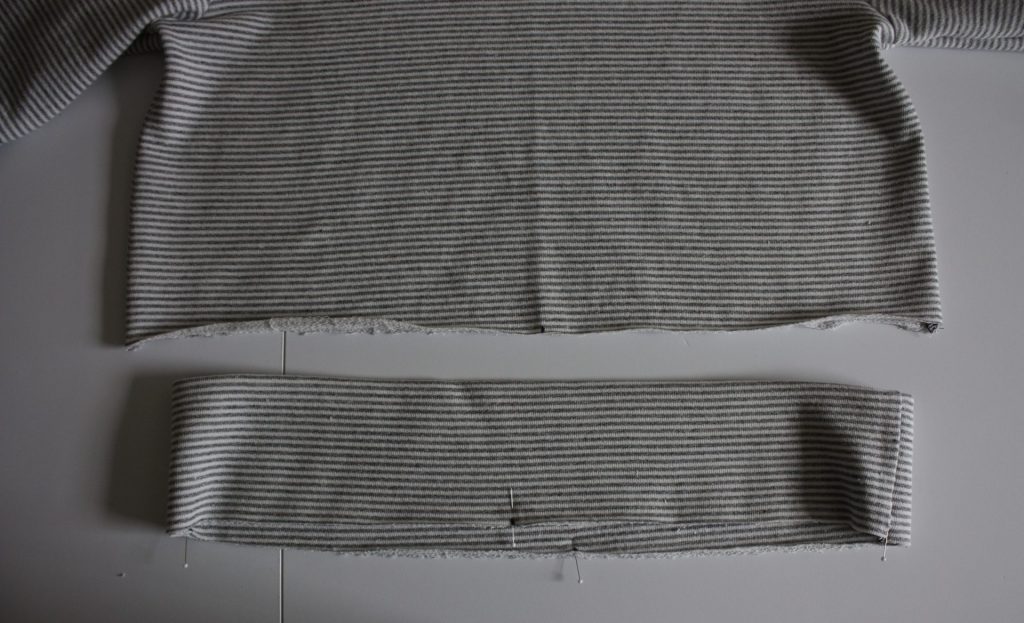
Prepare Bands and Cuffs
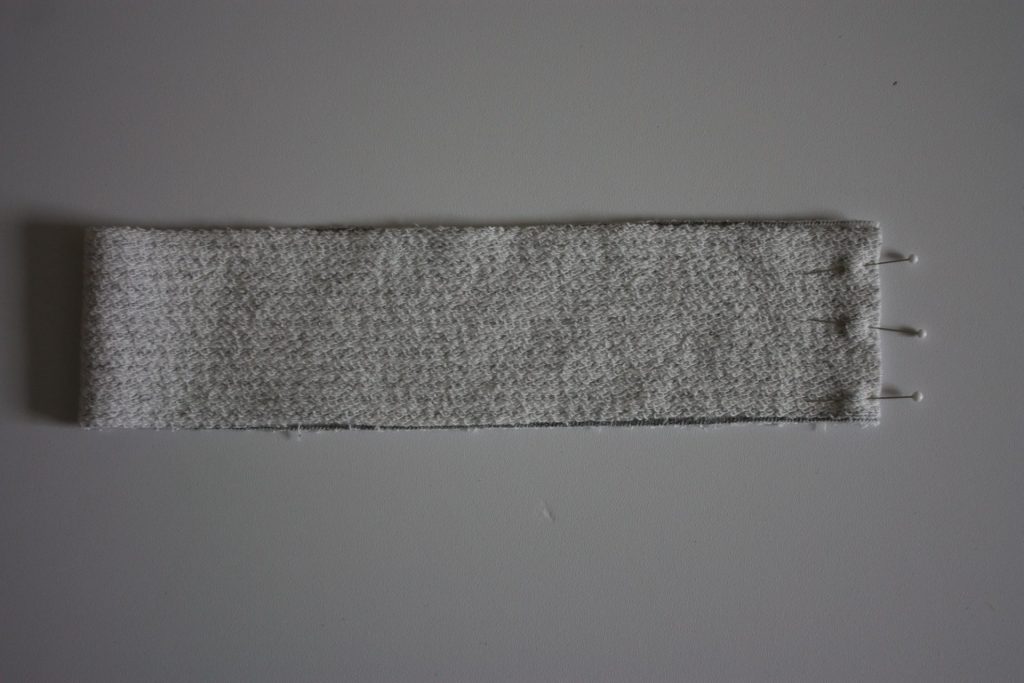
Steps 1-3 start off with preparing the bands and cuffs of the sweater. It’s so nice to get these done right away and have them ready to go so the final steps later on are a breeze. If you are using a regular sewing machine, sew a narrow zig zag stitch, and finish the seam allowances together using a wide zig zag stitch over the raw edges. You can always plan to finish your seam allowances together in all future steps too! A helpful tip from a pattern tester is to pre-press the bands by folding them in half, long edges together (or un-notched edges of the cuffs together) and wrong sides of the fabric touching. Then unfold and follow steps 1-3 below. The pre-press will make Step 5 a breeze!
Pin Neckband 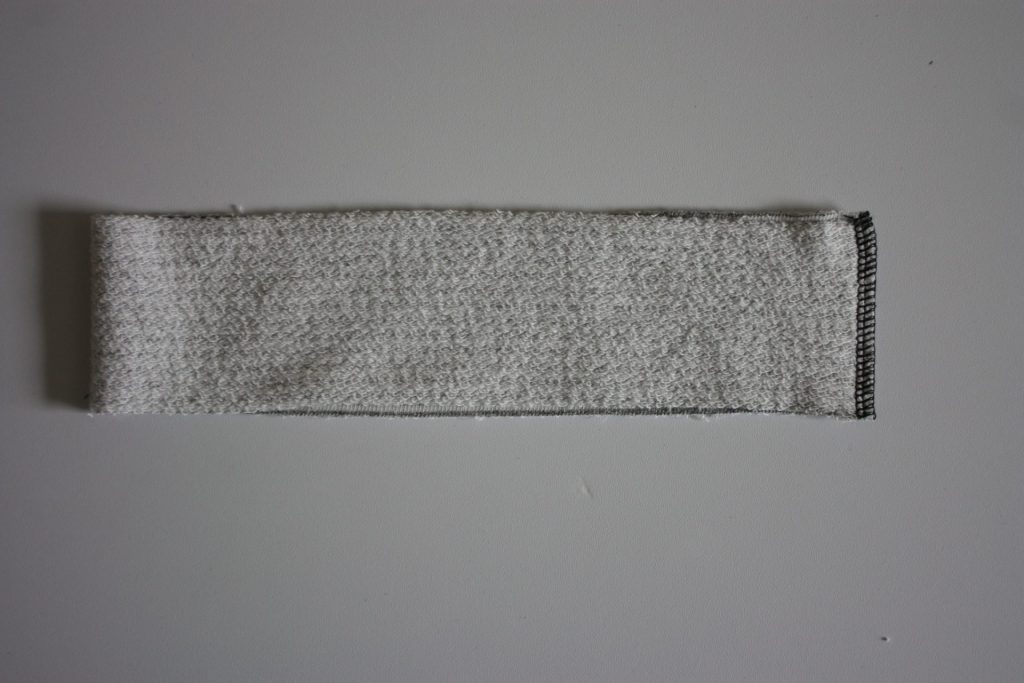
Stitch Neckband 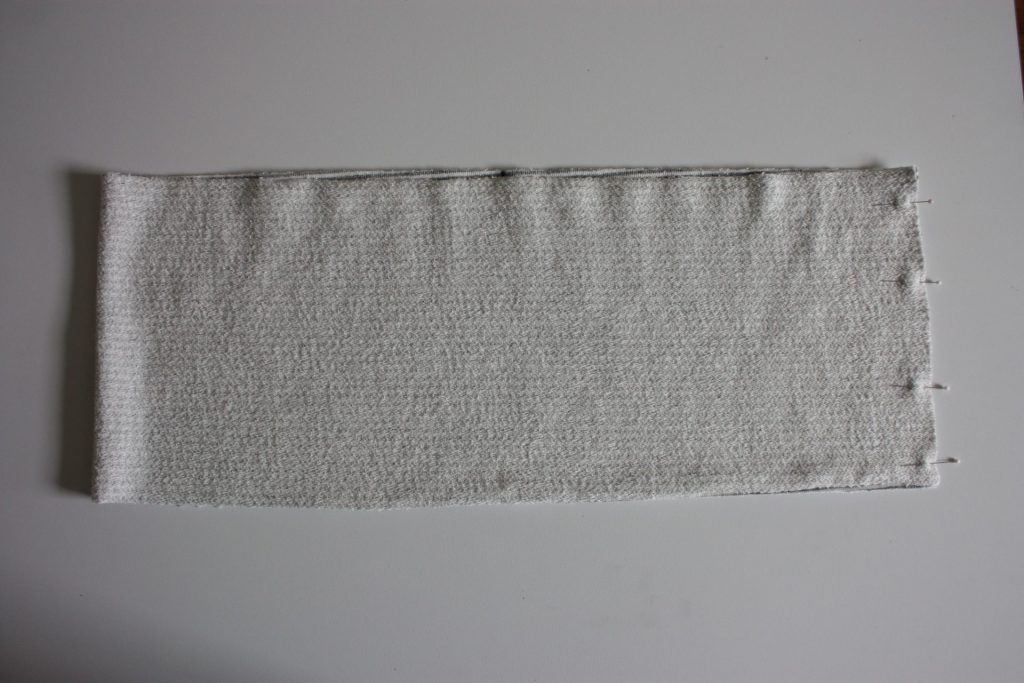
Pin Hem Band 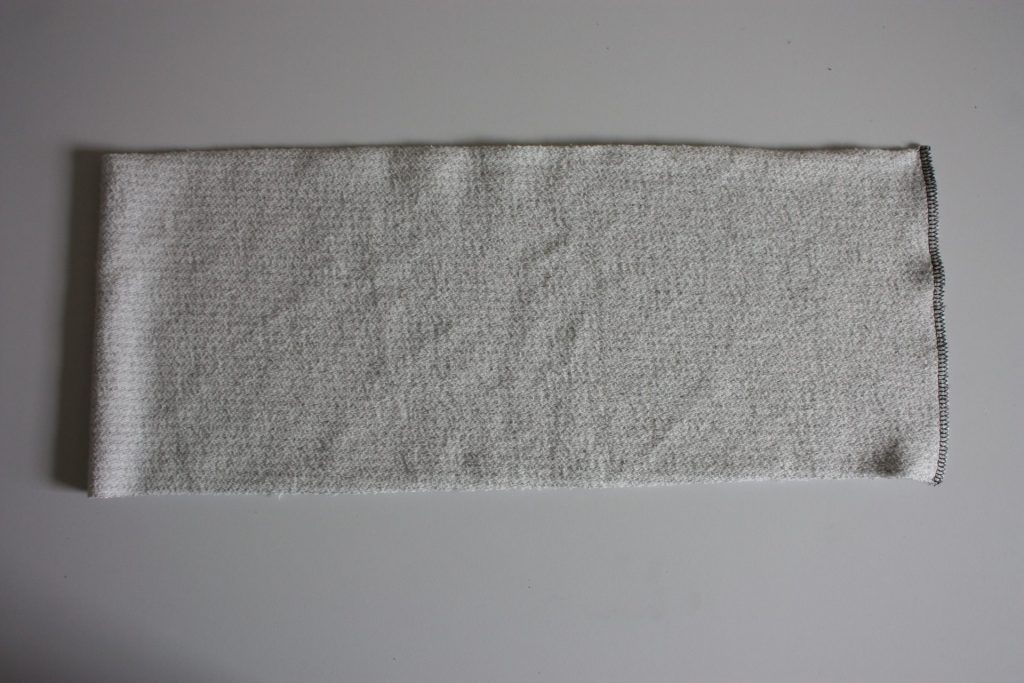
Stitch Hem Band 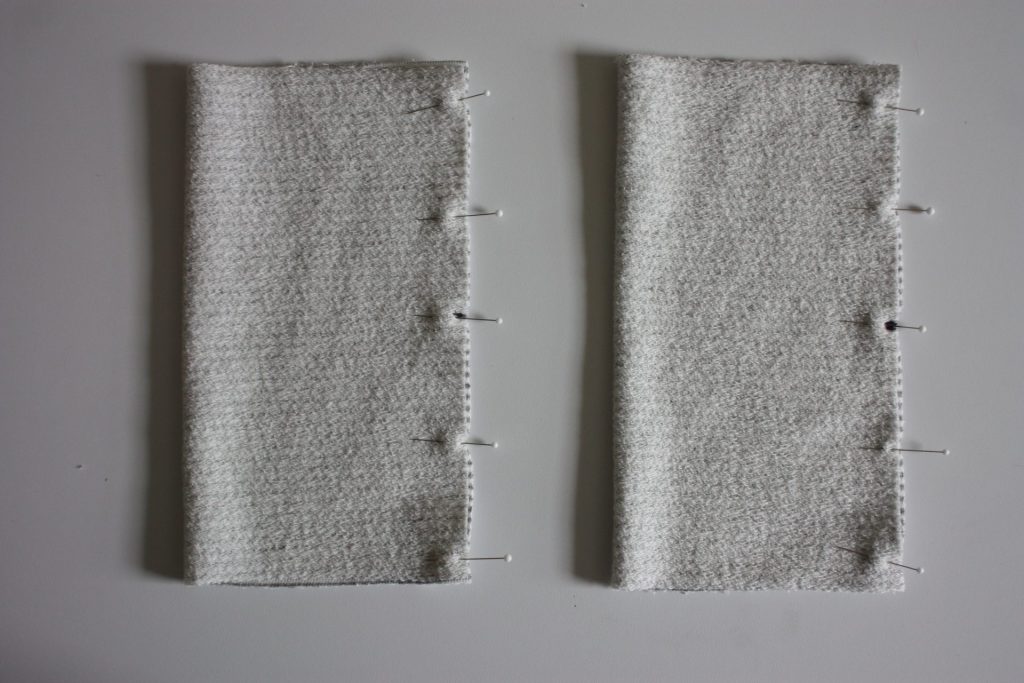
Pin Cuffs 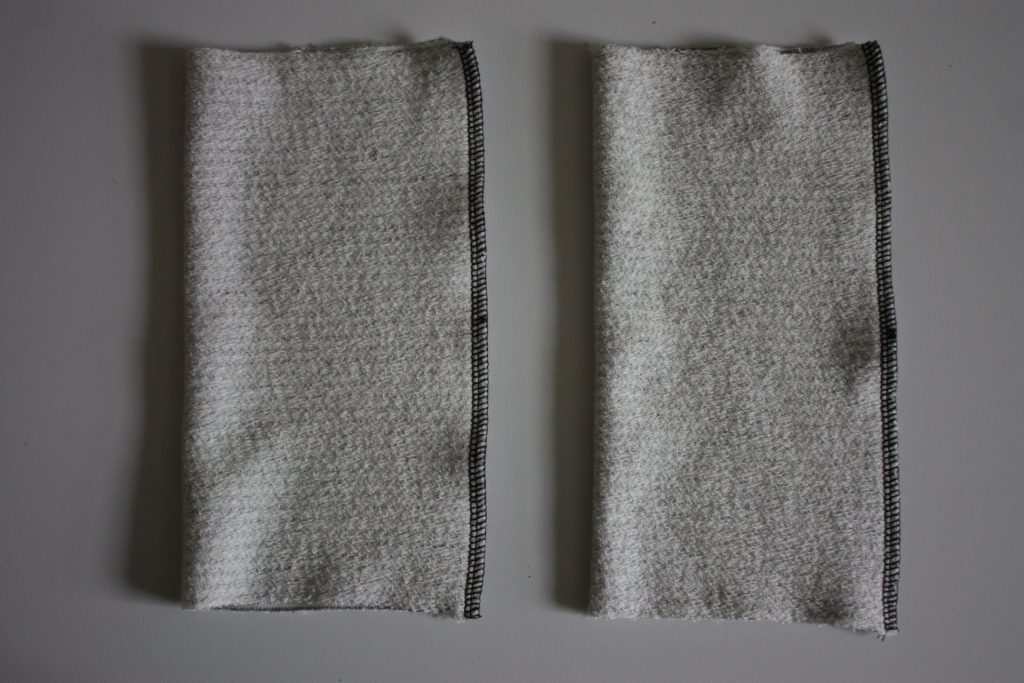
Stitch Cuffs
Step 4 helps to reduce bulk when we fold these bands in half.
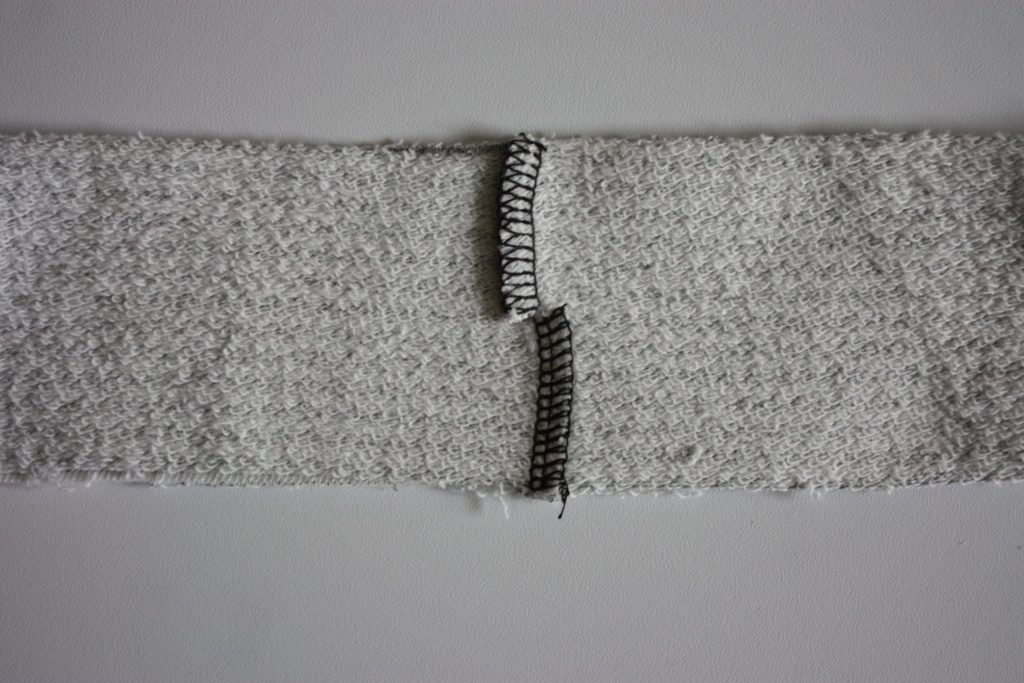
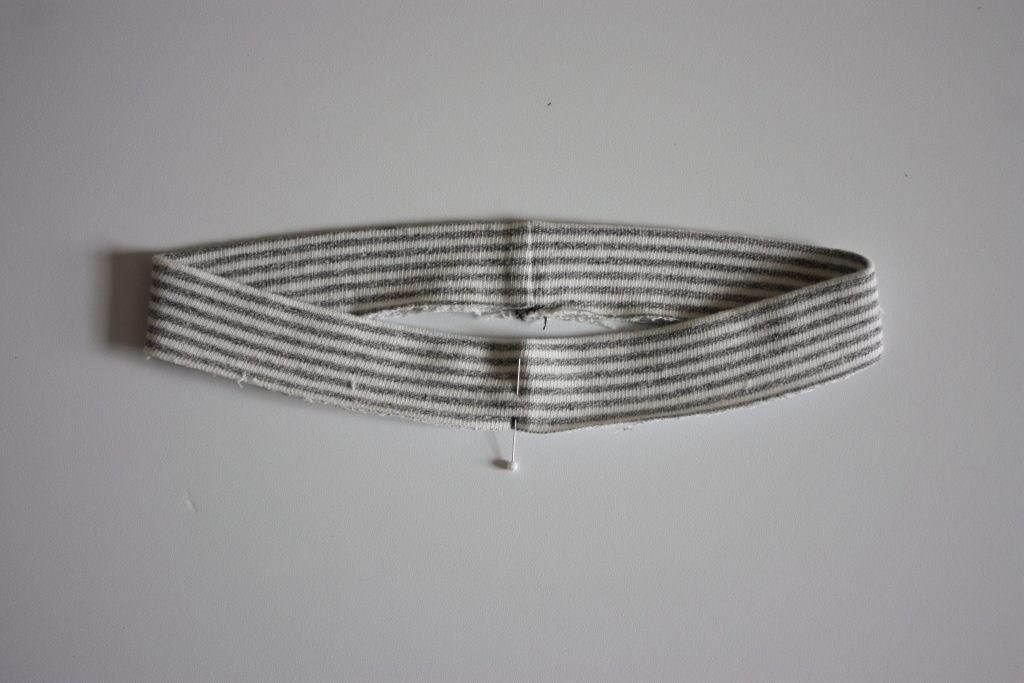
Be careful not to clip through the construction seams. On a 4-thread overlocker or serger, you’ll see two lines of straight stitches. I clip up to the first line but not through it. Press the seams apart.
Step 5 is to fold the tubes in half so the raw edges meet and the wrong sides of the fabric are touching. If you pre-pressed at the very beginning, this will be easy. Even if you didn’t, not to worry! Make sure your seam allowances are still pressed apart from each other so when they come together, they face different directions and reduce bulk.
Folded neckband 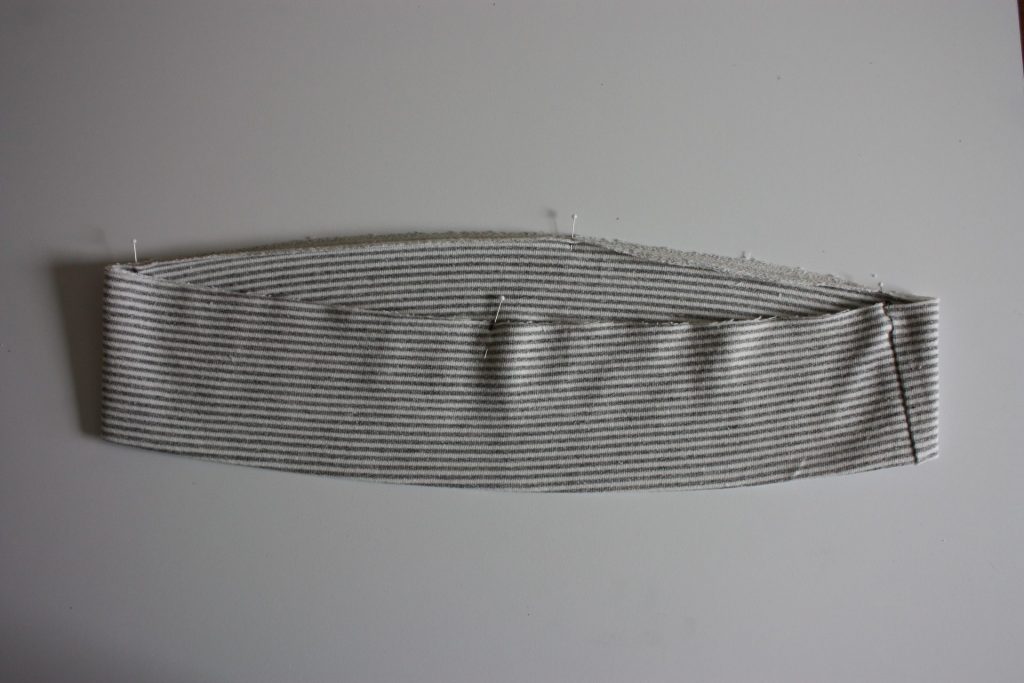
Folded hem band 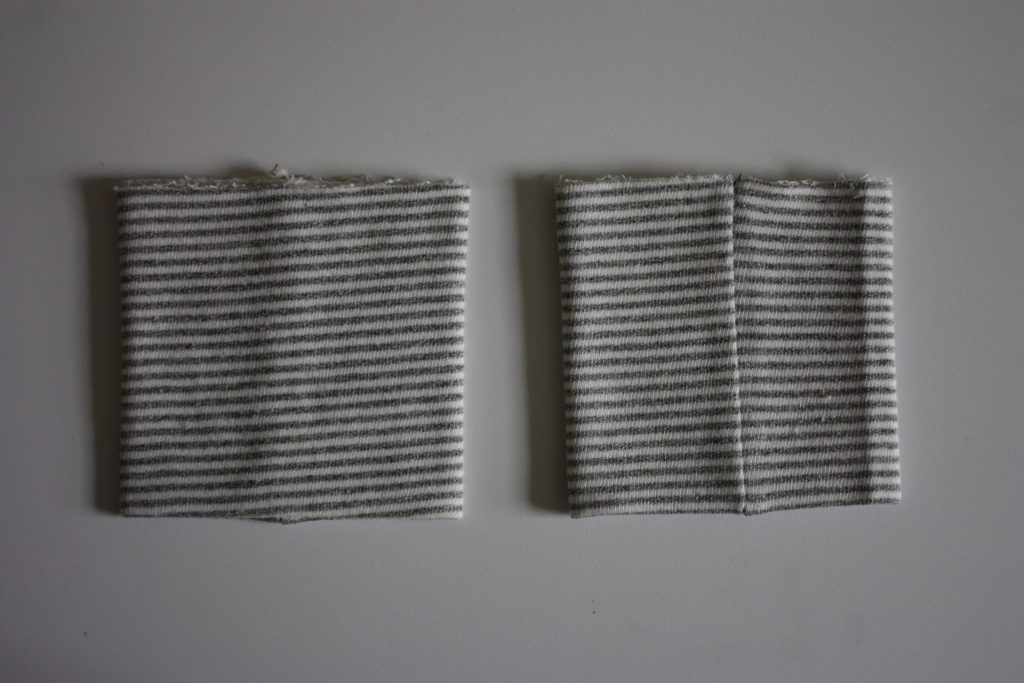
Folded cuffs
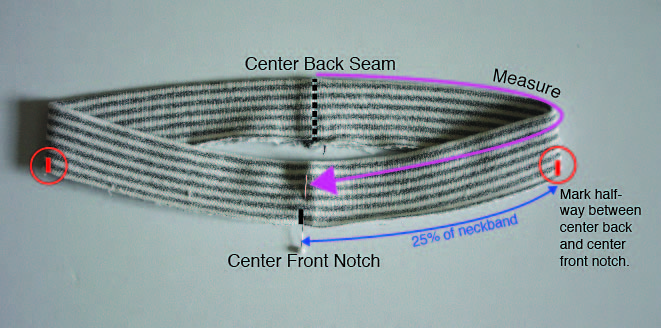
Give your bands and cuffs a good press and now is a great time to divide the length of your bands and cuffs into quarters. The Hem Band is already done for you with the seam line and three notches around the raw edge. The Neckband is already divided in half by using the seam line and the notch. Measure and mark halfway between the seam and the notch of the neckband, and this will divide it into quarters. You can do the same on the cuffs. If you prefer, you can also baste your raw edges together at this point, which can make attaching them a bit easier later on.
Prepare Elbow Patches
The awesome thing about these elbow patches is that you can really have fun with them. Use a contrast fabric, change direction of your stripes like I did, do a little embroidery before you attach them…the possibilities are fun to think about! The patches blend into the sleeve and cuff edges, so they are easy to align too.
Step 6 is to mark and identify your elbow patches. You should have a notch on one side of each elbow patch, since your elbow patches should mirror each other. With fabric right side up and the three short edges at the top, if the notch is on the right, then it is the left elbow patch as you wear it, and vice versa. See the diagram on the bottom of page 8 to help. Those notches will match to the notch on the sleeve in a moment.
Step 7 is to fold and press the edges of the elbow patches that will be top stitched to the sleeve. Start with the diagonal edges first, pressing them under 1cm, then do the top edge and the long un-notched edge. The notched edge and the bottom are not pressed since they will be sewn into the sleeve and cuff seams eventually.
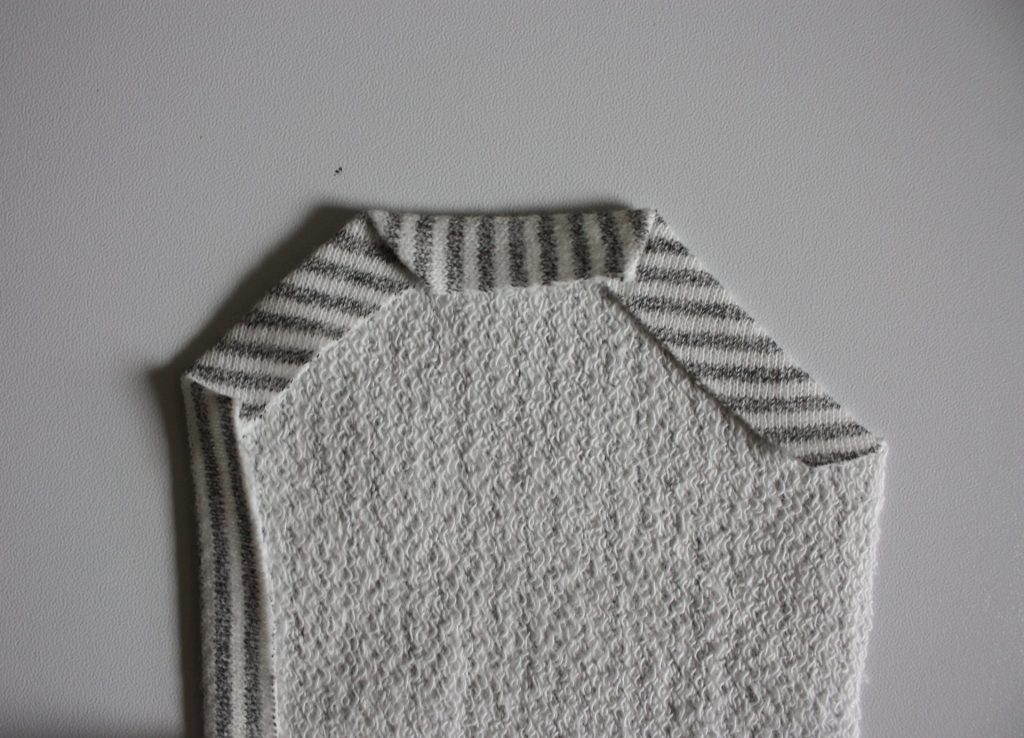
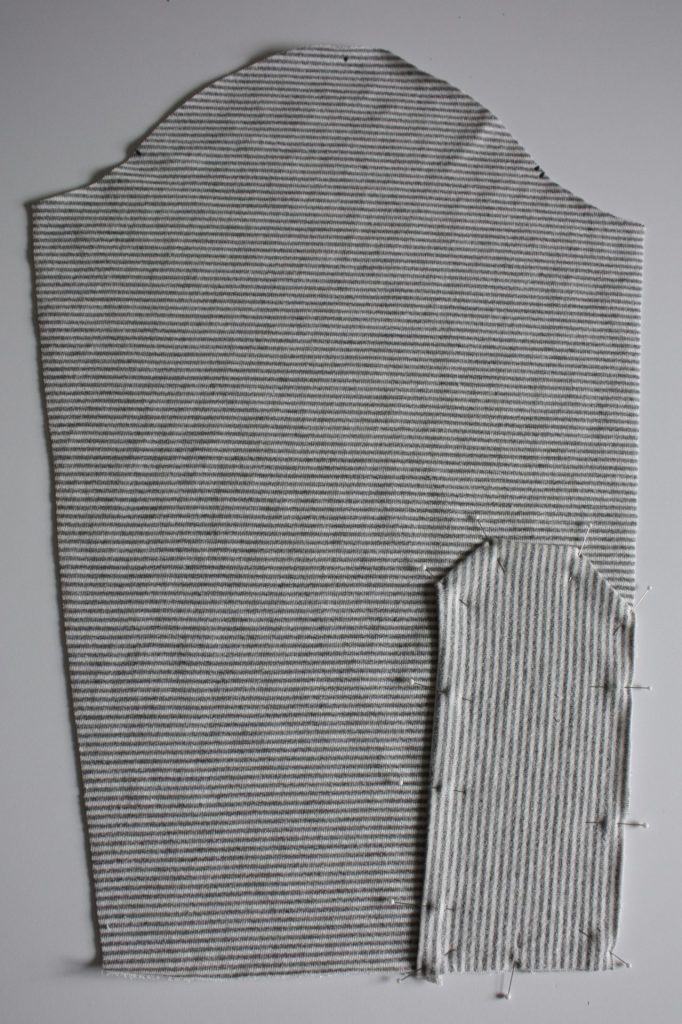
Place the pressed patch on the sleeve, matching notches. Patch will be below the double notch. 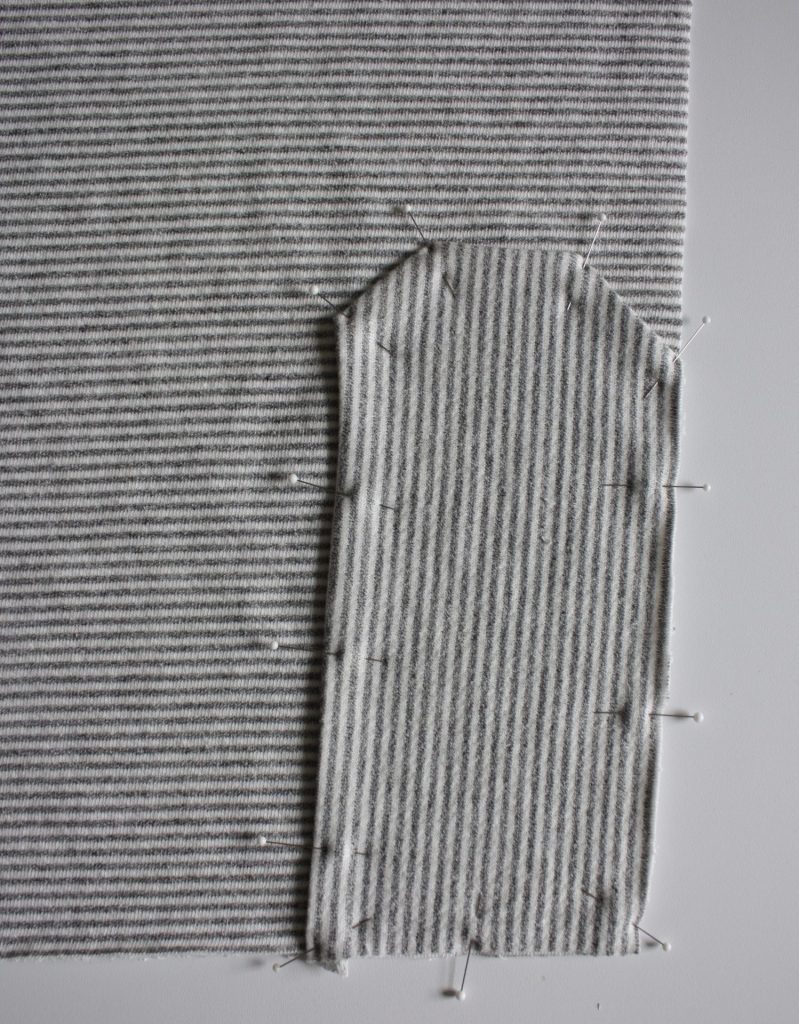
The wrong side of the patch touches the right side of the sleeve. Pin generously. 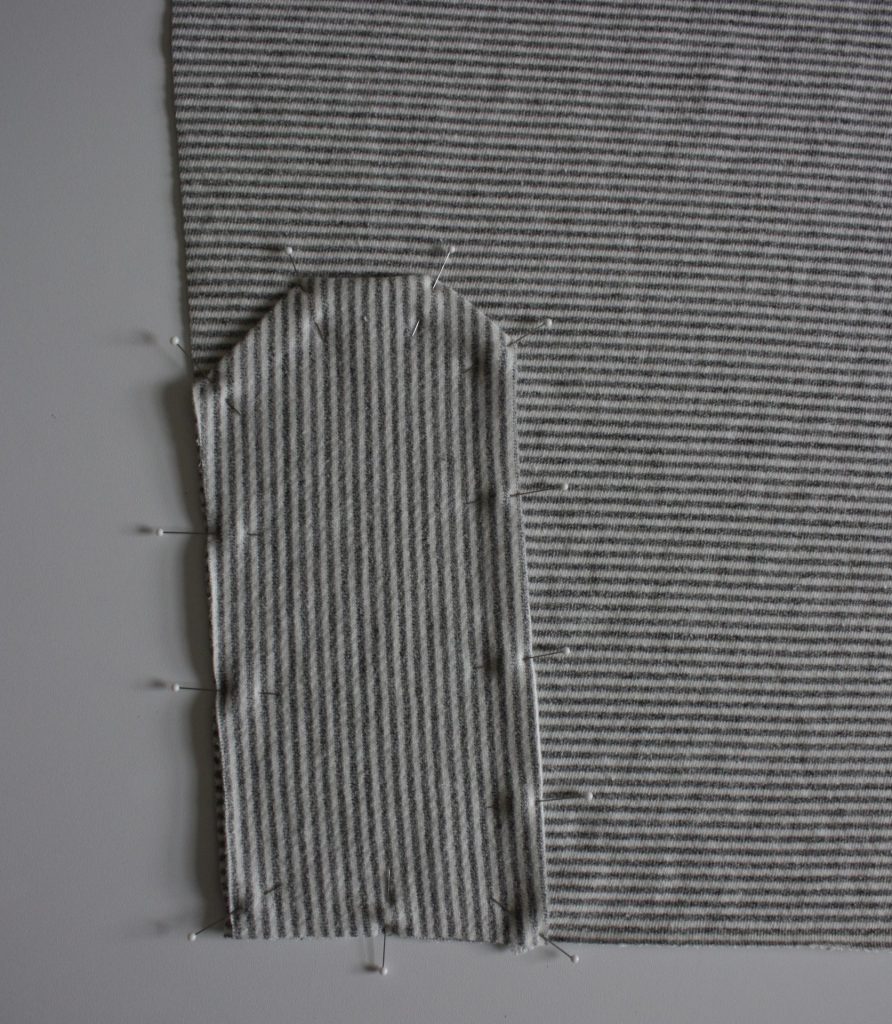
Repeat on opposite (mirrored) sleeve and patch. 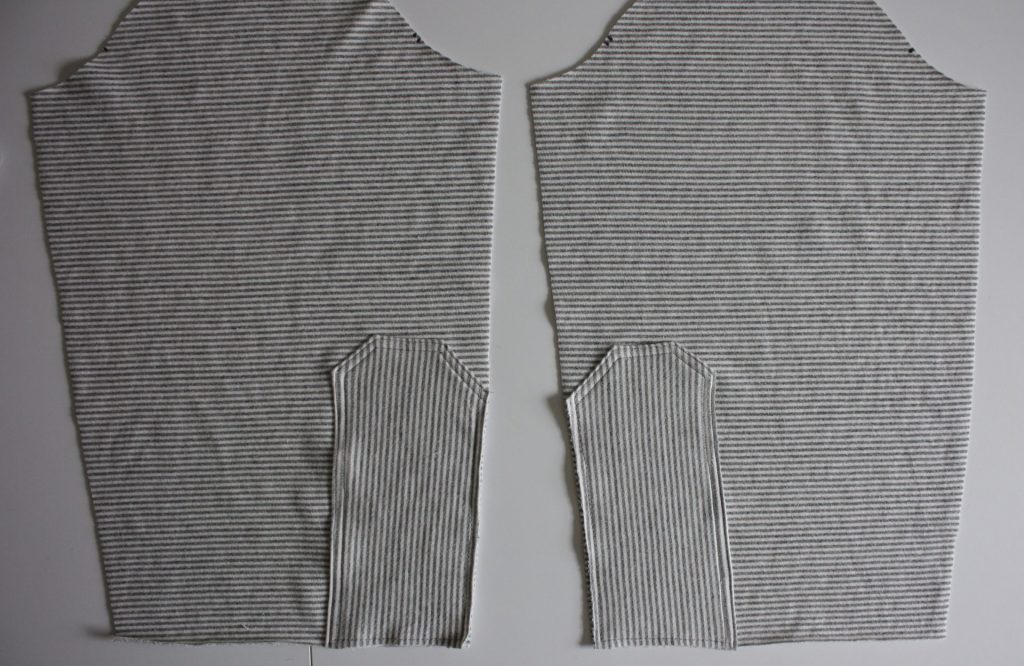
Top stitch two rows using a double needle or two runs of straight stitch. Baste raw edges.
When you sew your patches to the sleeve, be sure not to stretch the fabric as you sew. For nice and sharp corners, leave your needle in the fabric right at the corner. Lift your presser foot and pivot the fabric to change direction and lower the presser foot back down and continue to sew. Baste the raw edges together as well. Great! Set your sleeves aside and grab your Crew Front and Crew Back pieces.
Assembling the Shoulders
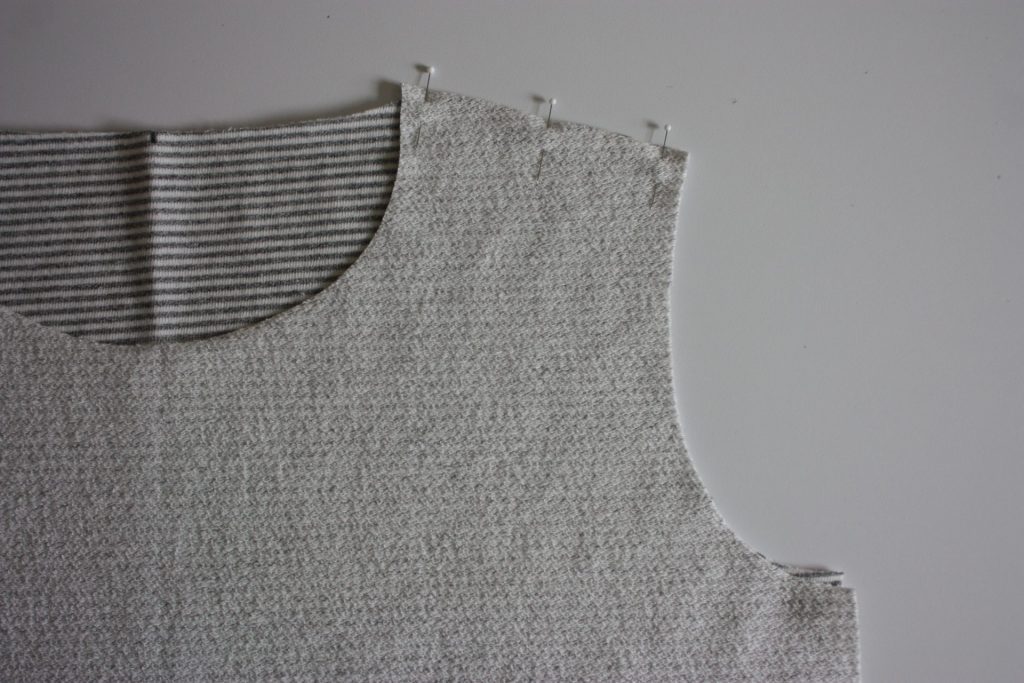
Pin Front and Back 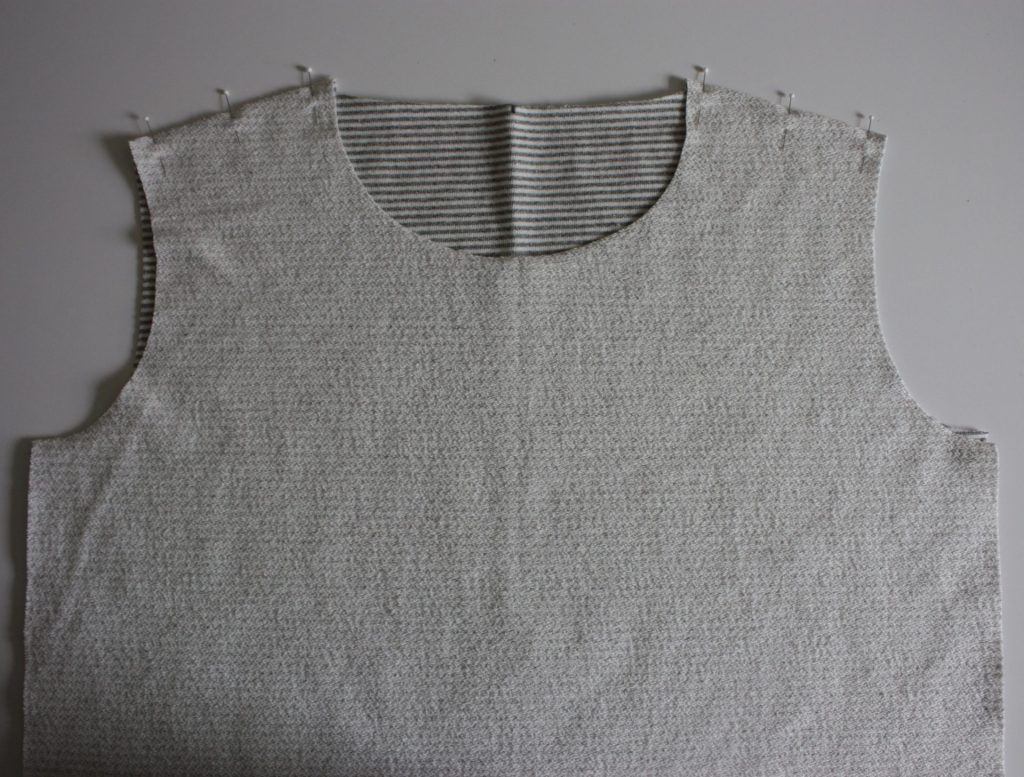
Pins at both shoulders 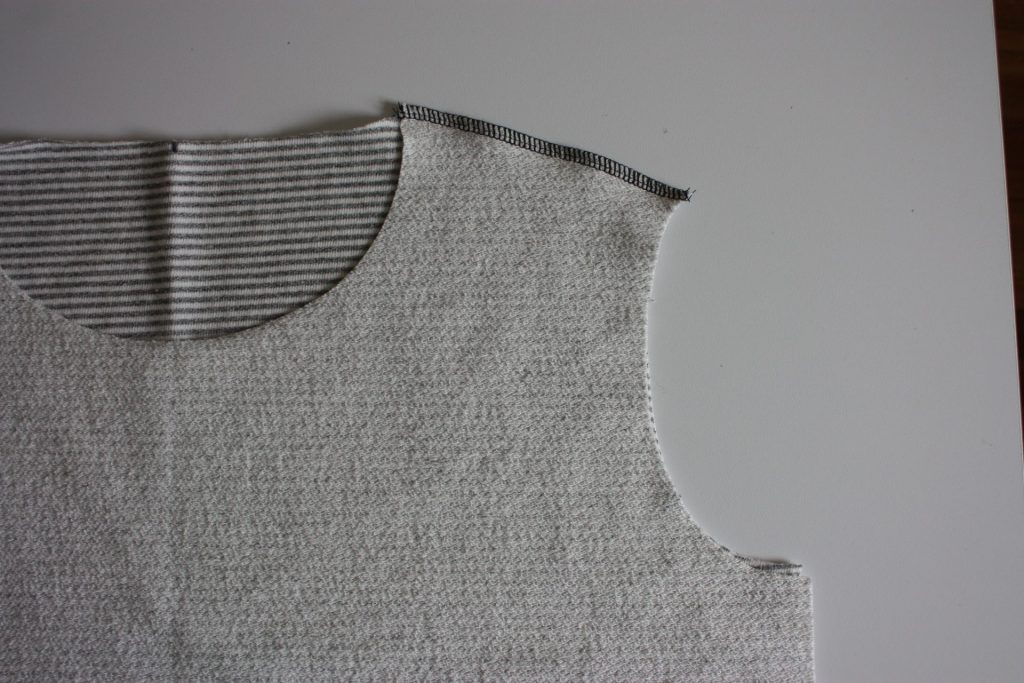
Stitch shoulder seams
Step 10 is to assemble the shoulder seams. After you stitch them together, you can add a strip of clear elastic tape to help stabilize your shoulder seams and prevent your Cedar Sweater from stretching out at the shoulders over time. You can either pin the elastic at the same time you pin your shoulders together and stitch in one go, or you can sew the shoulders first and add the elastic on a second run. You will pin and sew the elastic on the wrong side of the Crew Back shoulders. Be sure to stitch the clear elastic to the seam allowances only! Press the seam allowances towards the back of the sweater.
Before you move on to the next step, now is a good time to divide the neckline (the hole that your head will go into) into quarters just like you did with the neckband. Use the center front and center back notches on the neckline as a reference, and ignore the shoulder seams because they are not half way between the center front and back.
Attaching the Sleeves
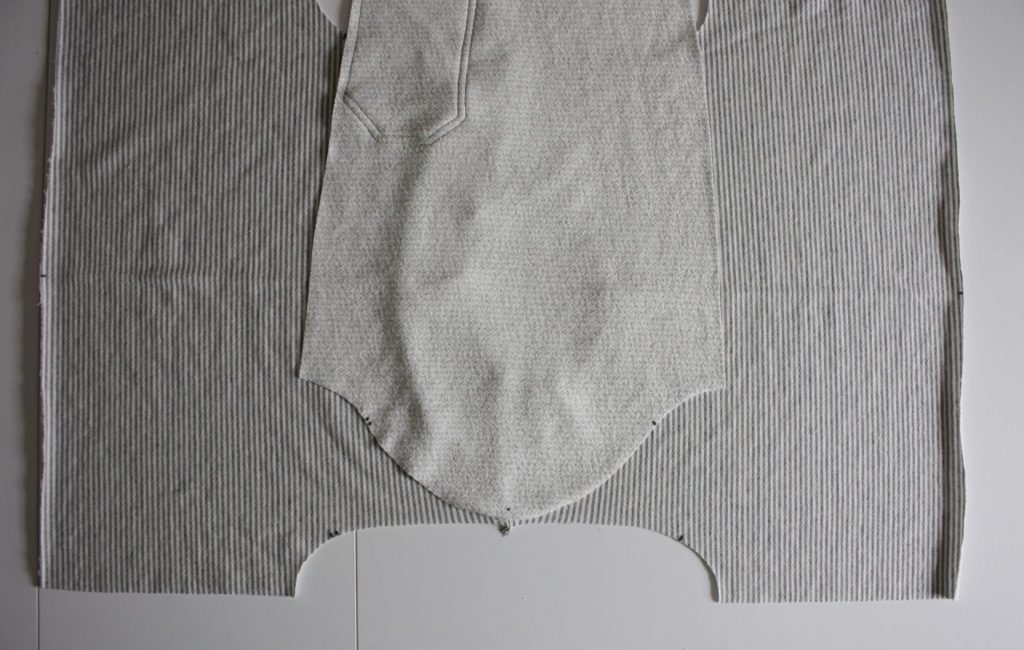
Match the circle mark with the shoulder seam 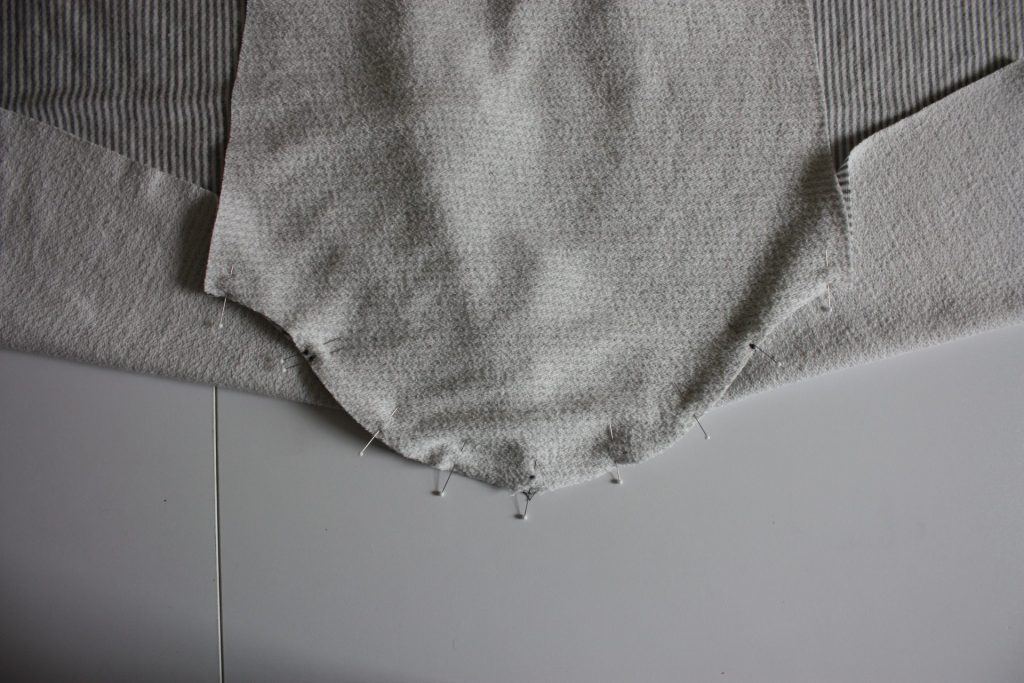
Match the single and double notches along the sleeve and armscye 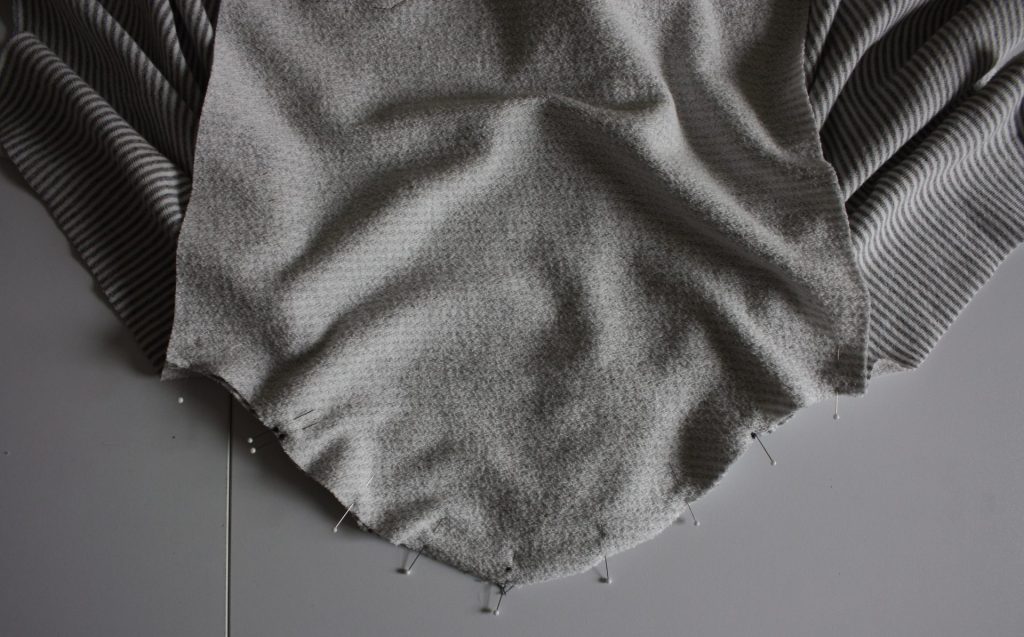
Pin along the entire armscye edge. 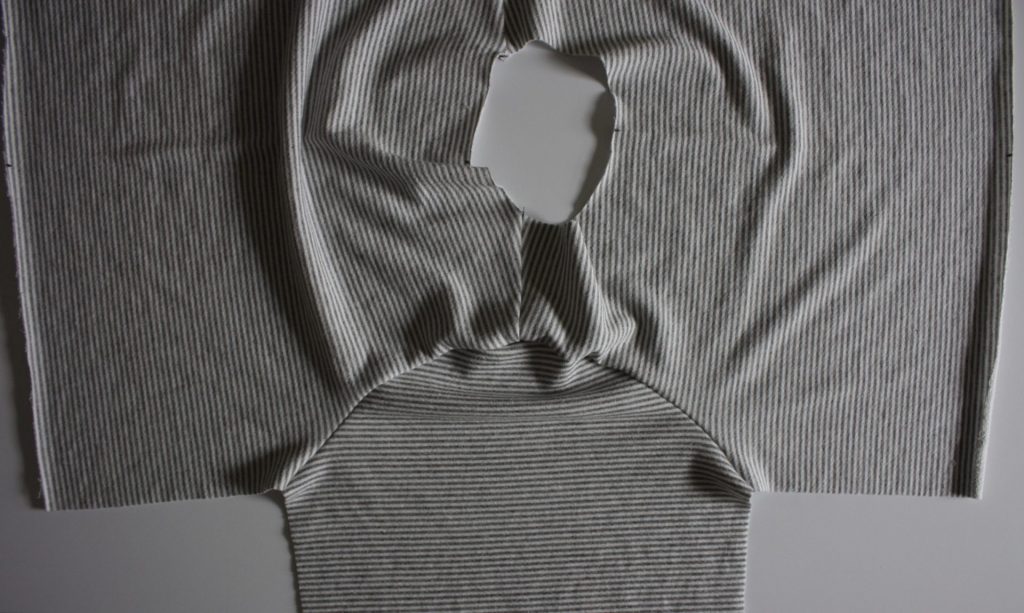
Stitch and press seam allowance toward the sleeve.
Step 11 is attaching the sleeve to the body. There are three markings on the sleeve to match to the body of the sweater: the circle mark and the shoulder seam, the single notches on the front body and the double notches on the back. Pin the sleeve to the body right sides together along the entire armscye. Stitch away and press the seam allowance toward the sleeve. A tailors ham can be handy for pressing this curve if you have one!
Assembling the Sides
Step 14 is fun because it transforms this big flat floppy thing into something that finally resembles a top! The side seams and the sleeves are stitched in one fell swoop from the hem of the body to the end of the sleeve. With right sides together, match the front and back side seams and underarm sleeve seams. Before you jump to stitching and finishing this seam, be sure that you have matched the seams at the armpit. I like to baste this little spot at the underarm first to check that the seams meet at a nice four corners. If they are off a tiny bit, it’s not a big deal because who is really going to be looking at your armpit, right? Then, stitch from the hem of the body up through the underarm all the way to the end of the sleeve in one go. Press the seams towards the back of the sweater.
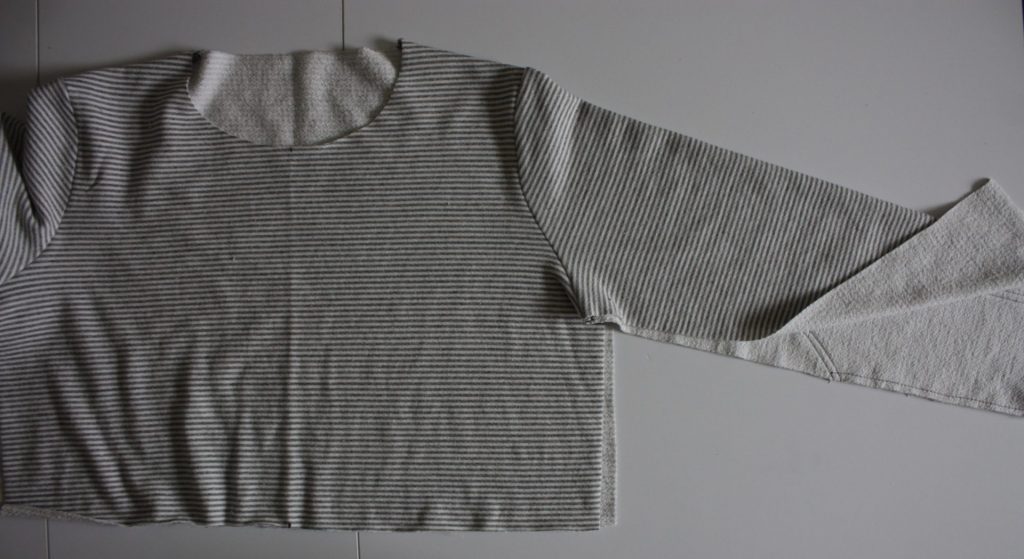
Flip your sweater inside-out with right sides touching. 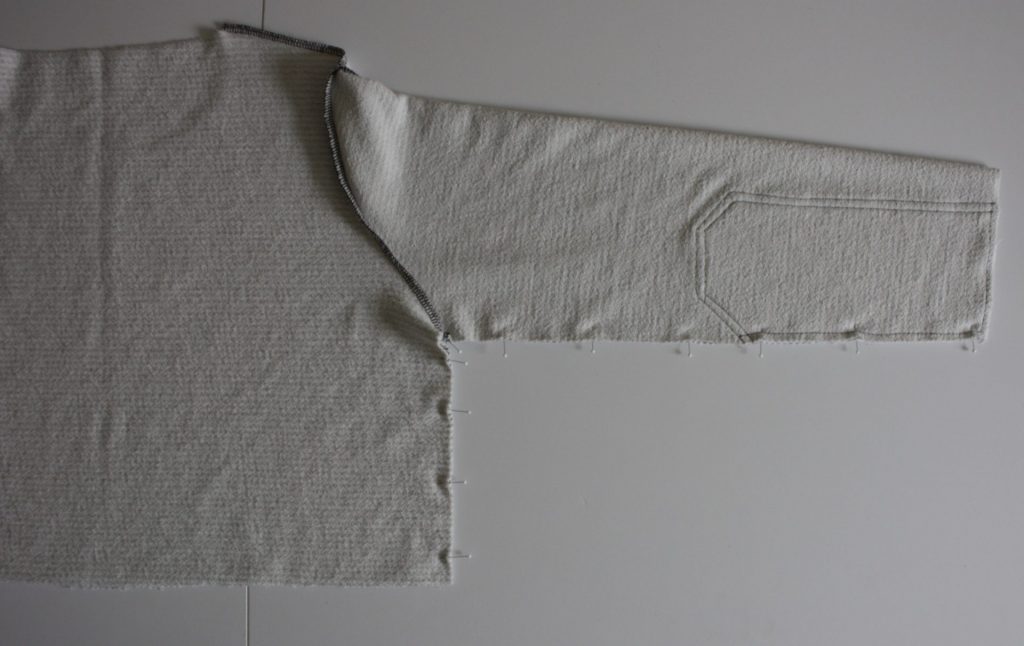
Match the underarm seam and pin the length of the side seam and the sleeve.
Finishing Bands and Cuffs
Now we will pin the neckband to the neckline of the sweater body (in other words, the head hole). We really want to do this evenly so the finished neckband doesn’t gape or look stretched out in some spots. This is where dividing the neckband and the neckline into quarters is a great way to keep things even. Divide into quarters, mark every 25%, and match those points together. The neckband is slightly smaller than the neckline, so we need to stretch the neckband slightly as we sew. Be careful not to stretch too much so that you are stretching the body of the sweater too. For another view of these steps, including what the stretching looks like at the sewing machine, have a look at the Raglan View Sewalong final steps.
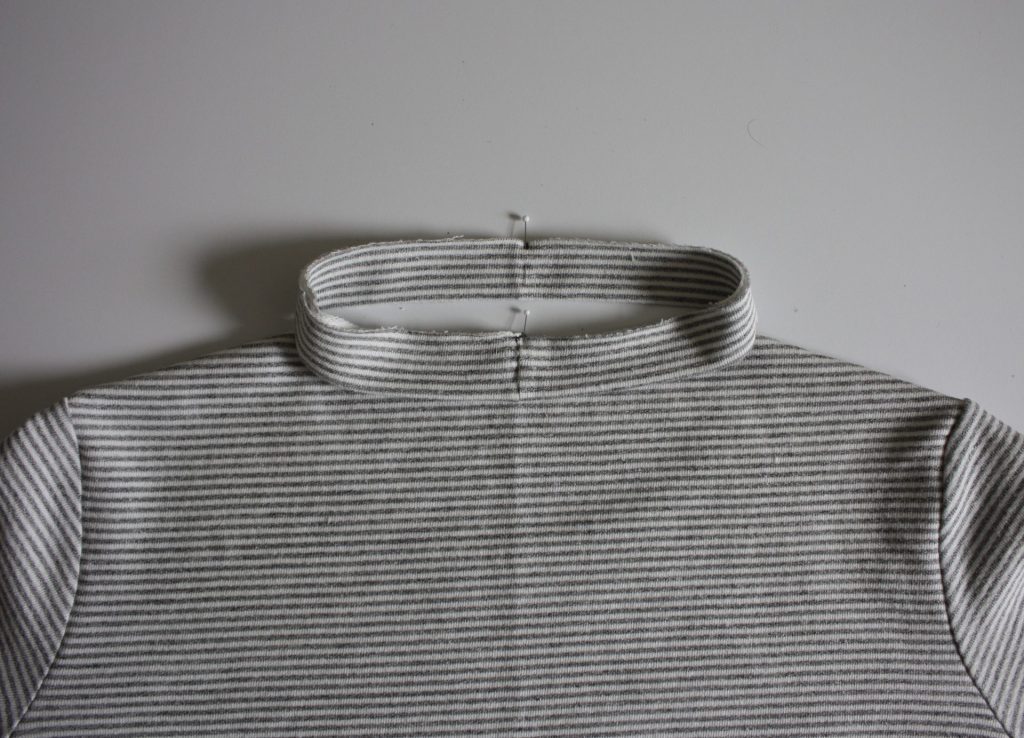
Match the neckband seam to the center back notch. 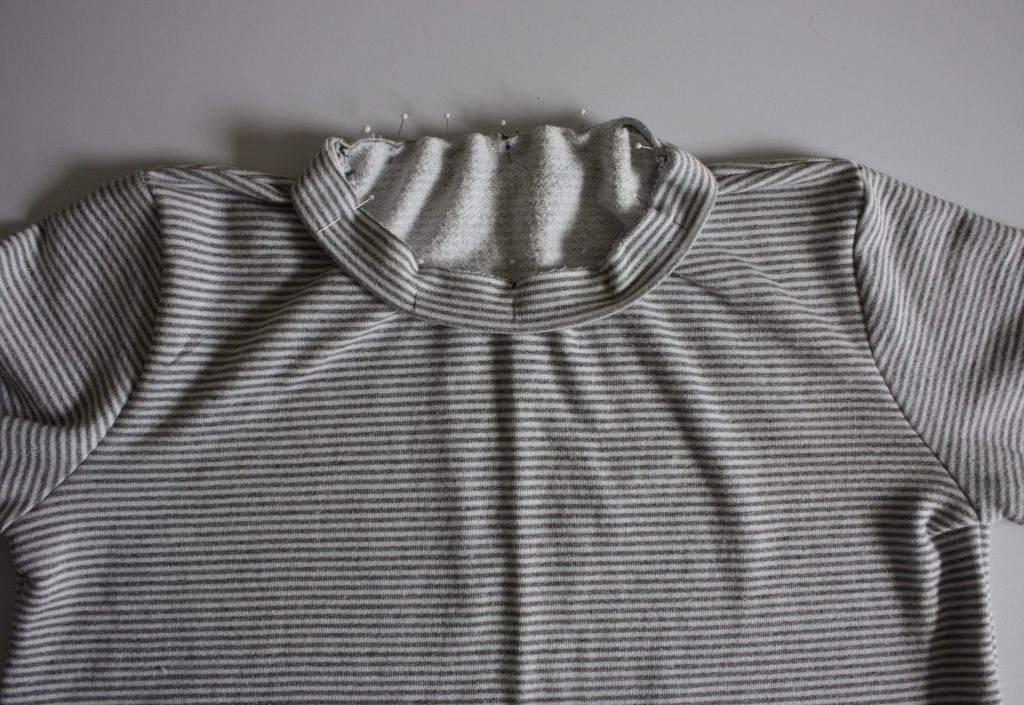
Match the neckband notch to the center front notch. 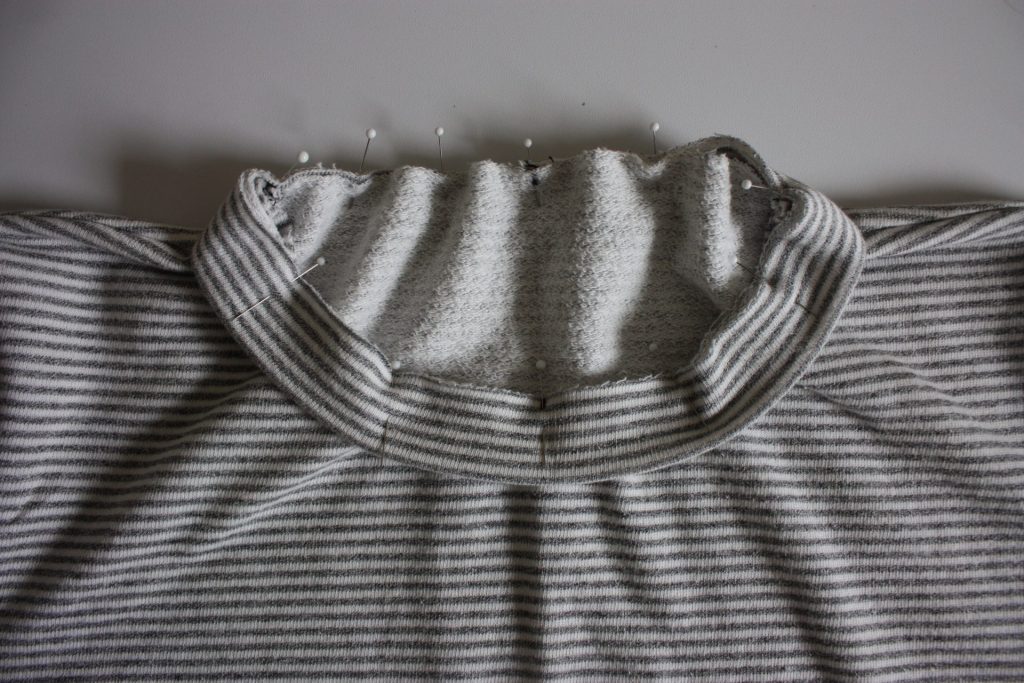
Match the marks you made at each quarter of the neckband and neckline. Pin generously. 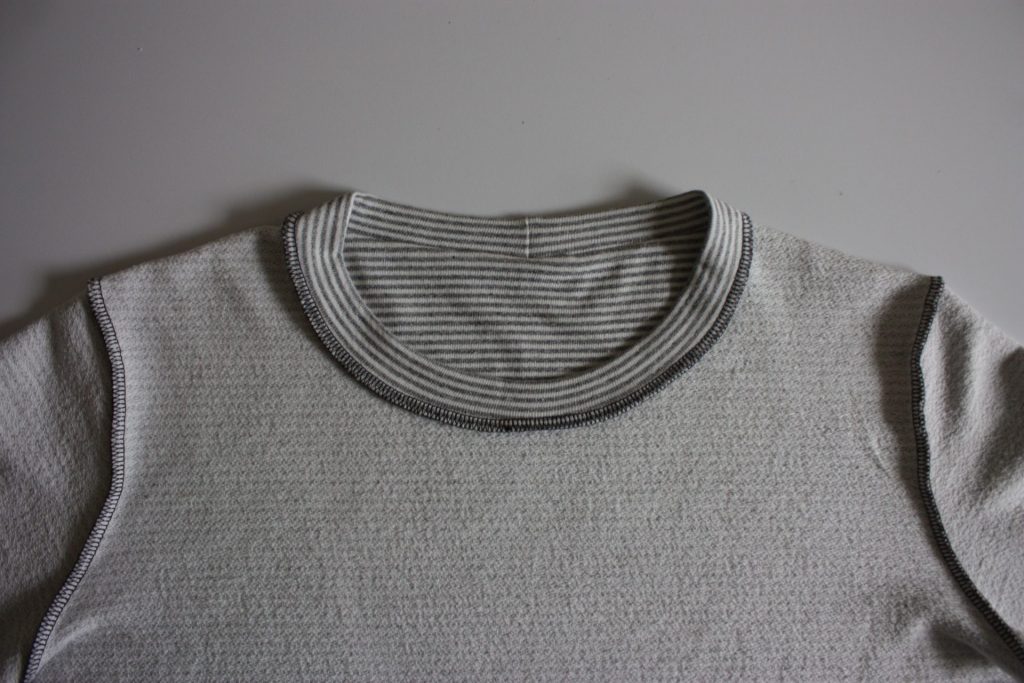
Stitch and press seam allowances toward the body of the sweater.
Match the hem band seam to the left side seam (as you wear it). 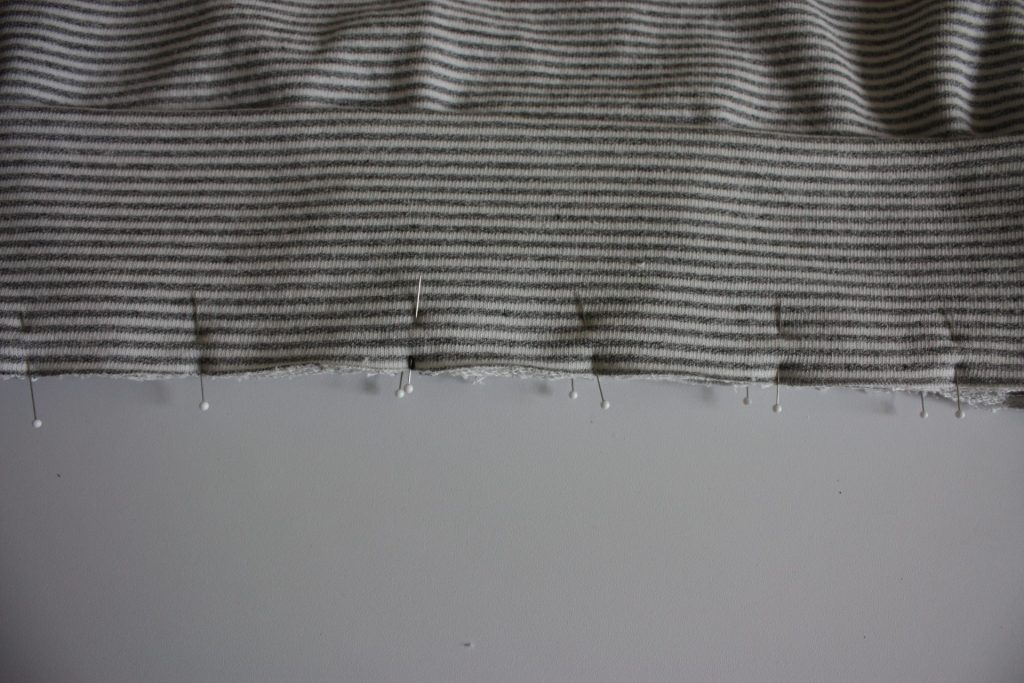
Pin the hem band to the body, right sides together and matching notches. 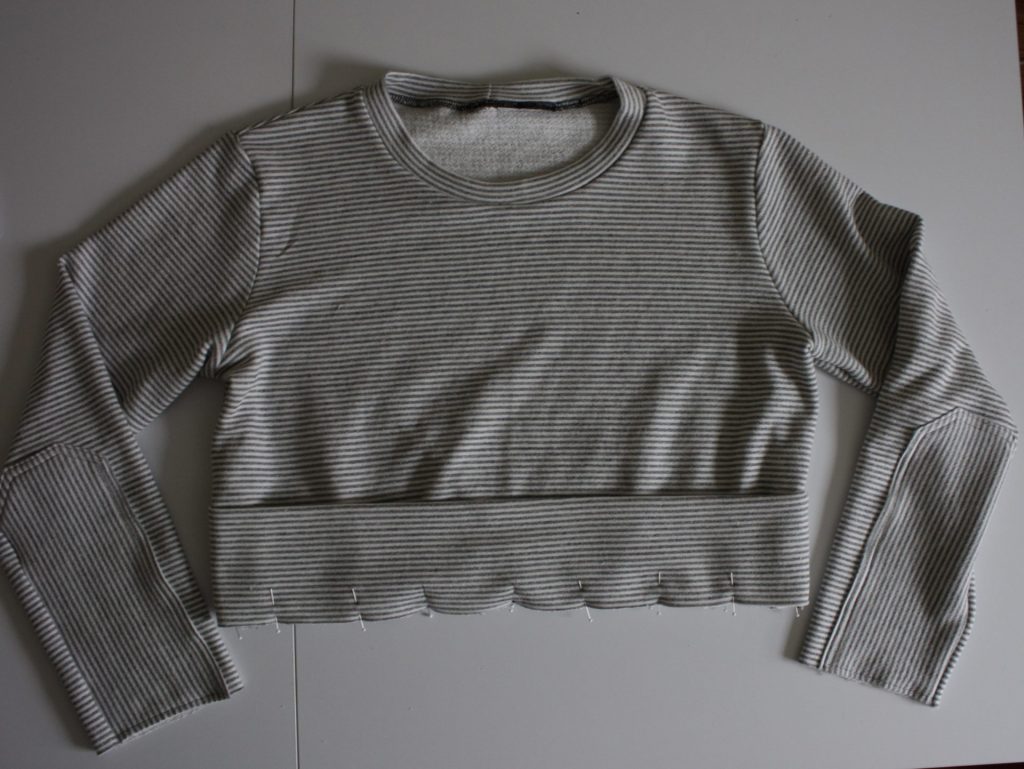
Pin generously. There is a notch on the hem band that aligns with the right side seam, as well as center front and center back notches. 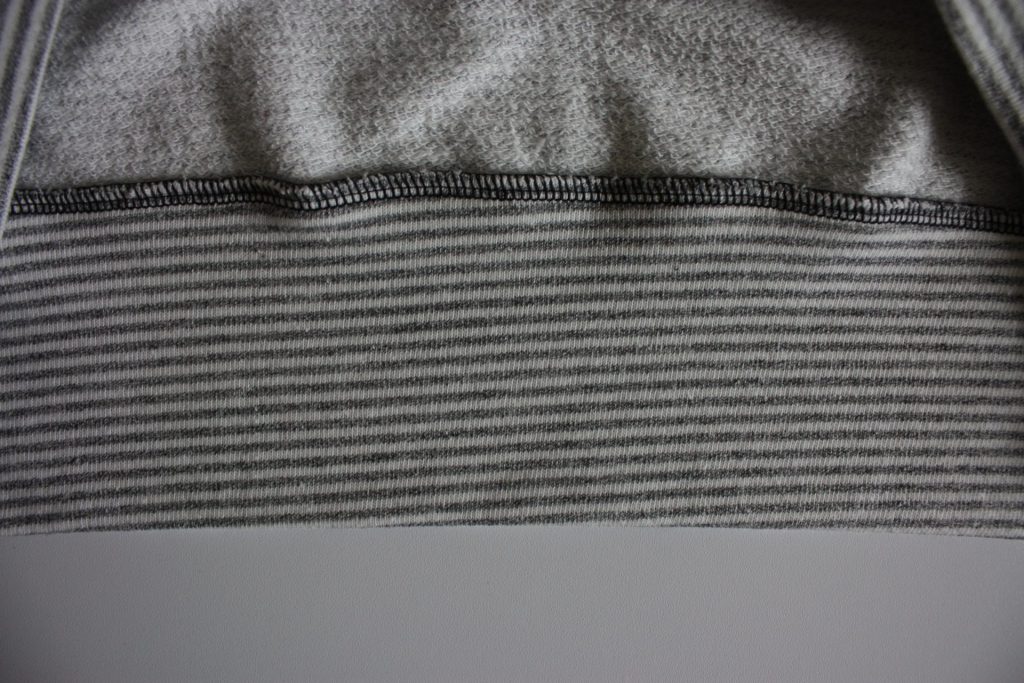
Stitch around the circumference. Press seam allowance up toward the body of the sweater.
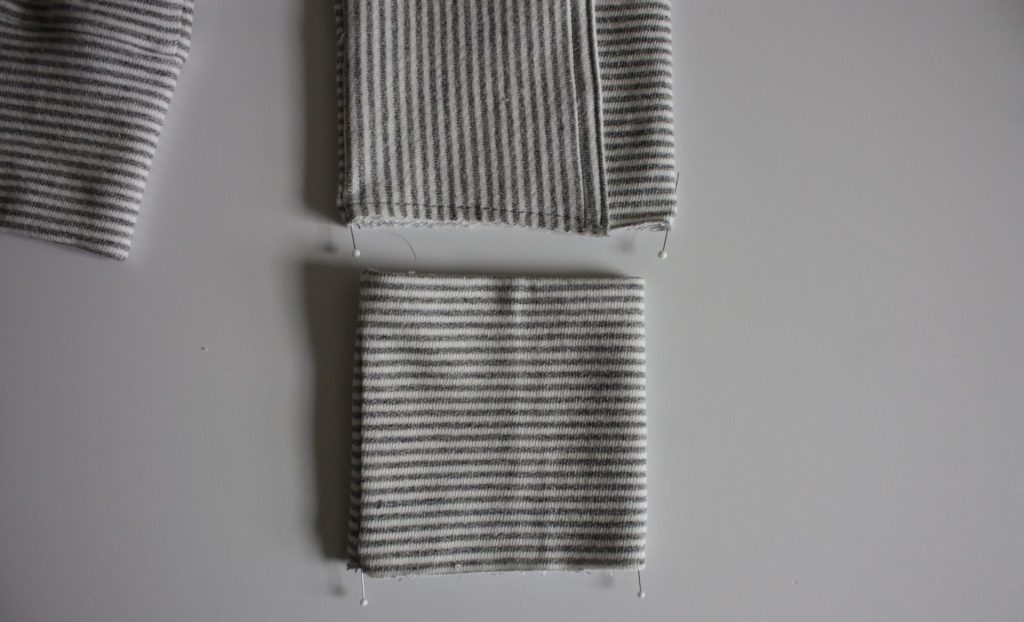
Match the cuff seam with the sleeve seam, right sides together. 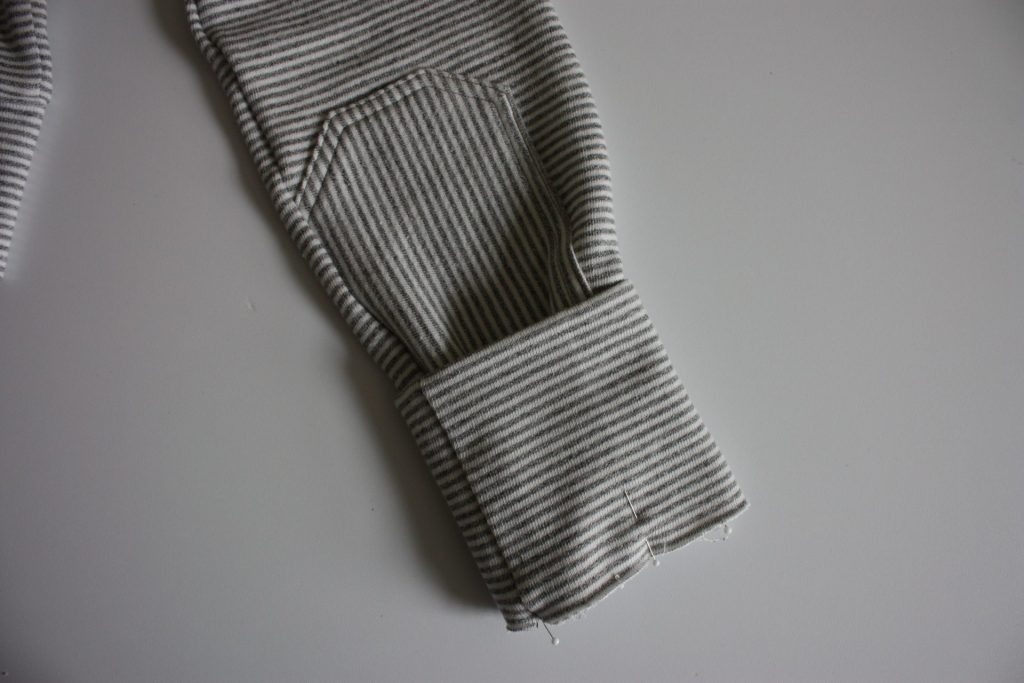
Pin around raw edges and stitch through all layers. 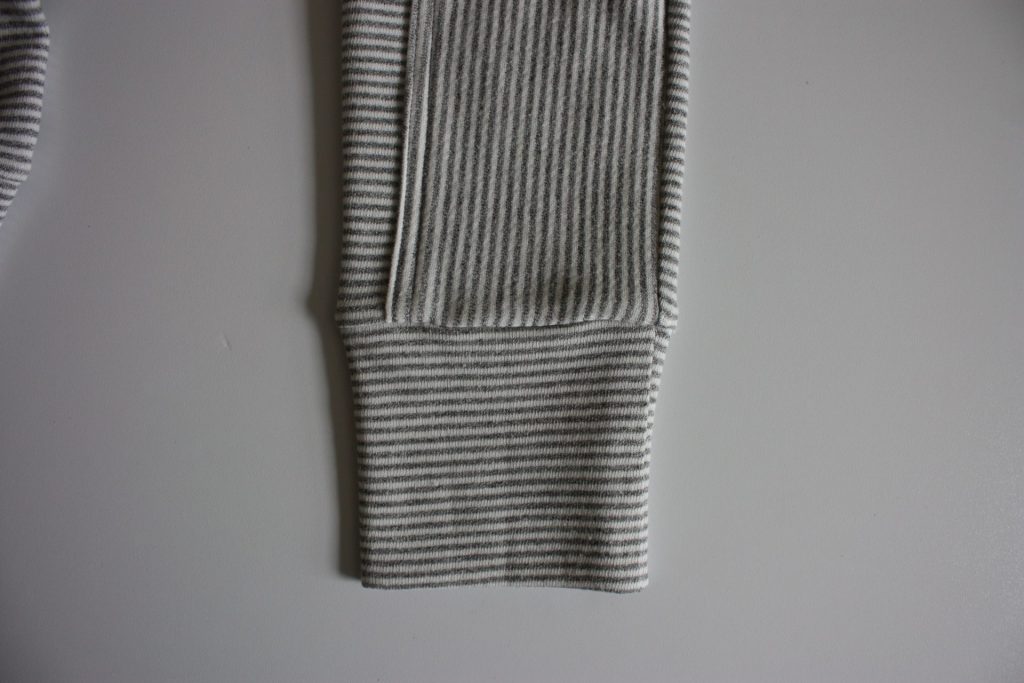
Press the seam allowances up towards the cuff.
You Finished your Cedar Sweater Crew View!

You’ve done it! Please share your finished Cedar Sweater Crew View with me over on Instagram using the hashtag #cedarsweater and feel free to tag me (@sewnorth). Enjoy your new make! You deserve it!