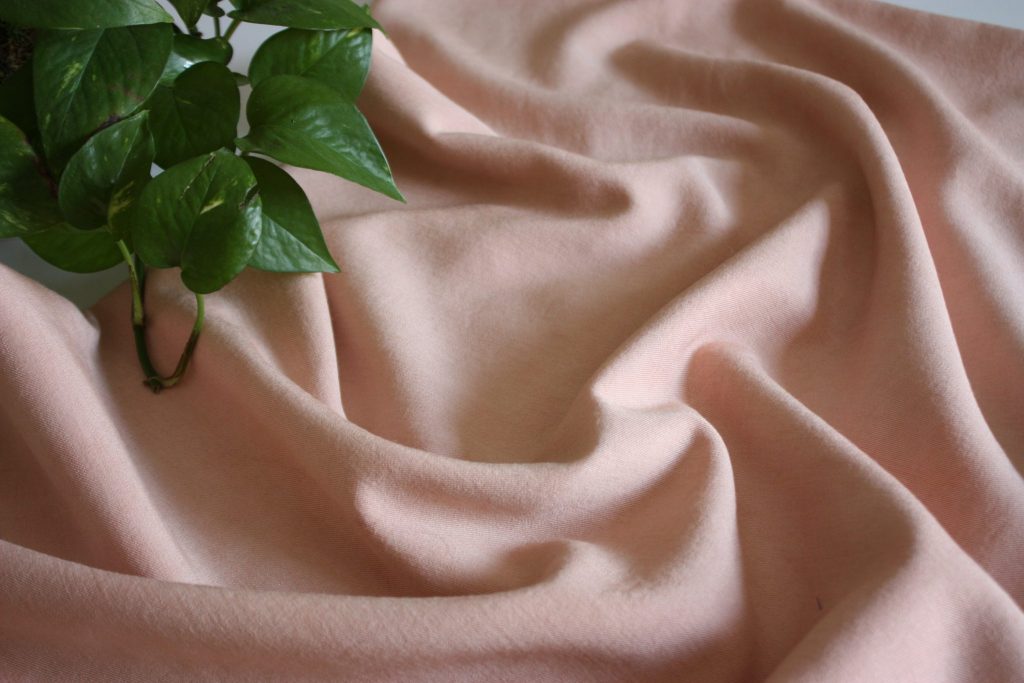
As I start to write this post, I’m overcome with dye-puns. I’ll spare you, but I really am dying to tell you about this. I never thought I could get sick of avocados, but it’s possible. Let me tell you how I drowned in guacamole and then used the avocado pits to dye some fabric and make some beautiful peach-pink garments. I dyed a few yards of merino-tencel fabric, and I also sewed a couple of garments and successfully (with one freak-out moment) dip dyed them to make some truly bespoke pieces that I love to death. I dye.*
*I’m sorry.
**I also want to take this chance to say I am an enthusiastic first time dyer here. Not an expert. Turns out you don’t need to be an expert, you just need to be willing to give it a try and follow your instinct. I’m sharing my notes so you can see my process and use that information to create and play with your own process. Have fun!

The Details
- Fabric is merino-tencel PFD (prepared for dyeing) from APC fabrics, gifted
- Mordanted with alum (alumiunum sulfate)
- 22 avocado pits from various types and sources
- Tap water (hard water put through our water softener)
- Dye extraction method was steeping the pits in a few inches of water on low heat for several hours, straining, and reserving the dye liquid. Repeated 5 times.
- Fabric sat either fully immersed or dipped in using dowels for 18 hours or more in cold or room temp dye bath
- Hang dry then sew. For the garments: hang dry, gentle rinse, hang dry and press.
Materials
- Mordant of choice, I used aluminum sulfate from Amazon, and have plenty left over!
- Large stock pot for dyeing only. I bought this stainless steel pot.
- Avocado pits or skins, or both
- Strainer and cheesecloth
- Fabric for dyeing.
- Non-reactive spoon and/or tongs. I just used a wooden spoon and my hands. Gloves optional.
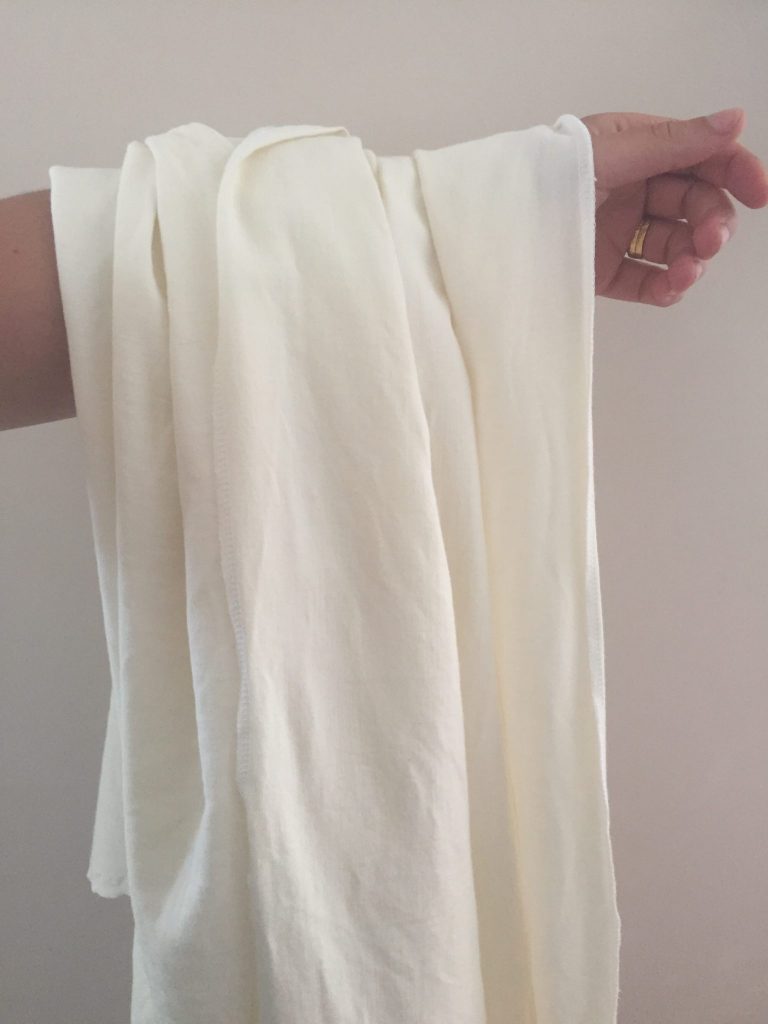
Merino Tencel PFD Fabric
My fabric is merino wool Tencel blend, labeled PFD (prepared for dyeing) gifted from APC Fabrics, and I haven’t worked with this type of fabric before. I actually found varying information for dyeing wool versus dyeing Tencel, but no information about this type of blend. So I decided to treat the fabric as gently as I would any other wool, though still mordanting the fabric since that process is especially recommended for Tencel. I pre-washed my fabric in cold water and ran through a low dryer to pre-shrink. This is how I will wash the finished garment going forward, though I will likely hang dry. Now about that mordant…
Mordant the Fabric
When I sought out advice before starting this process, the number one thing people said to do was to mordant the fabric. This helps the dye to set/bind on the fabric and keep it colorfast. Before this project, I had never heard the word “mordant” before. Verb? Noun? still don’t know, but I’ll say both. I mordanted the fabric by soaking it in a solution of water with aluminum sulfate, according to the weight of the fiber.
I laid out the pieces of the pattern I had planned for this fabric, and trimmed off the excess. It turns out I had enough excess to make two crop tops that I later dip dyed during this process. For now, I’ll be describing the process for the uncut yardage.
- Weigh the fabric: mine was a total of 700 grams
- Calculate 20% of total fabric weight: 140g is 20% of 700g
- Measure out 140g of aluminum sulfate powder (alum) into a heat-safe glass dish
- Add about a cup of boiling water to dissolve the alum, stir with a wooden spoon
- Fill 20quart stock pot half way with tap water
- Add the alum-water concentrate to the large pot of water and stir well with wooden spoon
- Add fabric to the pot (my fabric was dry when I put it in, but next time I might soak it in tap water before adding it to the alum so it possibly soaks more evenly)
- Heat slowly over a medium heat stove, bringing the temperature of the water up to about 180F (82C). This took around 40 minutes.
- Keep at 180F (82C) for an additional 30 minutes
- Cool for 30-45 minutes
- Put in the washing machine on a rinse/spin cycle, no soap. Can also rinse and wring out by hand. The instructions on the alum package say to not rinse it, but that is for a marbling effect.
- Hang dry until you’re ready to dye it, or keep it damp and dye right away
I re-did the exact same process on a different day with my crop top garments that were sewn up. So instead of putting fabric in the pot that day, I put the two tops in to mordant at the same time.
Avocados and Water
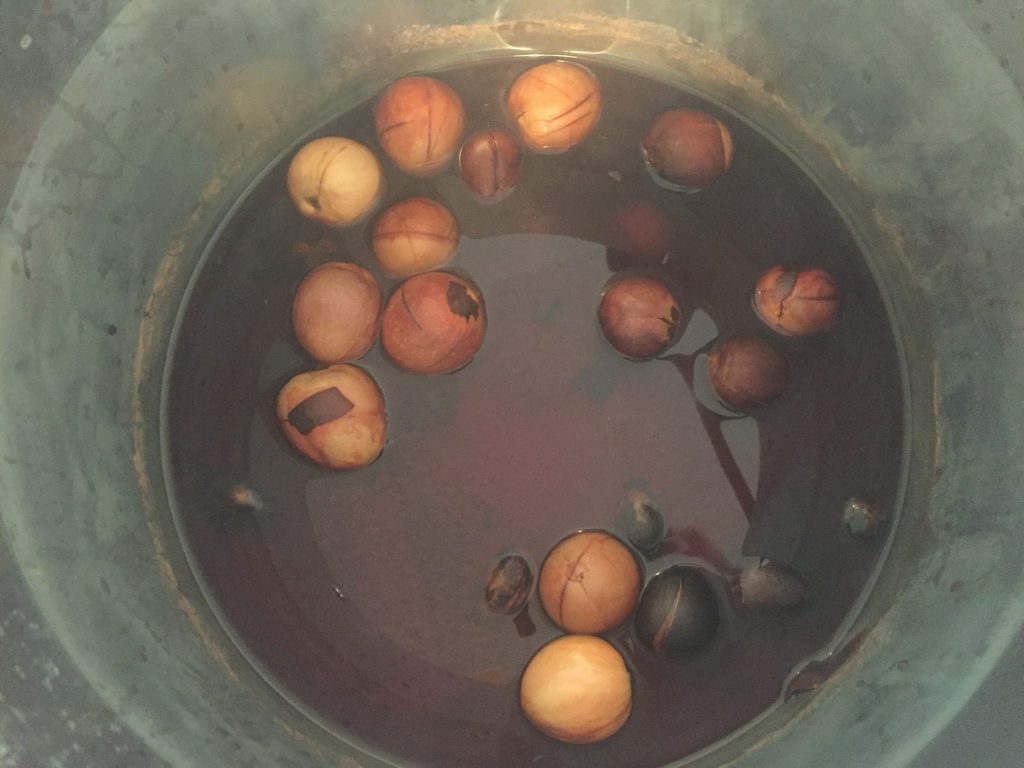
I chose to use avocado pits only, and not the skins. I had a couple of skins set aside just in case, and some say the more the merrier, but this can also affect your color. The only reason I stuck with pits-only was because I could get them super clean, unlike the skins. I didn’t want any of the green stuff affecting my dye pot. Again, just instinct talking. The pits came from a variety of sources, the ones I purchased were organic Hass avocados, but my husband also brought home a handful of mystery pits from his work’s cafe. They were so kind to set them aside for me. I kept them in the freezer until dye-day, thawing them out before putting them into the water.
I also used regular water from my tap. My home does have hard water, but we have a water softener. I’ve heard that using filtered or rain water is a good option. I was planning to use rain water that we collect in our rain barrel out back, but I started to fill the pot and the water was sad and brown. No thanks.
Extracting the Avocado Dye
This is the most involved part of my process, considering I was tending to the pot on and off every few hours for a day and a half. Some dyers say you can fill a big pot of water and put your dye stuff in on a low heat for a really long time. That may work, but I did mine in smaller batches. I watched Lauren’s process (of @rosegardenln) and she said she got a more intense color by doing batches. I can’t say one way or another because this was my first time dyeing, but I was very pleased with the results, so I may stick to this method in the future.
Here is an outline of my process:
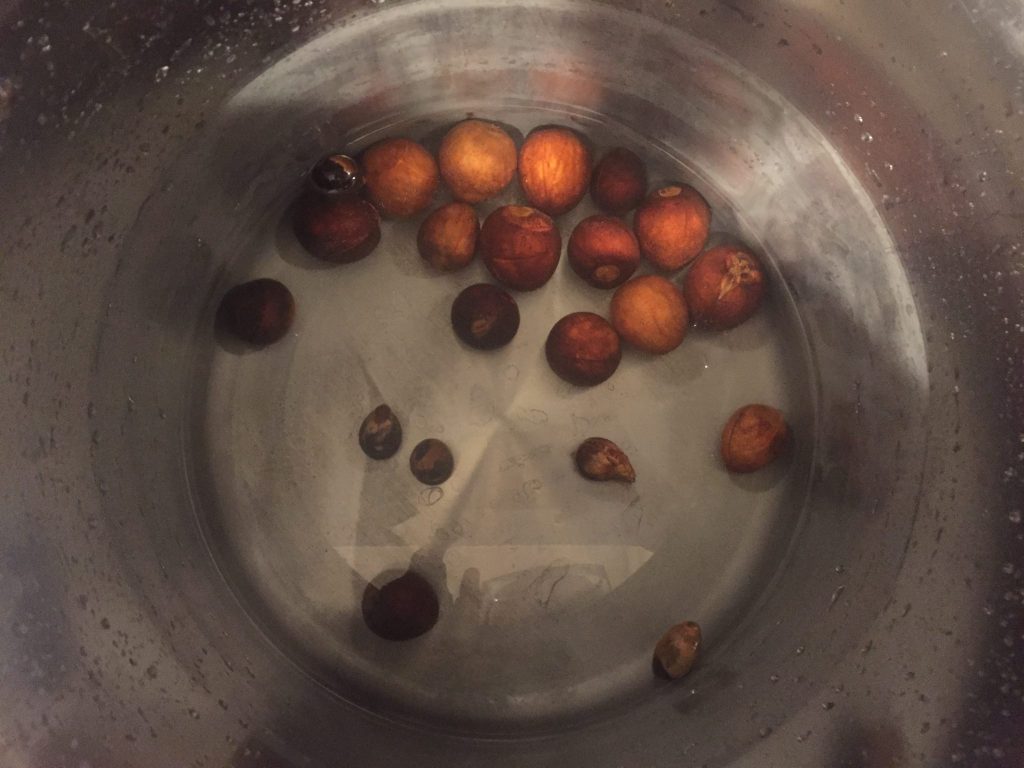
- 22 avocado pits covered in about two inches of tap water
- Steep over low heat for three hours (I never brought to a boil or even a simmer, just steam)
- Stir occasionally with wooden spoon
- Skins will start to fall off of the pits. They kind of look like the brown skin from popcorn. Remove and discard.
- Some pits start to have a pink hue
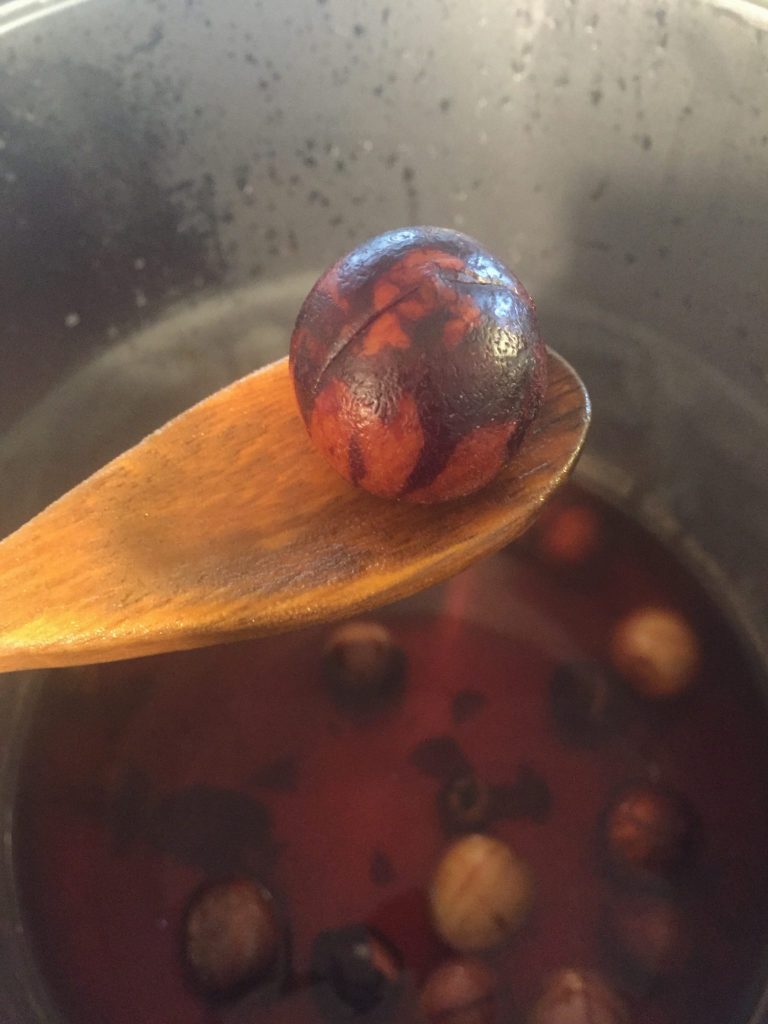
- After three hours, the liquid reduced by about half, and was a deep red color
- Pour this liquid over a strainer and cheesecloth into a glass bowl and set aside. This is the dye!
I repeated this process a total of 5 times! I added a bit more than 2 inches of water going forward. Sometimes it would steep for three hours, sometimes four depending on my schedule. This happened over the course of a day and a half; three rounds on the first day, and two more on the second day.
Overnight, I did not steep anything. I put all of the reserved dye in the fridge to reduce the chance of mold. Then I put the avocado pits in fresh water in a container and left those in the fridge as well. I didn’t really have a method for doing it this way, I just wanted to pause everything until the morning.

Strain through cheesecloth 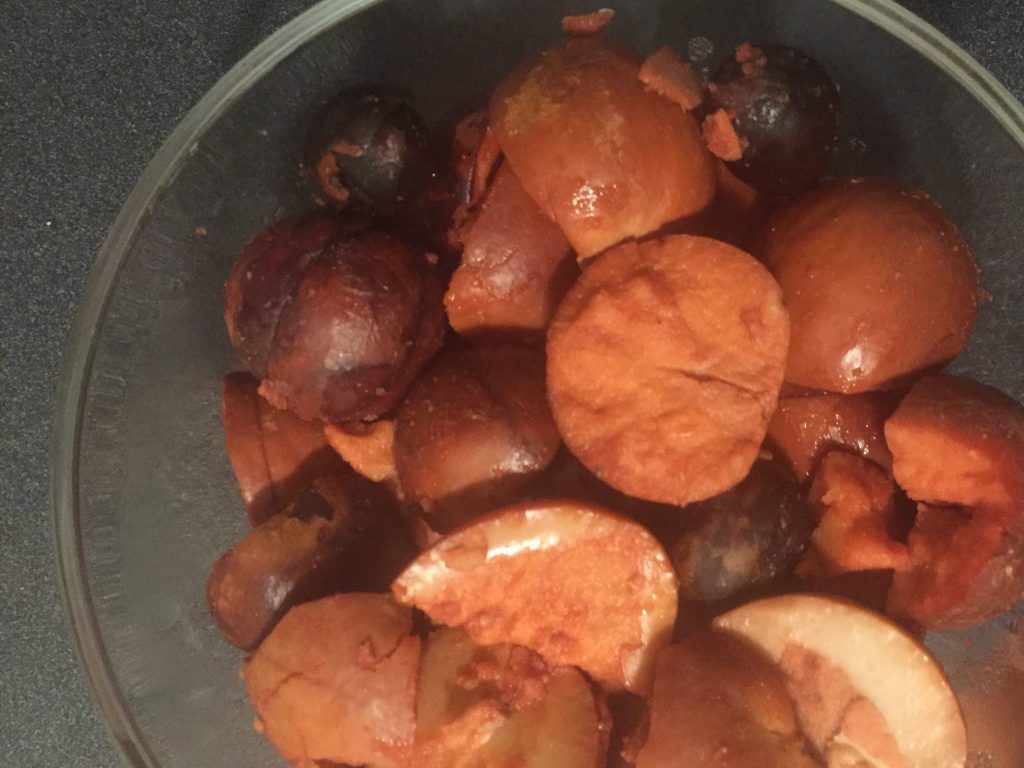
Here’s what they looked like
after Day 1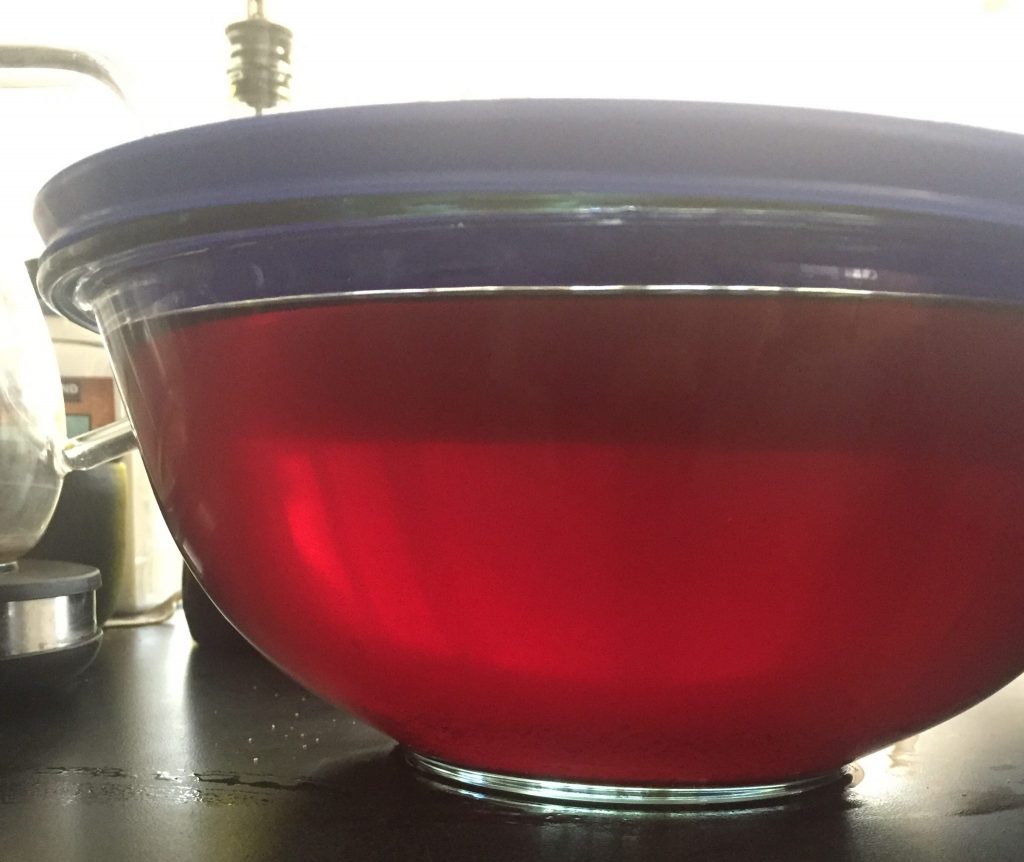
Store liquid dye in glass bowls
Swatch Tests
I was amazed at the depth of the color of the fabric that spent time in a cold dye bath. See the photos below. I know some continue to keep their dye bath hot while their fabric is in there. I chose not to after seeing the results of the cold dye. Plus, I didn’t want to put my merino wool through a lot of heat and agitation if I could avoid it. I think wool can end up felting in those conditions. Not sure how a wool blend like mine would react, but I didn’t want to risk it. Cold it is!
90 mins in cold dye bath (damp) 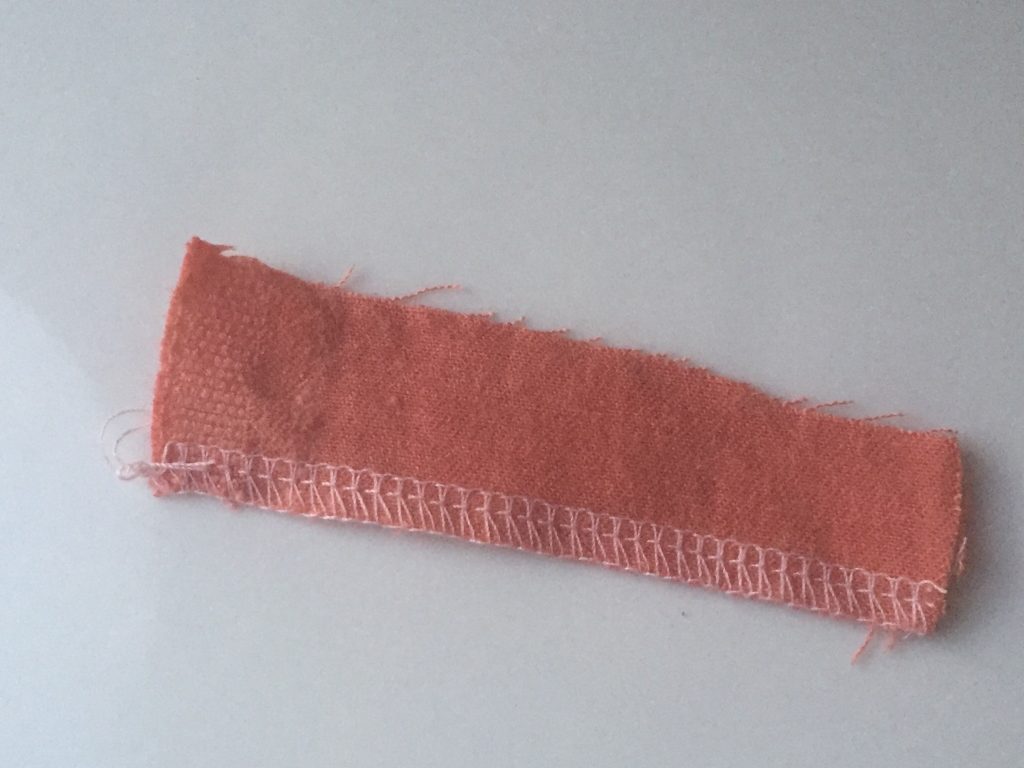
18 hours in cold dye bath (damp) 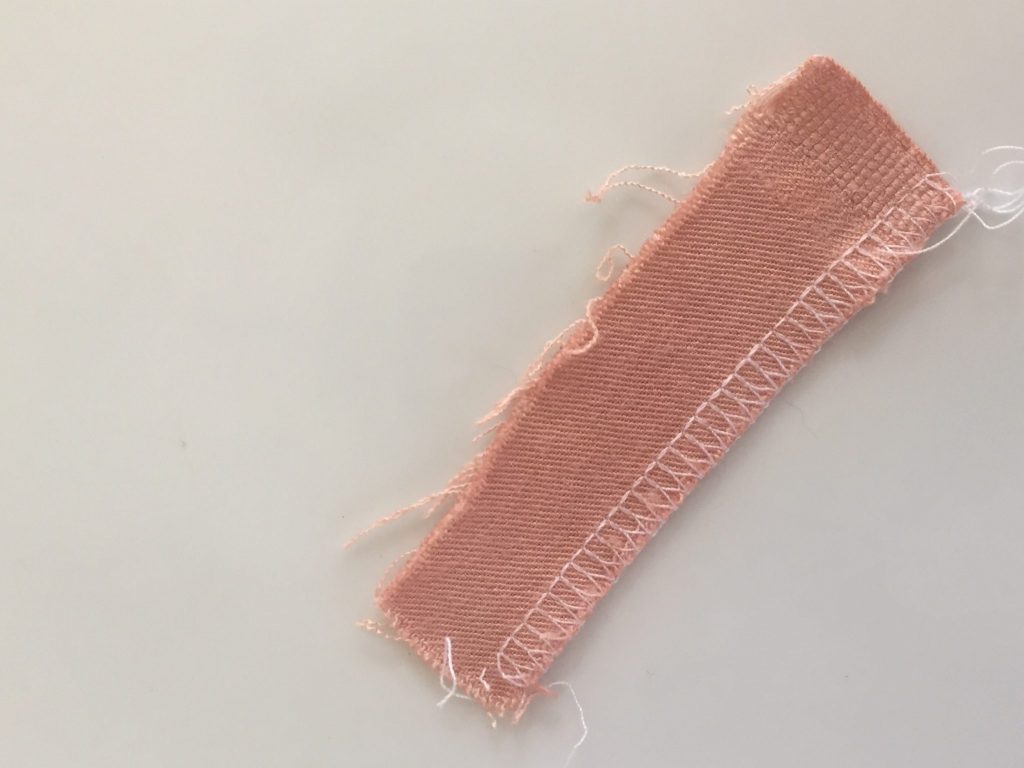
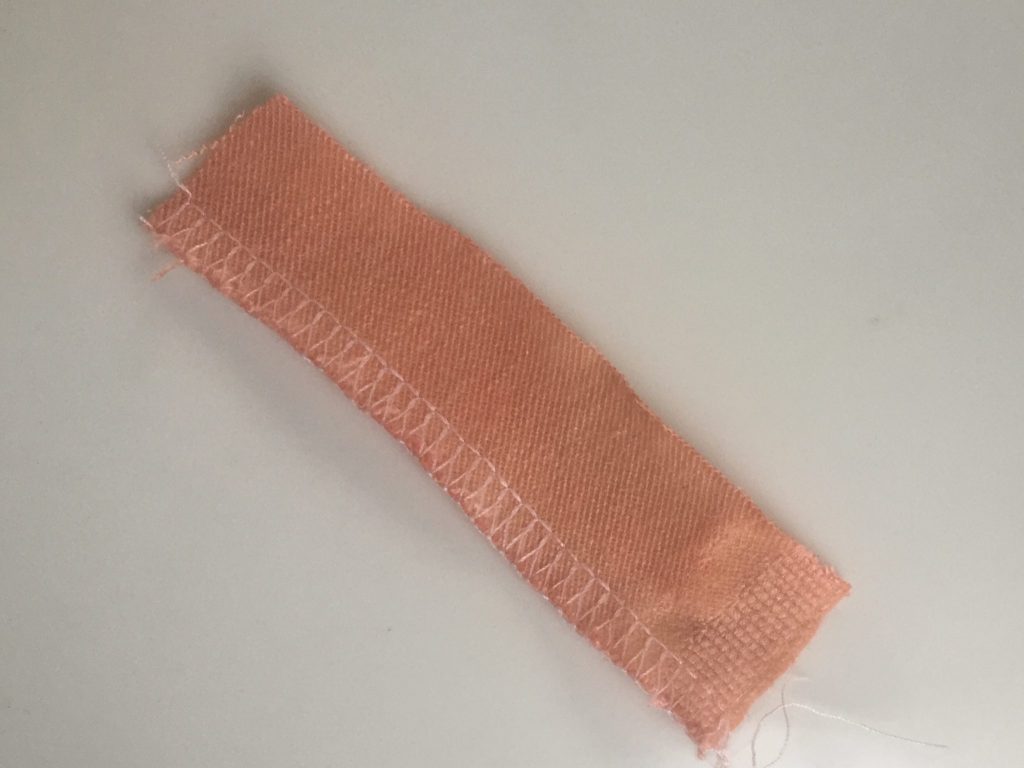
After a gentle hand wash (dry)
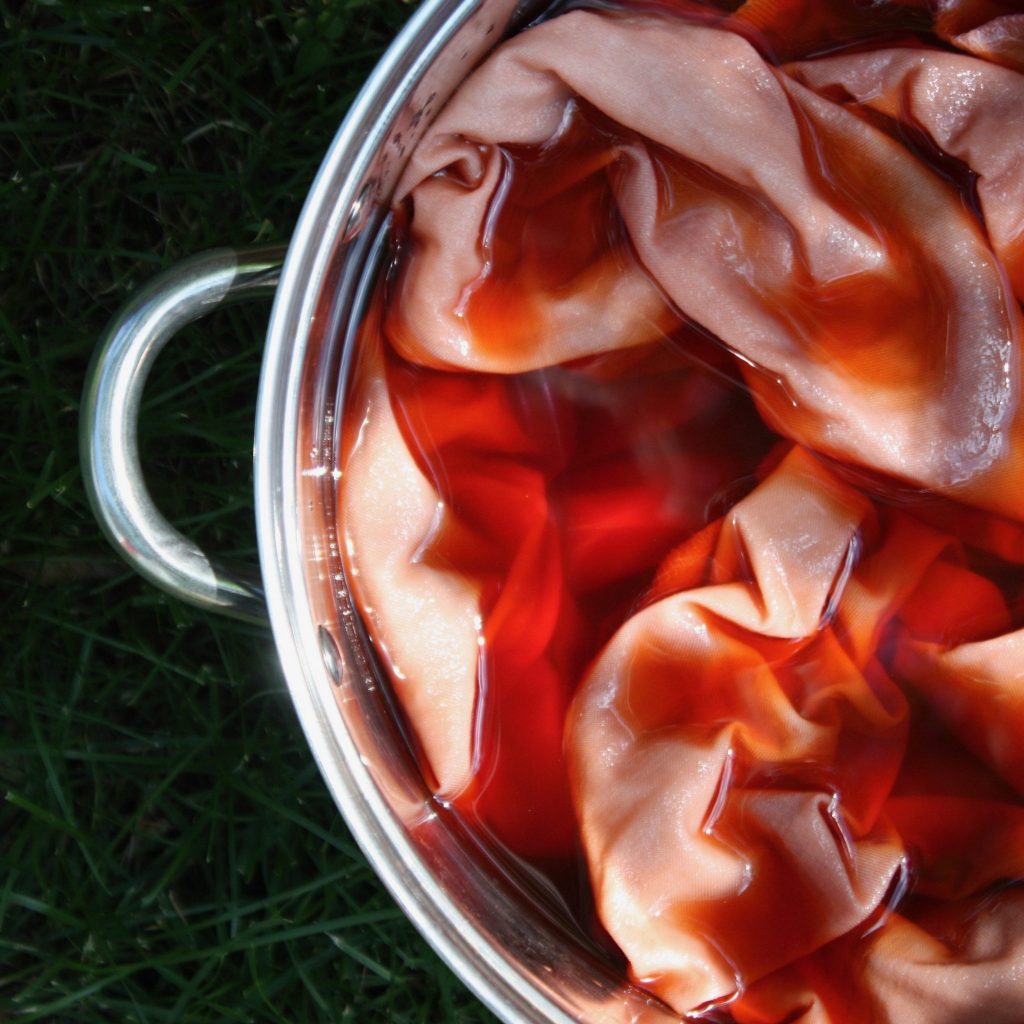
Dye the Fabric!
After several rounds of extracting the dye, I had enough liquid volume for my fabric to swim in. By the look of all my Pyrex bowls I estimated I had about 8 or 9 quarts (roughly 8 liters) of dye liquid. I measured around 8 quarts of tap water to start soaking the fabric in the same clean pot. I just wanted to see how much room there was for the fabric to swirl around, and I was ok with it.
An online friend shared some of the chemistry background and informed me that I could add water without it diluting the dye. It blew my mind, but she explained that there are a fixed number of dye compounds, let’s say, in the dye pot. Those compounds will bind to the fabric fibers given the opportunity, and the added water can serve as a means for the compounds to find the fabric to bind to. She explained it so well, and in much more detail than I can do here! I learned this after I had my fabric in the pot for several hours, so next time I won’t be afraid to add water to give the fabric more room.
I allowed my fabric to soak in room temperature tap water for 30 minutes. Then I transferred the cool dye liquid that was in the fridge overnight to the clean dye pot and let it sit on the counter and come up to room temperature. Finally I gently wrung out the fabric and placed it into the big pot of dye.
Every few hours I used a spoon and eventually my hands to get in there and move the fabric around a little bit. I wanted to ensure there weren’t any bubbles or folds in the fabric, and I figured moving it around would give me an even color.
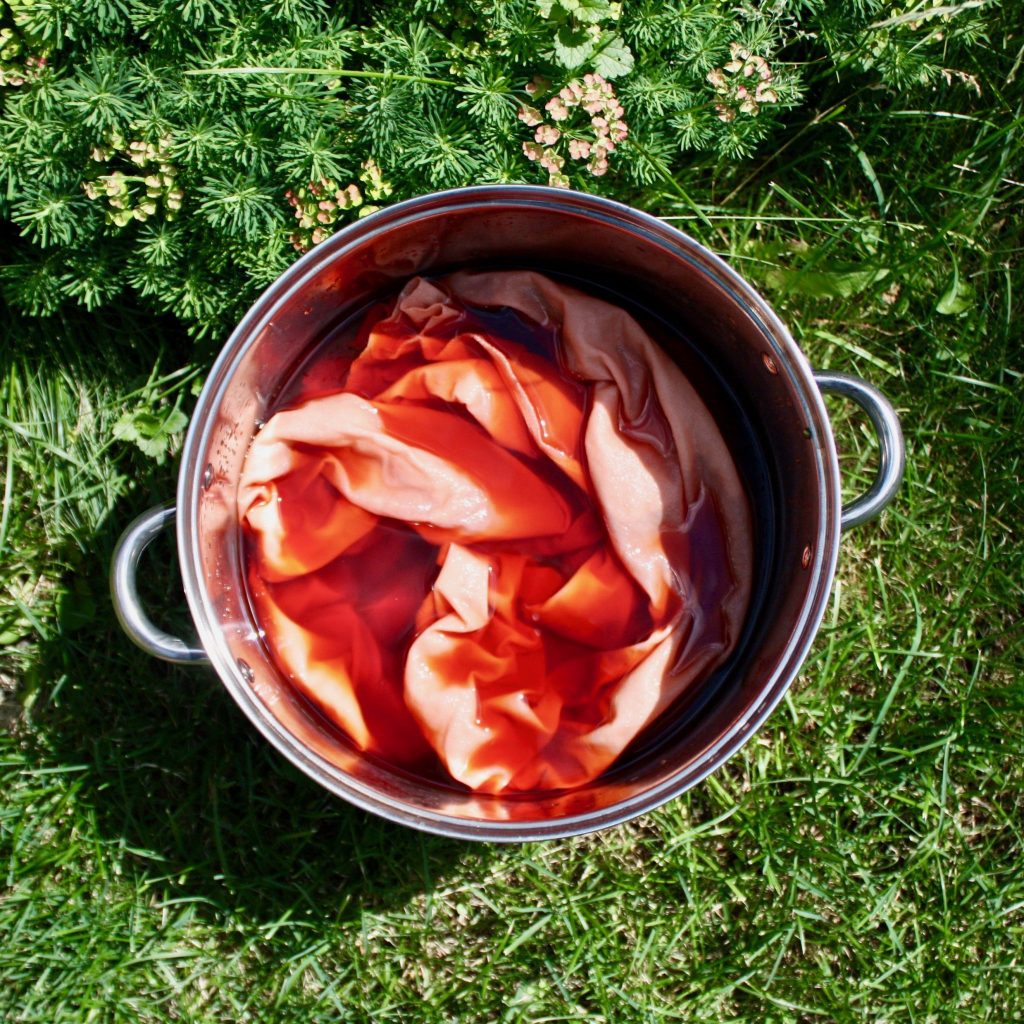
I chose not to heat the dye for reasons I mentioned above due to my swatch tests being so vibrant in a cold dye. Also, I chose not to keep the pits in the dye pot along with the fabric, because I figure that can create a marbling effect on the fabric. I was going for an even color. Strained liquid only!
The fabric spent a total of 18 hours or more in the dye pot. I had around 2.5 yards of fabric in the pot at once. One piece of fabric was in for 18 hours, the other piece was in for about 21 hours. The piece shown above is the larger of the two, and when I checked it at 18 hours it looked vibrant and even! The other smaller piece was a bit more splotchy and not as vibrant, so I decided to keep it in the pot for the extra three hours or so. It made a bit of a difference, but overall I was happy with both pieces at the end of it all.
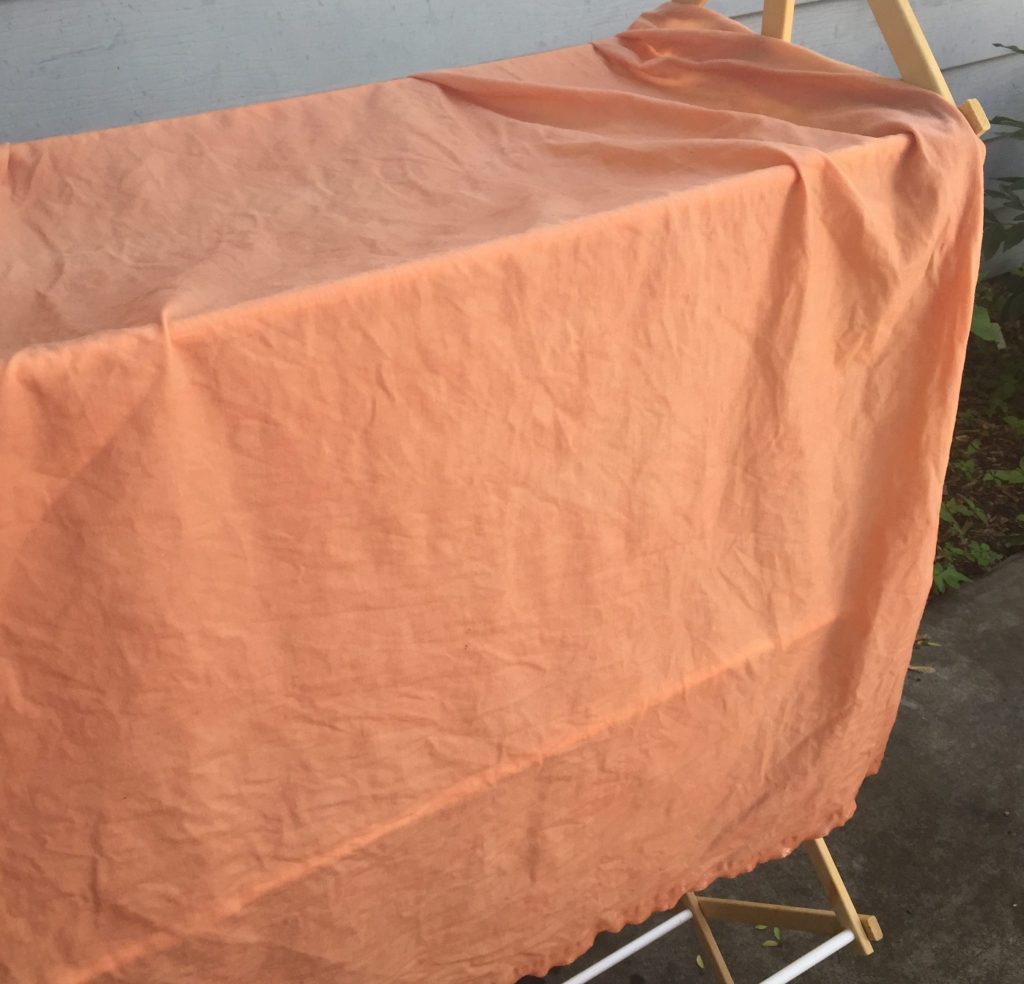
I let the fabric dry out on the line in the shade until it stopped dripping on the ground, and then I hung it up on the line in my laundry room.
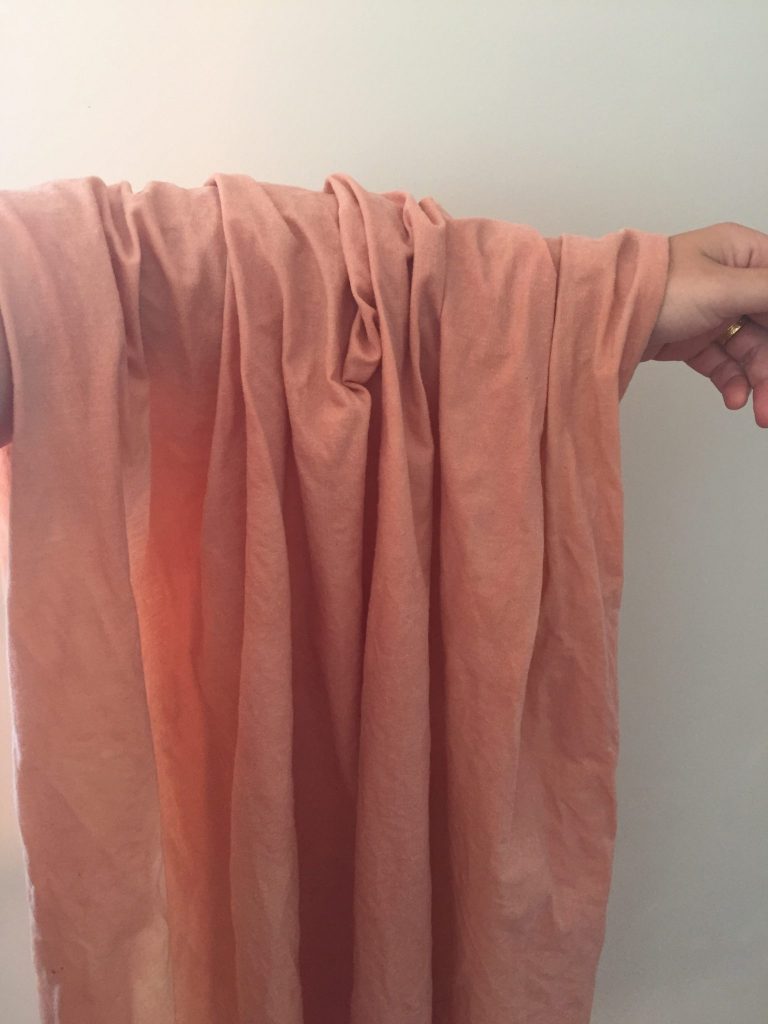
I did not rinse the fabric because I wanted to give the dye several days to set into the fabric before washing it. Simply let it dry, pressed it, and then cut it up for sewing! I’ll even wear the garment a few times before washing it. Mine didn’t have any residue or anything from the dye liquid. If you leave the pits in with the fabric, you’ll definitely have to rinse before wearing or maybe even sewing.
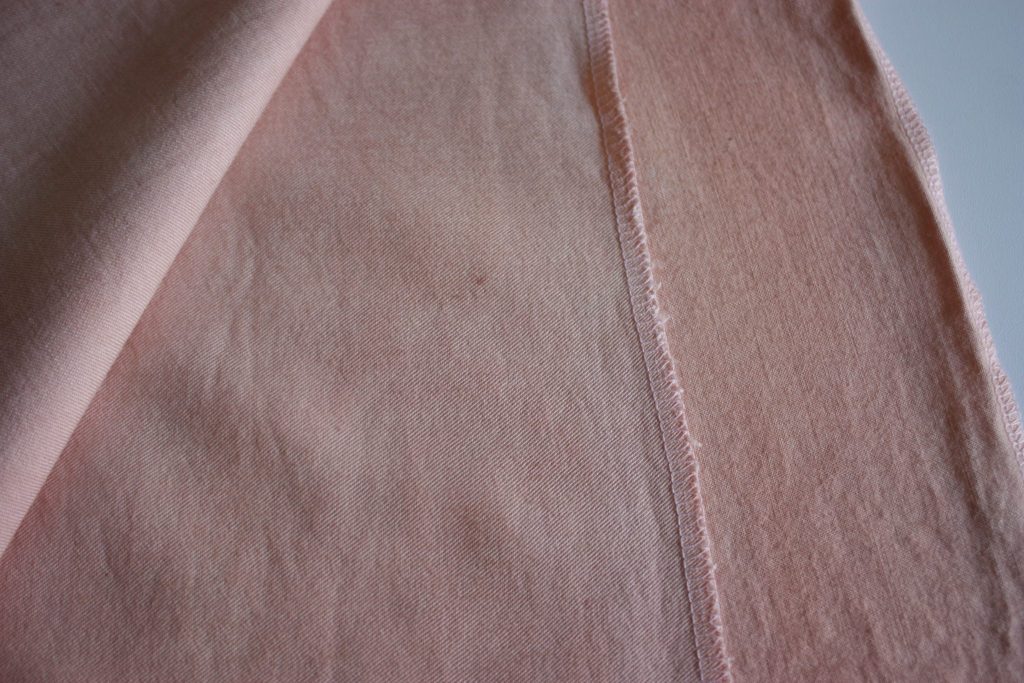
(Wrong side is on the right. Right side is on the left. lol sorry.)
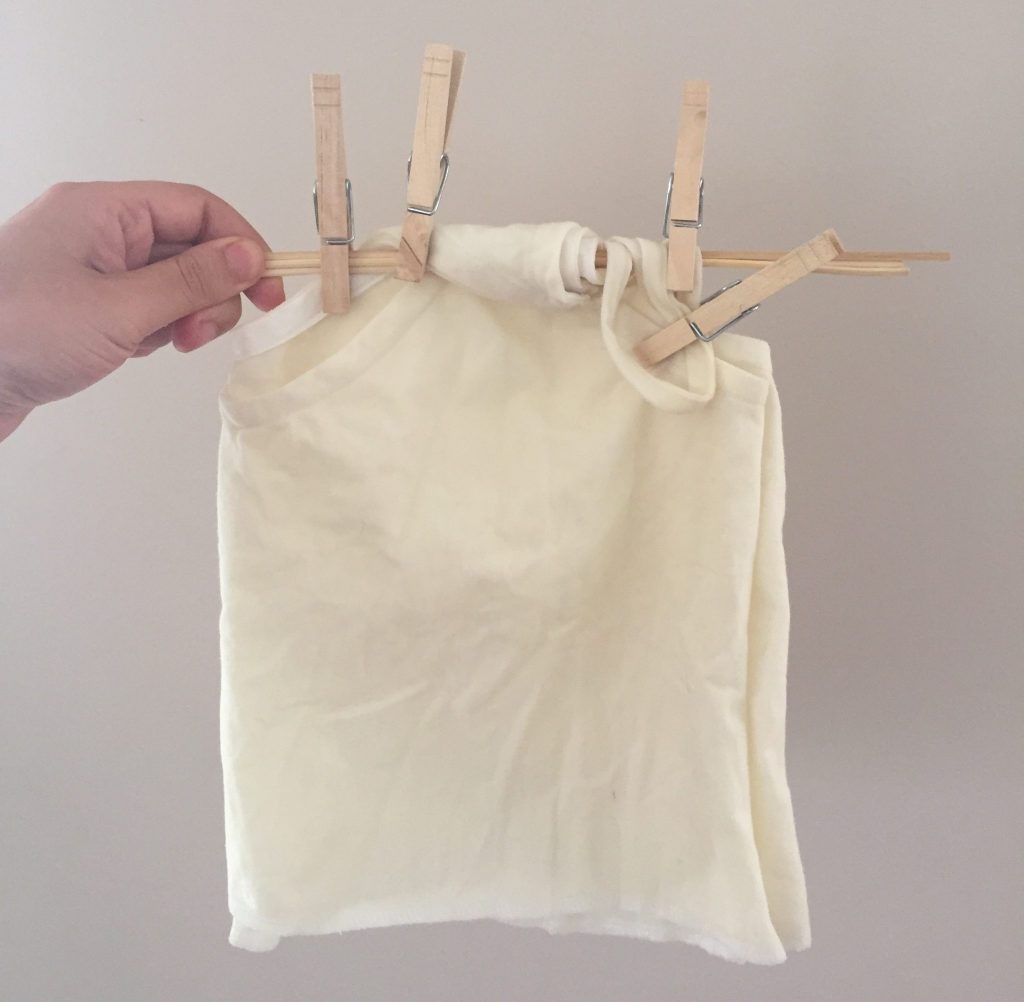
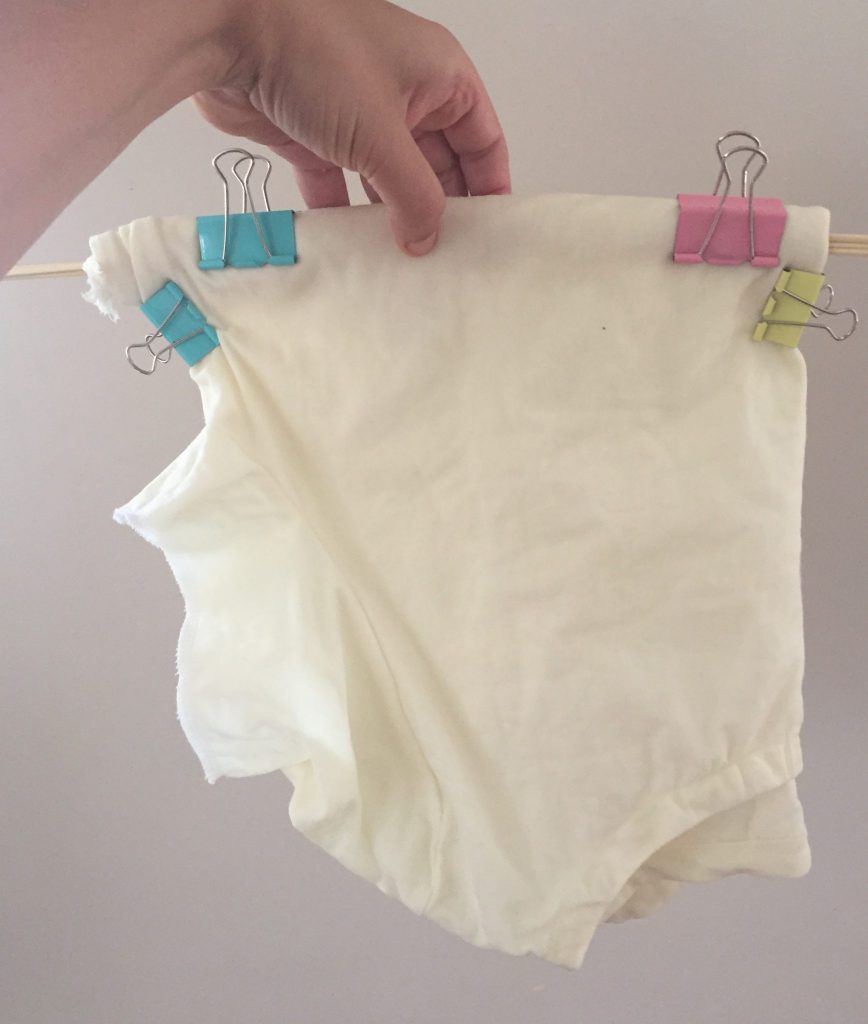
Dip Dye Pre-made Garments
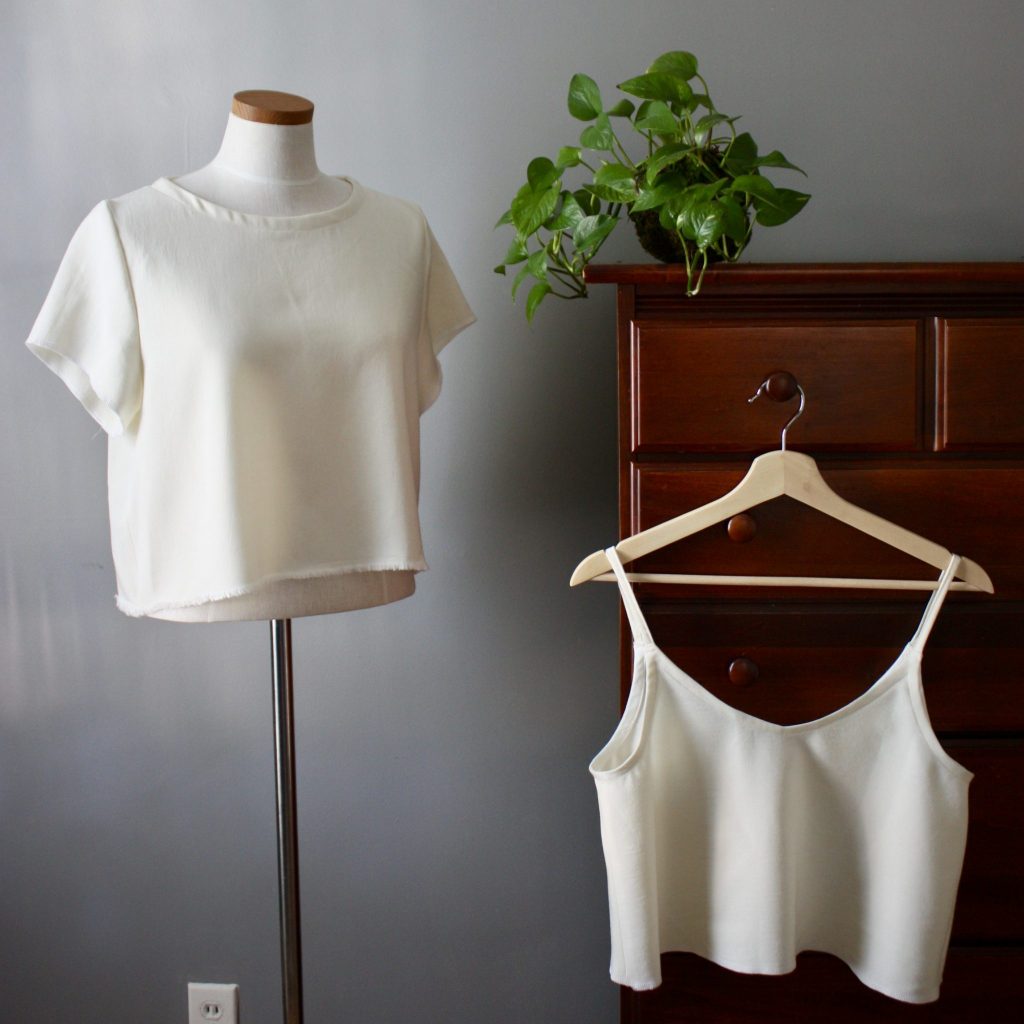
I made an Inari Tee (left) by Named Clothing, omitting the facing and cuffs. I also left the sleeves and bottom un-hemmed. The other top is a very cropped Ogden Cami by True Bias, omitting the lining and using bias binding instead. Check out my tutorial hacking this unlined Ogden Cami. I used bias binding on the neckline of the Inari Tee as well. The fabric for these came from the excess that I cut off from my yardage above! I played around with the pattern pieces and realized I could either make an Inari Tee with the facings and cuffs, OR a regular-length and regularly lined Ogden Cami. I couldn’t choose! So I hacked them in order to fit them both. Worth it!
My same dye bath was hanging out at room temperature. I soaked the tops in tap water for a few hours. This was way longer than necessary, but they were already soaking when I realized that other piece of fabric needed a few more hours in the dye pot. When the other fabric was ready and out to dry, I was ready to dip these!
As you can see in the images above and below, I clipped each top to a bundle of bamboo skewers that acted as a dowel across the top of the pot. The tee went in head-first, and the cami went in feet-first. Heavy duty clips helped the bulkier tee to stay in place.
I clipped the dowels to the edges of the pot so they wouldn’t move or slide around. I left this still on the counter all day, and then carefully put it into the fridge overnight. Once or twice, I went in with a spoon to stir the dye a little bit, but I didn’t really mess with moving the tops around.
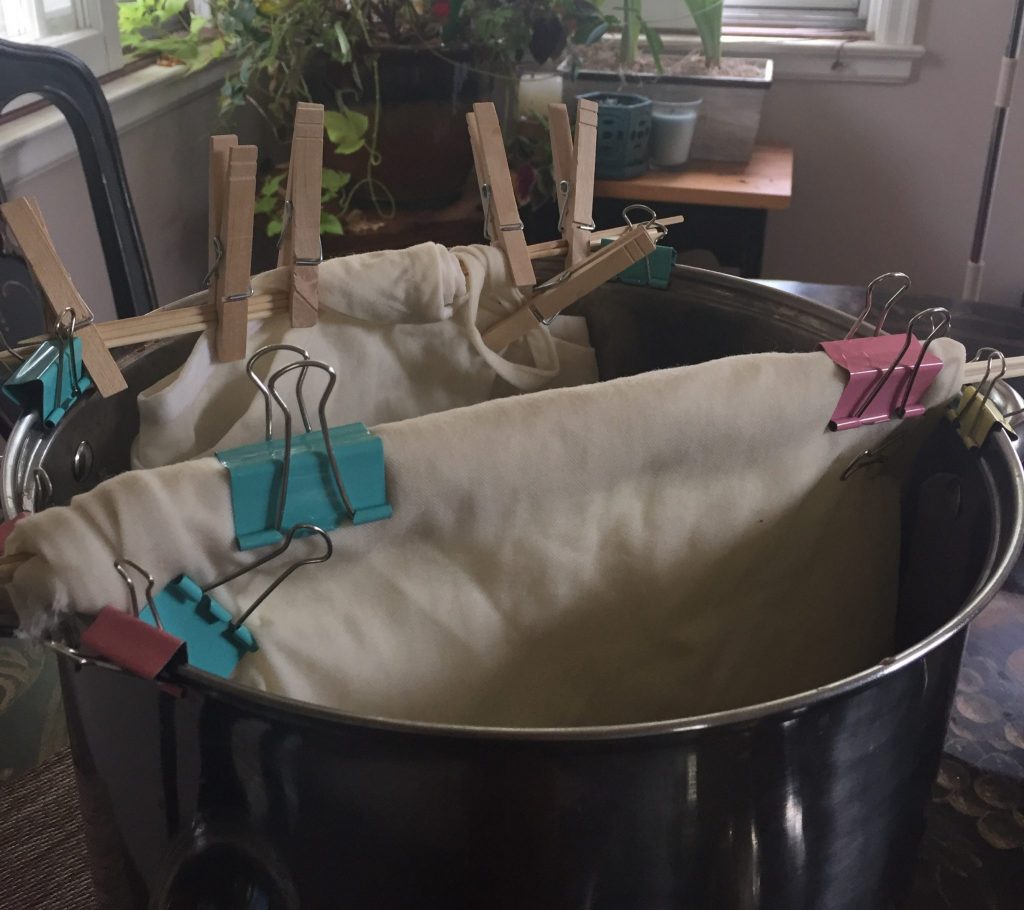
The following morning I took out the garments and carefully squeezed out the excess liquid. Then I hung them to dry outside. Dye facing down of course! I was so so happy and excited to see these turn out so well!
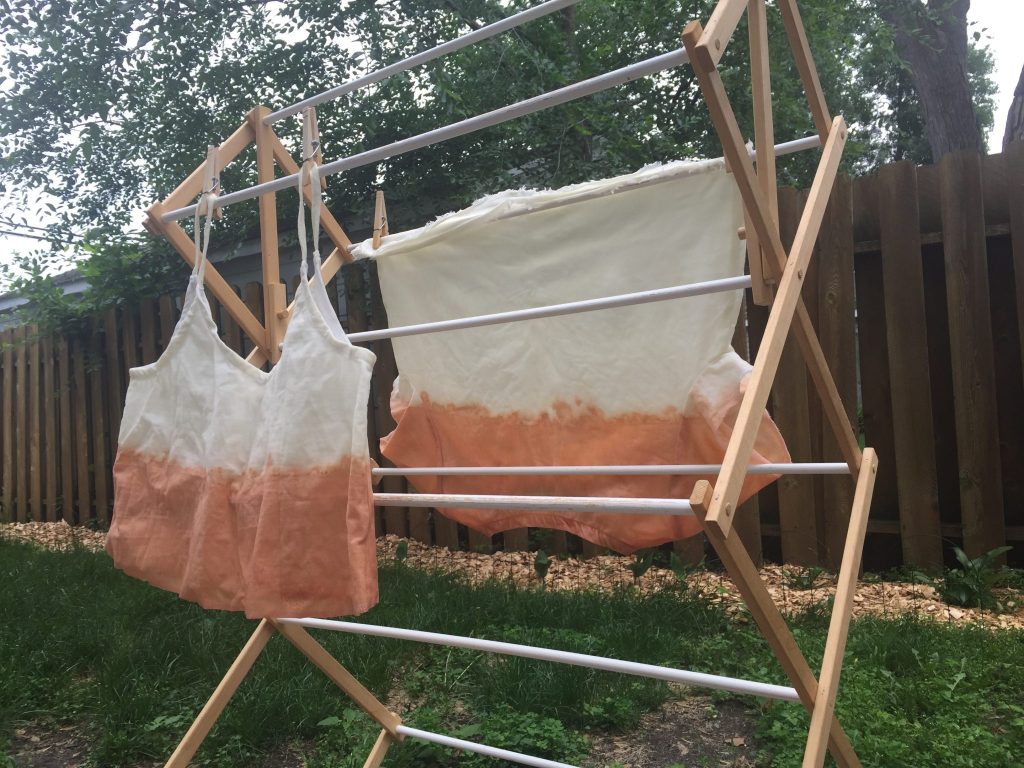
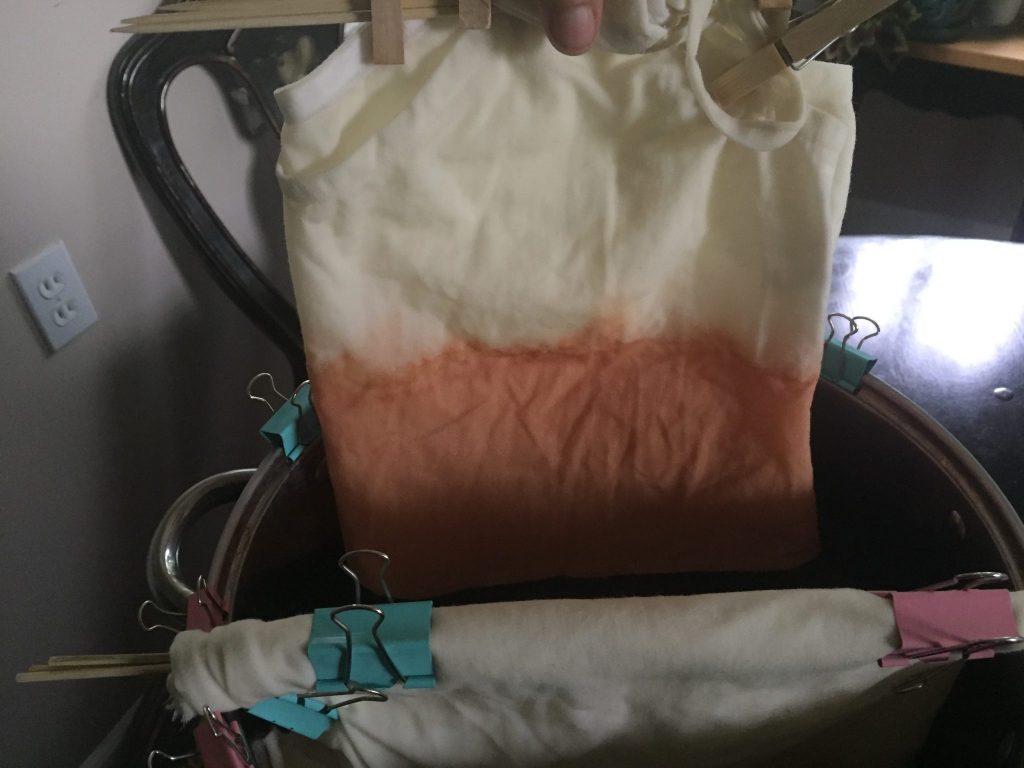
When Disaster (or Wind) Strikes
Ugh… my eff-up. I was almost in the clear too! My intention was to leave the garments hanging outside just to stop dripping for FIVE MINUTES. But a storm was coming, and I went back outside to find the wind had already knocked the rack over on its side. The tee fell into the dirt (ugh whatever, I figured I could wash that out). The real tragedy is that the Ogden probably caught itself on the rack and dripped dye onto the white top. DANGIT! I’m still a little salty about it because I really wanted a clean white on the upper half. I tried rinsing right away and the spots still showed up when the top was dry. Bummer!
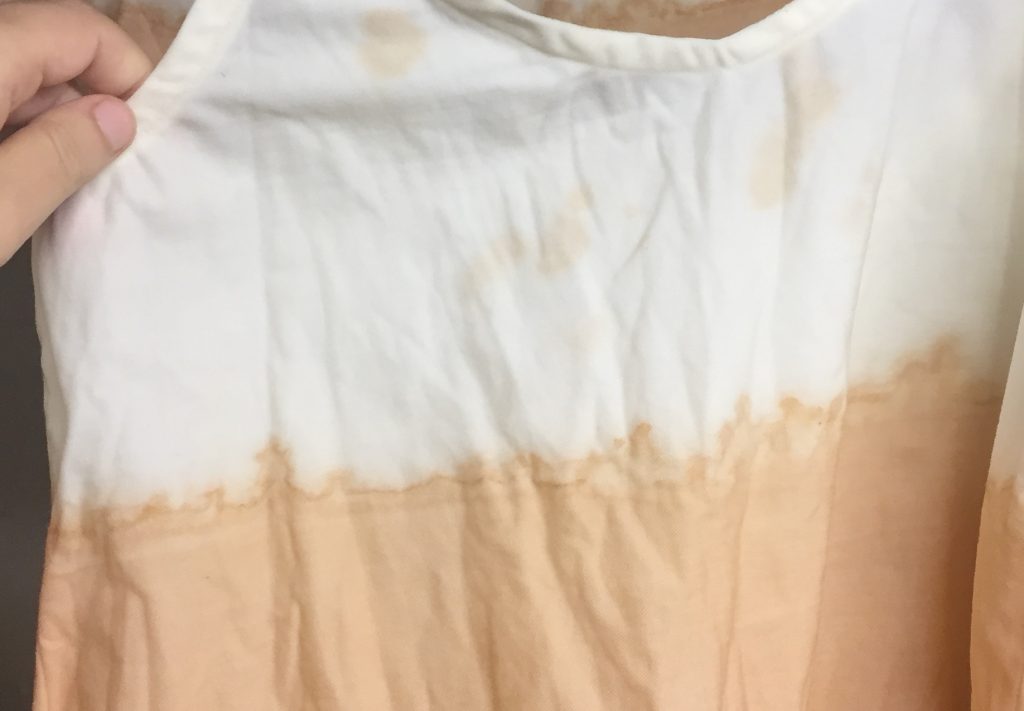
My pride…! I sucked it up and dipped the top part, just to the stain, back into the dye pot for only about 20 to 30 minutes. This is an important tip!! Don’t discard your dye until everything is dry and you are happy! It takes so much time to get the dye, and I would have been so pissed at myself if I dumped out the dye right after hanging those garments up. I’m actually happy with the lighter top portion fading into the center white stripe. It also differentiates the tank from the tee a bit too!

Can we have a moment of gratitude for that watercolor effect on the edge? In love.

Oof, this was a beast of a project, and a beast of a post to write! I’ll have more information about what I did with all that dyed fabric soon! I hope you find something useful from peeking at my process on how to dye fabric with avocados. Please let me know if you venture into the world of natural fabric dyeing! I’m hooked. Thanks for tagging along throughout this process. If you want to see a bit more, head over to Sewnorth Instagram highlighted stories for some in-the-moment videos during my dye weekend extravaganza! xo
I’ve had a growing collection of avocado pits in the freezer for a couple of months, meditating on how to proceed! This post is awesome and your results are fabulous!! Well done and thanks! les
Really wonderful post. I am saving up avocado pits at the moment. I don’t have a project in mind but this post is inspiring! Great job on saving the tank top, it looks cool!
Thanks for sharing this and taking the time to document it! Really appreciated and your results are lovely!!!!!
wow! The cami and the t shirt came out awesome! I really liked how to cami came out, definitely a happen accident!
cant wait to see what you make with the yardage! i would love to try avocado dyeing but i live in a small city apartment. 🙁 maybe some day!
also wanted to say i love blog posts like this!
I’m so excited to try this! Your results are so stunning. Thank you for going into such detail, so I know what to do when I’ve saved up enough pits!!!
Pingback: Unlined Ogden Cami - SewNorth - Scrap Buster Hacks
This is so detailed and helpful. Thank you.
Pingback: Oberlin Bag Maker Kit - SewNorth - Pattern Reviews