See three pairs of Philippa Pants in three different phases of designer Anna Allen‘s pattern test in three different denim fabrics. This was a Goldilocks story, and spoiler: this black pair is juuust right. Check out the evolution of this pattern through my involvement in the designer’s testing process and see these tapered pants in three different types of denim. I made both button and fly versions too. TLDR: Great pattern!
The Details
- Pattern is Philippa Pants by Anna Allen Clothing
- Size 8 waist, graded to size 16 hip, back to 14 leg (I’m 29 waist, 45 hip, 26 full thigh, 16″ full calf)
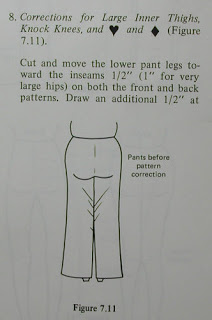
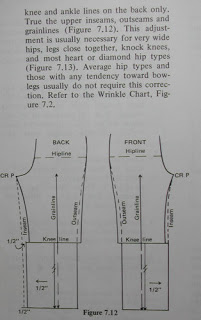
- Early muslin modifications: large inner thigh and knock knee adjustment (see below)
- Final modifications: grading sizes, increased back darts, full seat adjustment
- Black denim: Cone Mills rigid bull denim 12oz in black from Imagine Gnats
- Green and blue denim: mystery denim from local outlet (SR Harris)
- Hardware from Citron Jeans
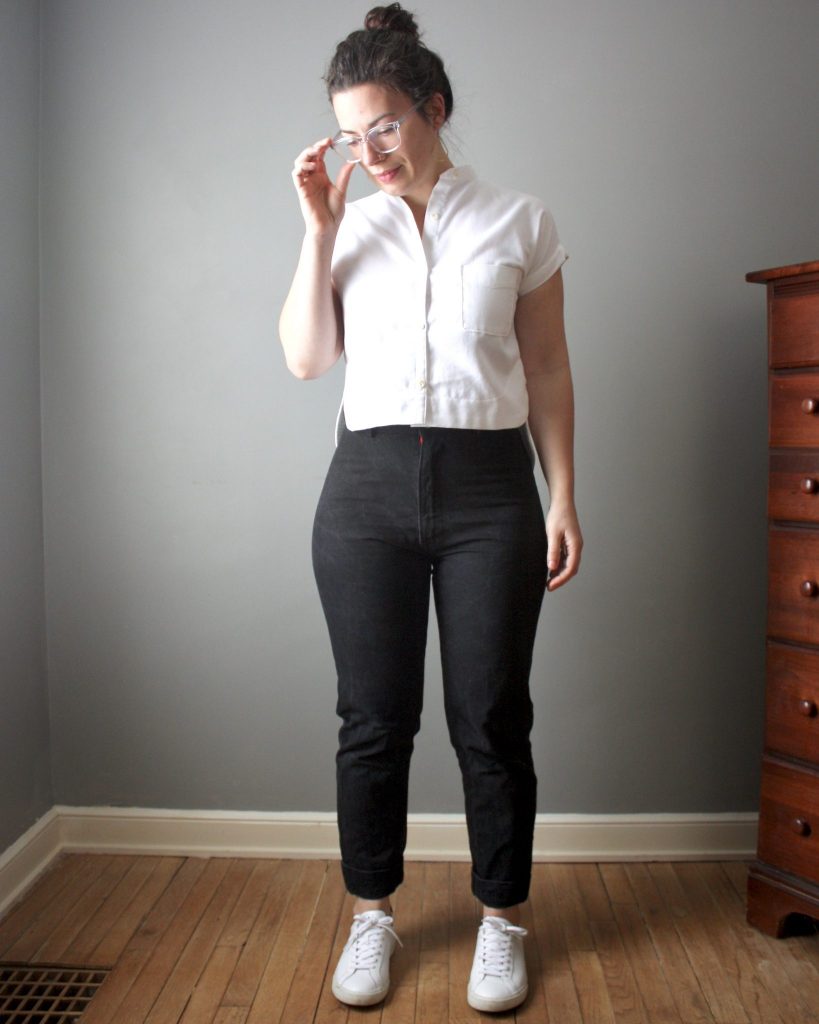
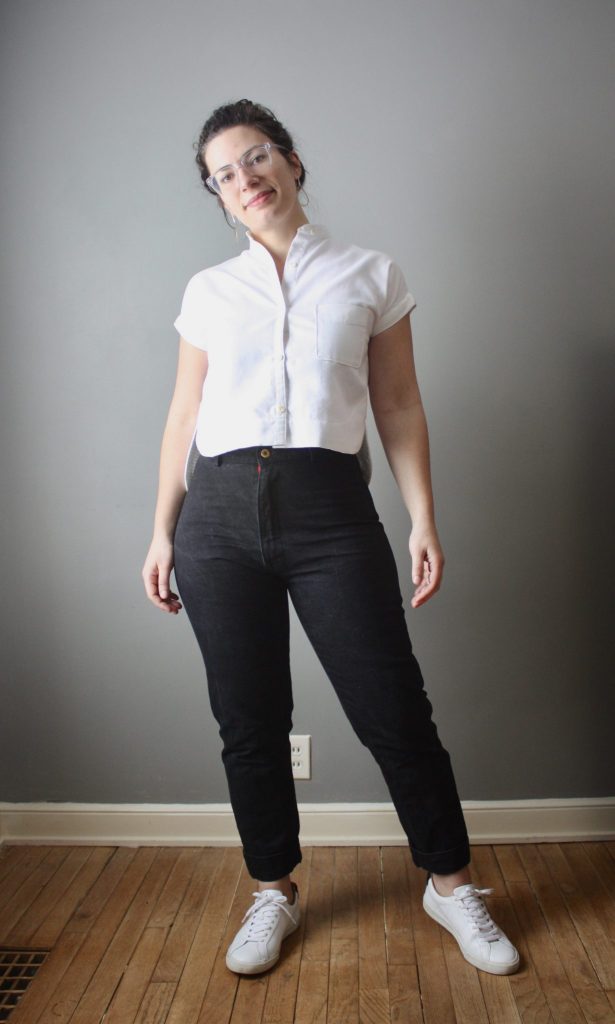
- Worn with: handmade Kalle Shirt in cotton shirting by Closet Case Patterns – also see my denim Kalle shirt refashion from a men’s shirt, pictured below with blue Philippa Pants
- Shoes by Veja
The Pattern Design
The Philippa Pants pattern is a tapered pant design from Anna Allen with straight side seams that would be appropriate for selvedge denim. I haven’t made a selvedge pair yet, but that is on my list once I figure out how to draft a yoke and traditional front pockets to make them look more like traditional jeans. Anna made a gorgeous distressed pair that gives me all the envy eyes. She also has a great tutorial on her blog how to make the Philippa Pants with a wider leg with cute front pockets.
I might be one of the last sewing people on the planet who has yet to make her wildly popular Persephone Pants. I wasn’t sure if the lack of side seams on that pair would work for my waist-hip ratio. My adjustments for other pants require major changes at the side seam around the hip, and I was still skeptical for how these Philippa Pants would work with straight side seams. After seeing how well these fit around my waist and hip, I’m pretty sure the Persephone’s will work for me too. Also, seeing her careful drafting practices with this pattern, I still don’t know why I’m waiting so long to make another of her patterns.
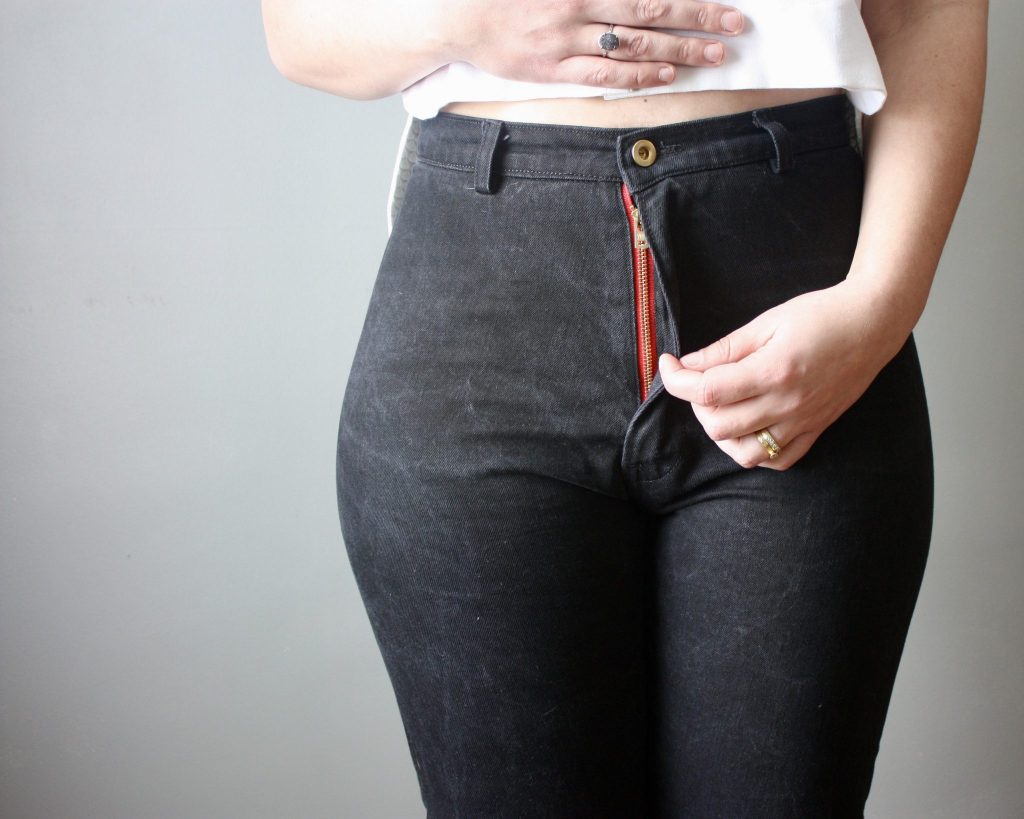
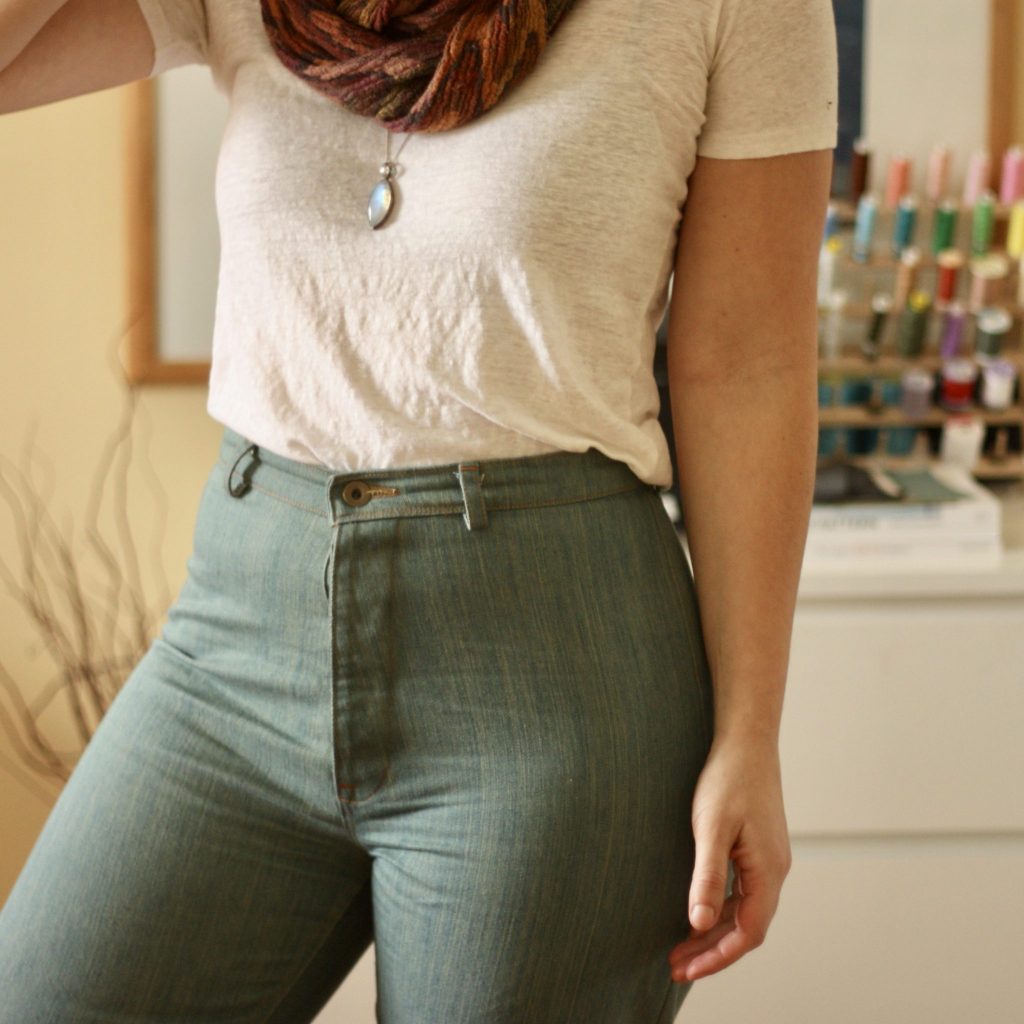
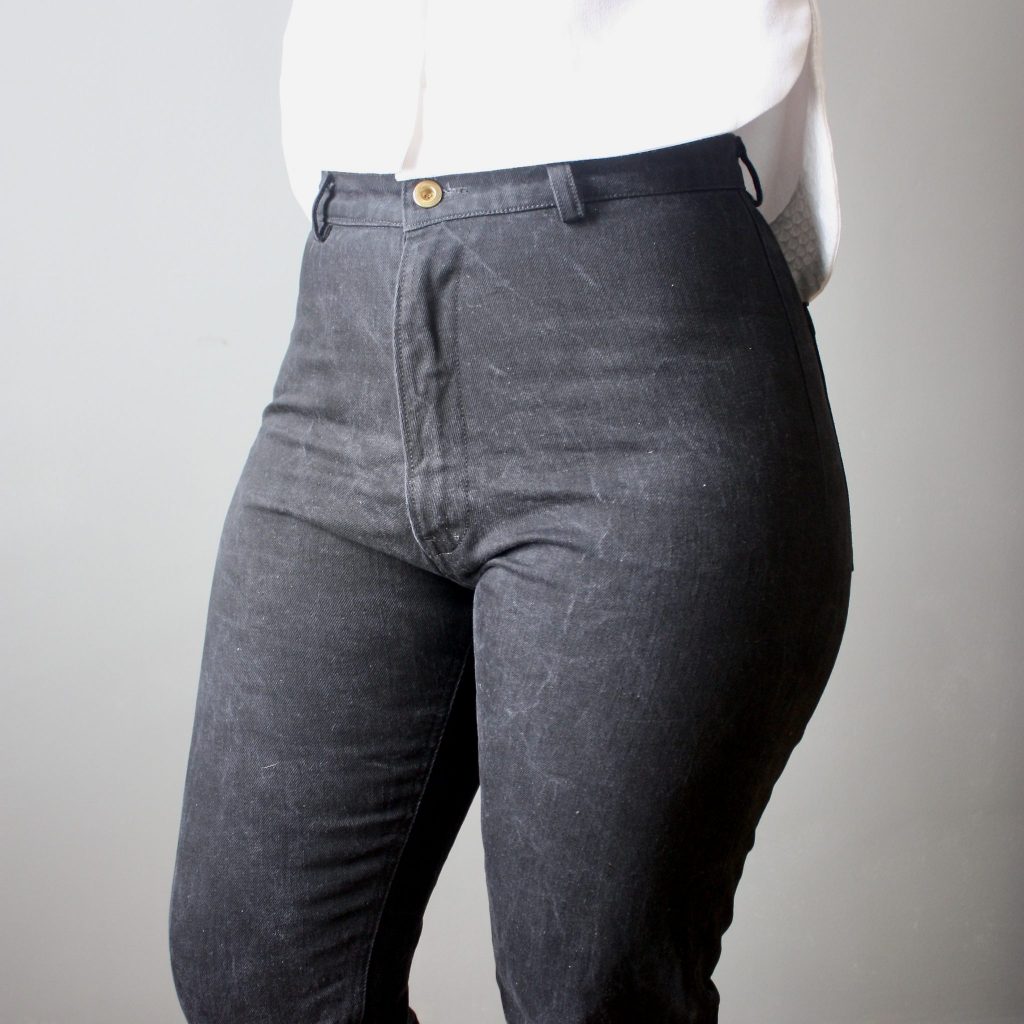
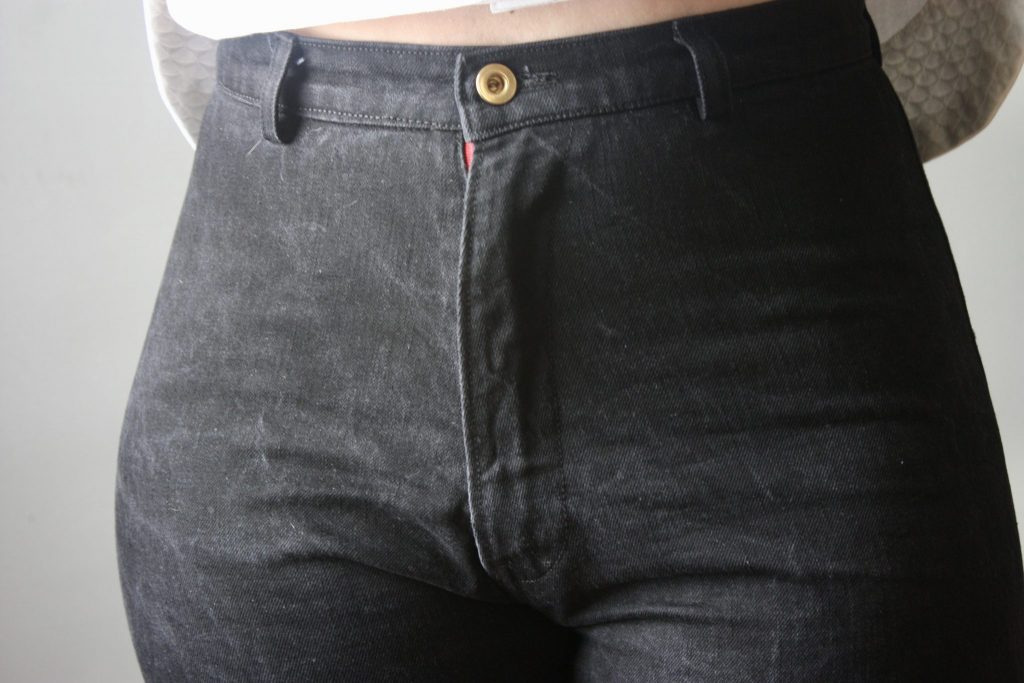
Zipper Expansion
I love Anna Allen’s zipper fly expansion that can work with both the Philippa and Persephone Pants, and her instructions are excellent. I went with a contrast zip for my own little dose of satisfaction. My own mistake was not following the recommended zipper length for my size because I only had a 7″ zip on hand and my hip size calls for an 8″ zip. I wish I used an 8″ zip so it would close at the very top and not peek out due to a tiny bit of gaping at the top. This wouldn’t have been an issue if I used a black zip to match though.
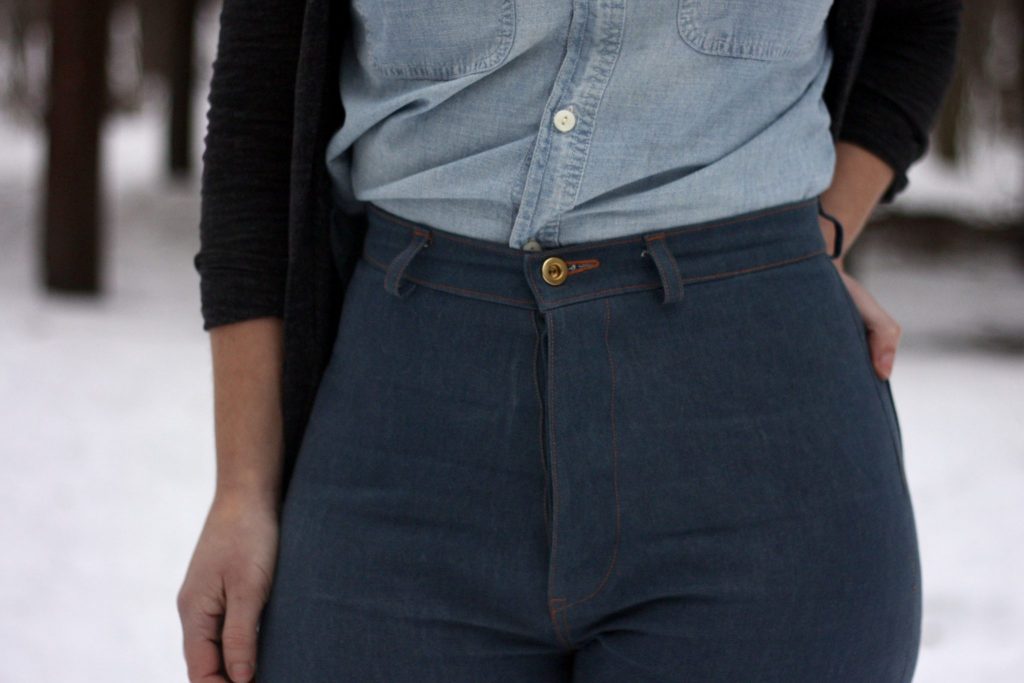
Cone Mills Bull Denim in Black
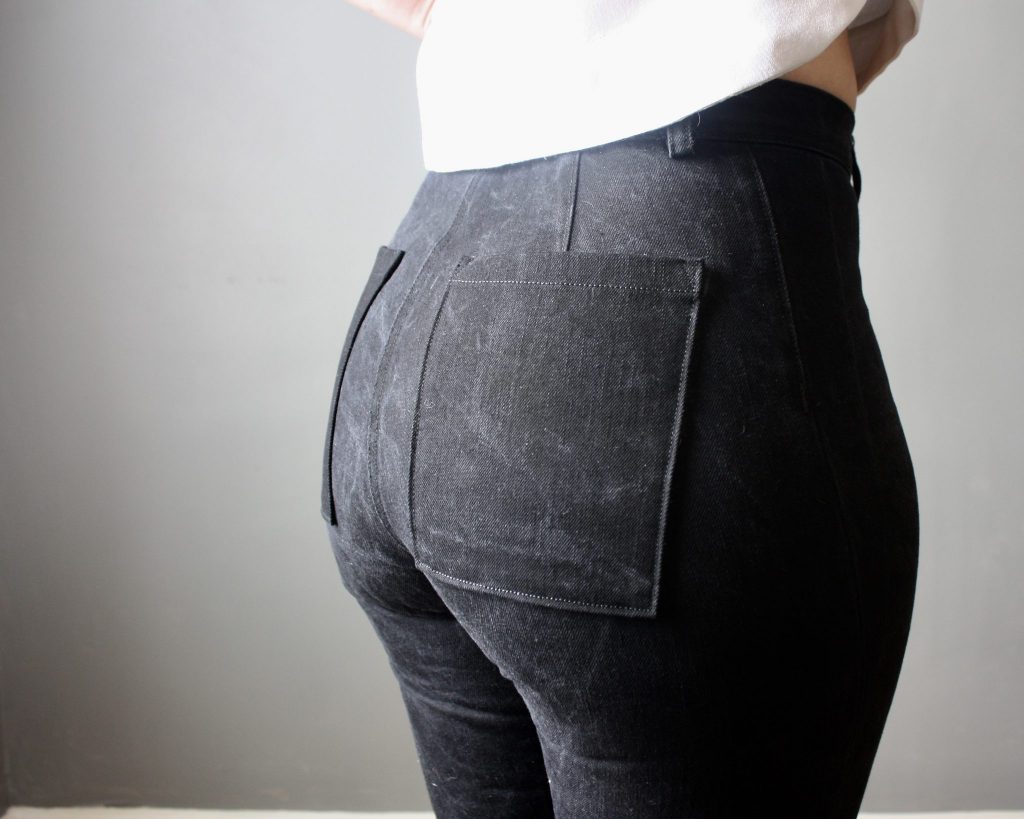
This denim was a dream to sew, as is all Cone Mills that I’ve sewed with before. I was a bit disappointed in how it washed though. I used a gentle detergent in a cold pre-wash and there was already some crazy fading. The second wash proved to have more fading too. You can see the marbling fade effect in some of the close up images. I can live with it, but it definitely gives these a more casual feel. I think they will probably fade really nicely with more washes, but it’s just not what I was expecting. These shrink up quite a bit after a wash and line dry, and they relax to a comfy state after about two days worth of wear. These photos are shown around a half-day post wash so they are still snug. This denim is from the lovely Imagine Gnats shop.

Modifications for My Shape
I followed the size chart for what my measurements are and graded sizes accordingly. I started at a size 8 in the waist, graded to a 16 in the hip near the bottom of the crotch, and then back to a 14 throughout the leg.
The only part that I am stumped about is the finished measurements around the hip. I graded to a size 16 in the hip for a brief few inches around the widest part of my body. The finished measurements chart shows 47″ at the hip, and while my hips are 44″-45″ – I have a hard time believing there is 2″ of ease here. It may be due to my intense grading, but it makes me wonder if I should size up next time. Perhaps the added ease comes with wearing rigid fabric until it relaxes? I’m not sure. You can see my front and back grading in green pen in the images below. The side seams remain totally straight.
I also adjusted the back darts. I wanted a size 8 in the waist, but to account for some intense grading out to the hip, I decided to trace a size 10 for the back piece only, and take in the extra amount into the dart. You can see in the image below that the original size 8 is in green, and my adjustment is in red. The extra bits on either side of the dart are equal to the difference between a size 8 and size 10 at the side seam. In the end it feels like an 8 at the waist. The drastic grading doesn’t solely live in the crotch curve, it’s distributed to the dart too. Hope that makes sense!
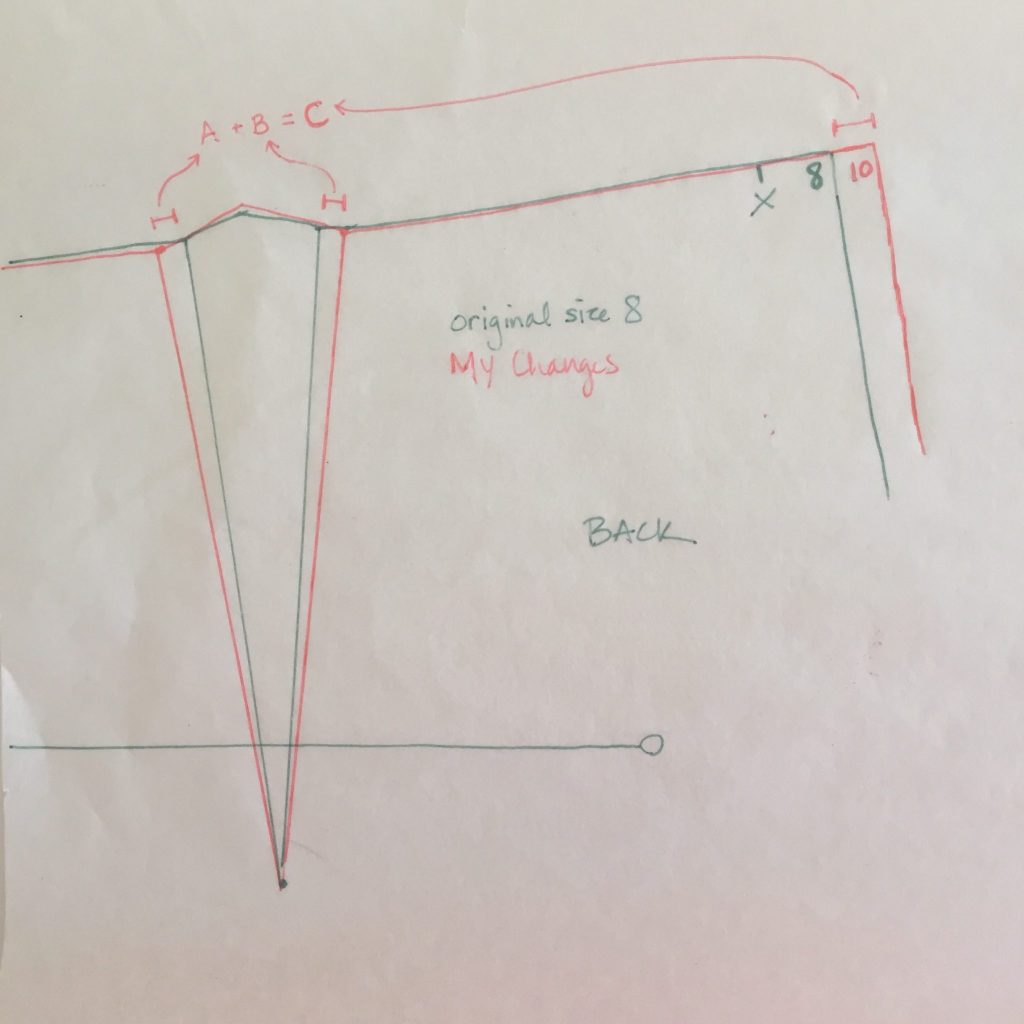
Dart adjustment 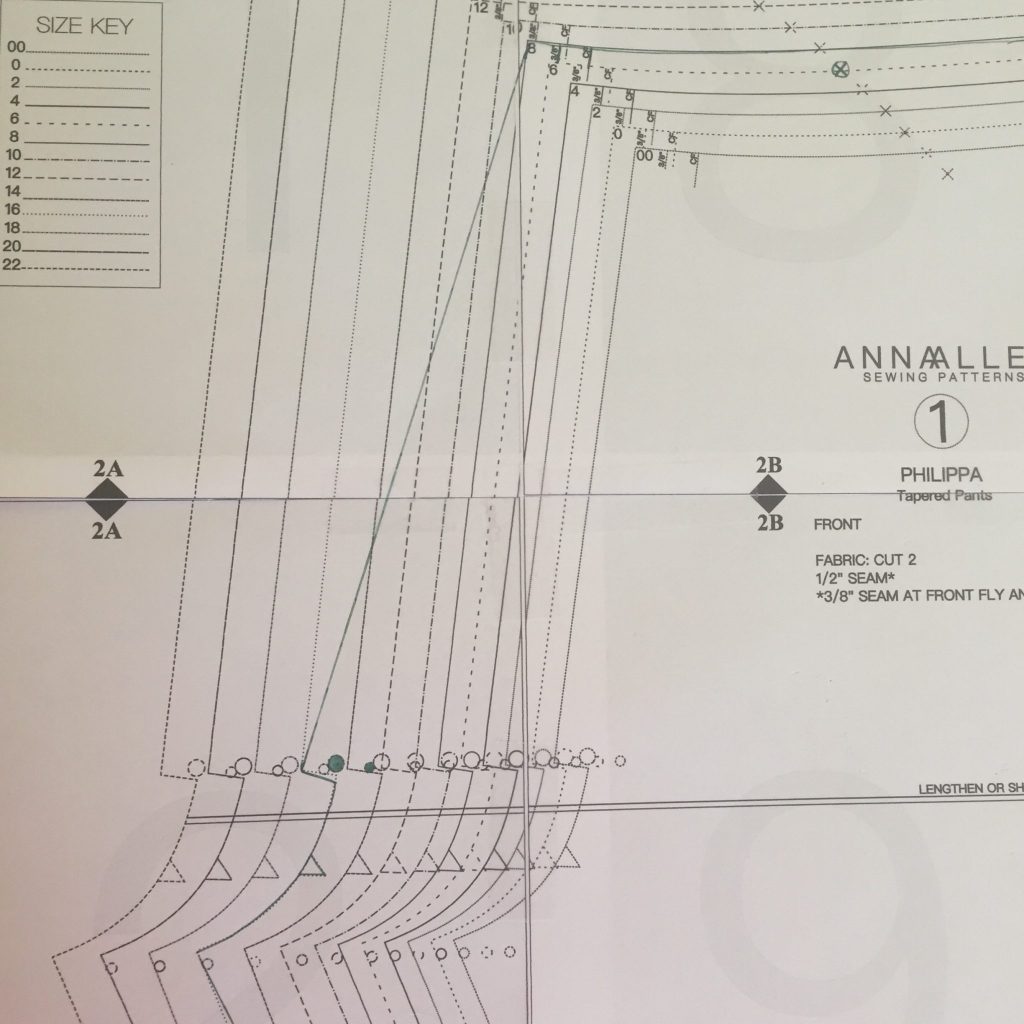
Front size grading 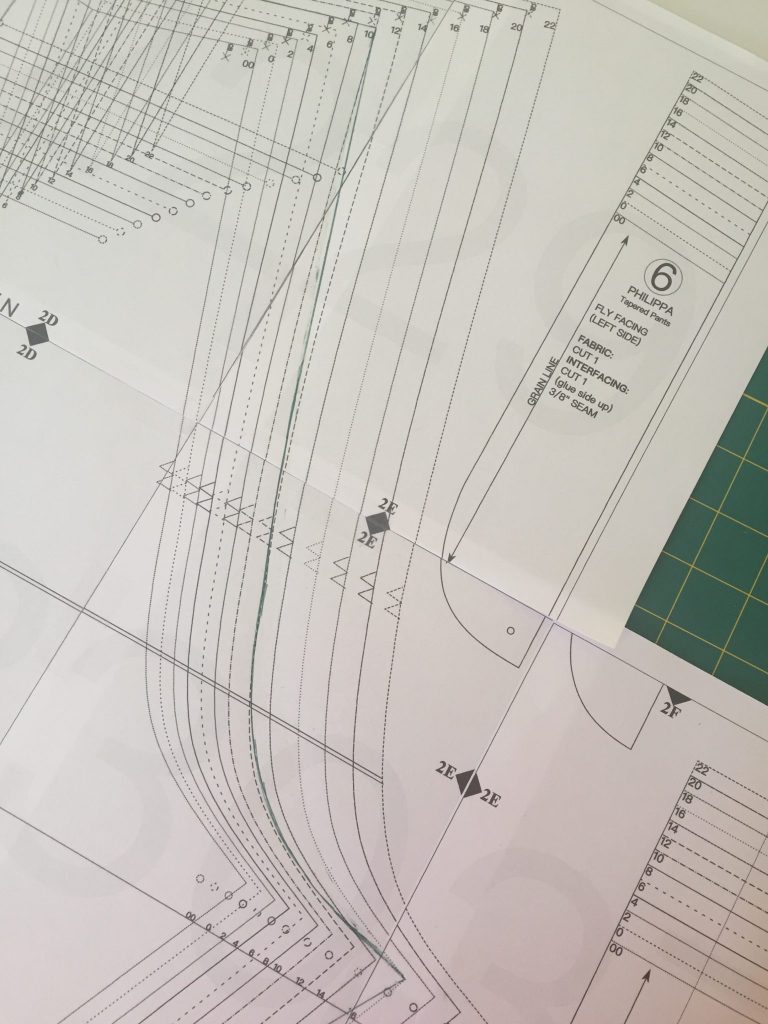
Back size grading
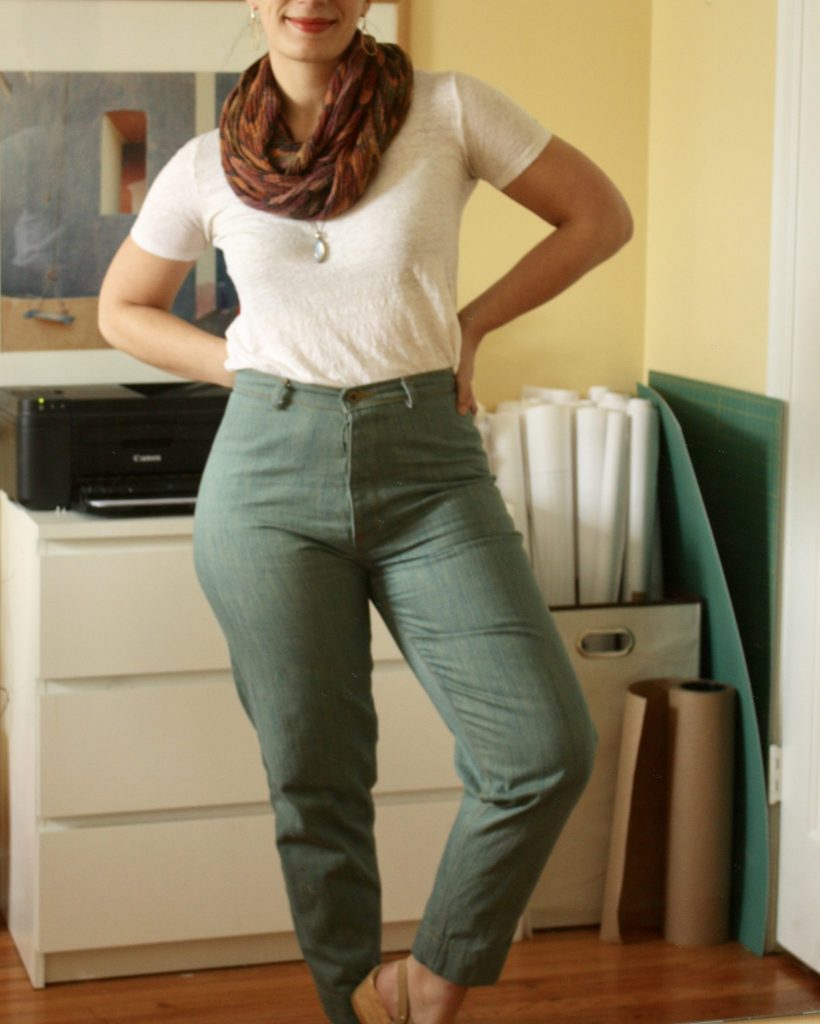
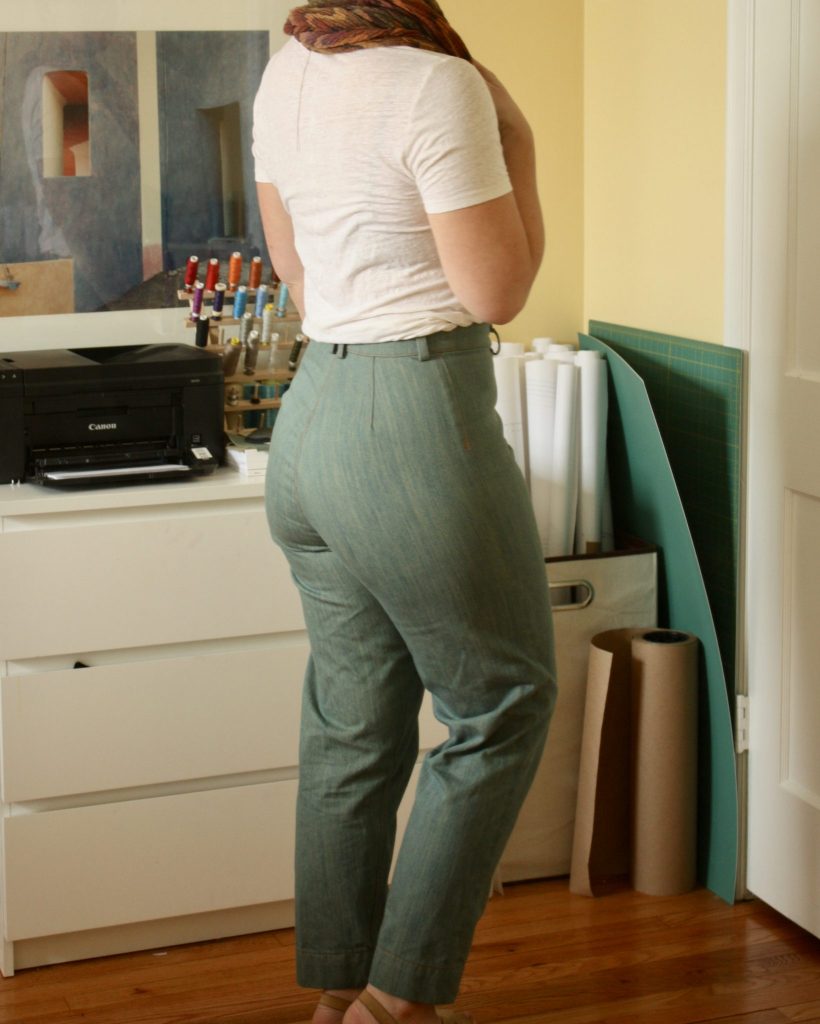
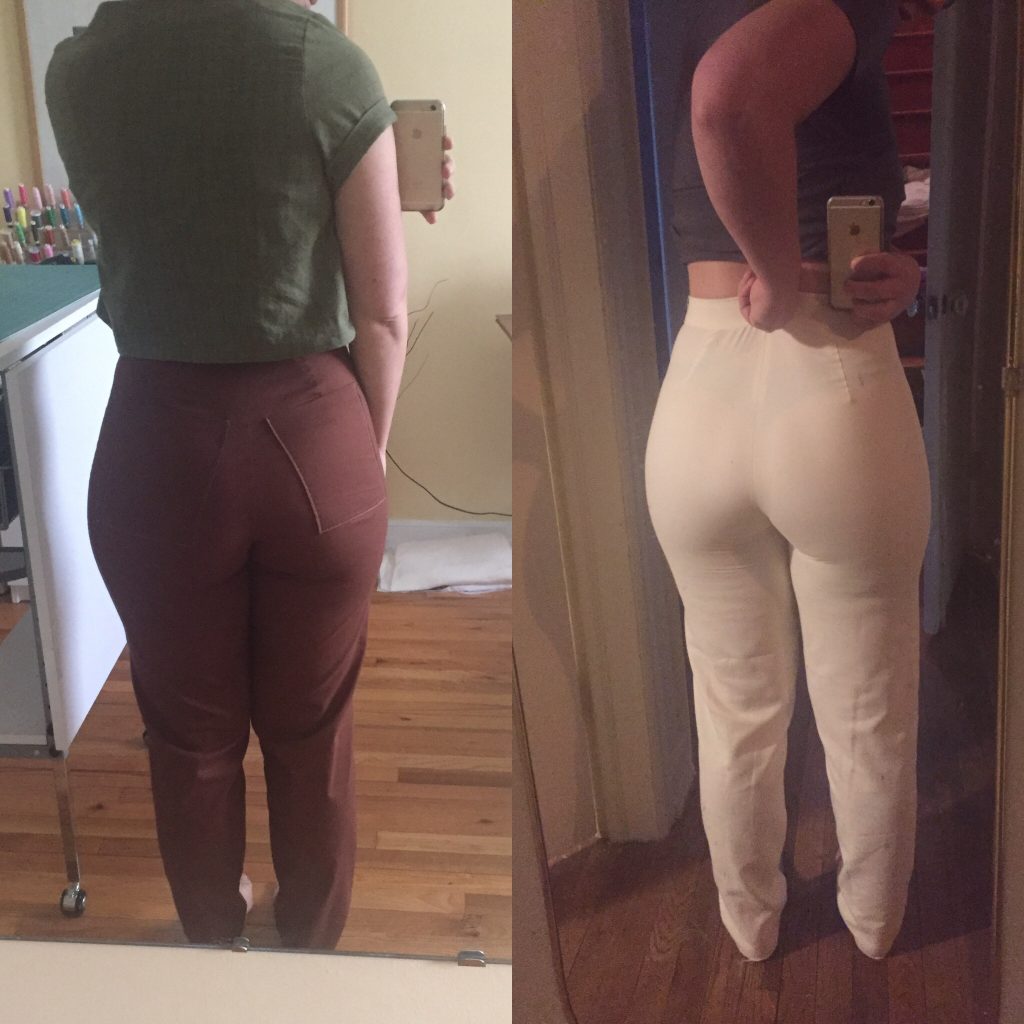
First Round: Too Relaxed
This is the first round during my pattern test with Anna’s tester group. This green pair is pretty relaxed throughout the thigh and calf for me. She hadn’t developed the finished measurements for the lower leg at that time, and that resource proved helpful in my final black pair later on.
Don’t get me wrong: I like these a lot. I love the button fly and my double belt loop at the back. I also like the bare booty pocketless look at the back. However, there are no front pockets and I always notice the lack thereof when I wear these. My husband rolls his eyes when I ask him to pocket my phone for me when we’re out. I still may add pockets later…
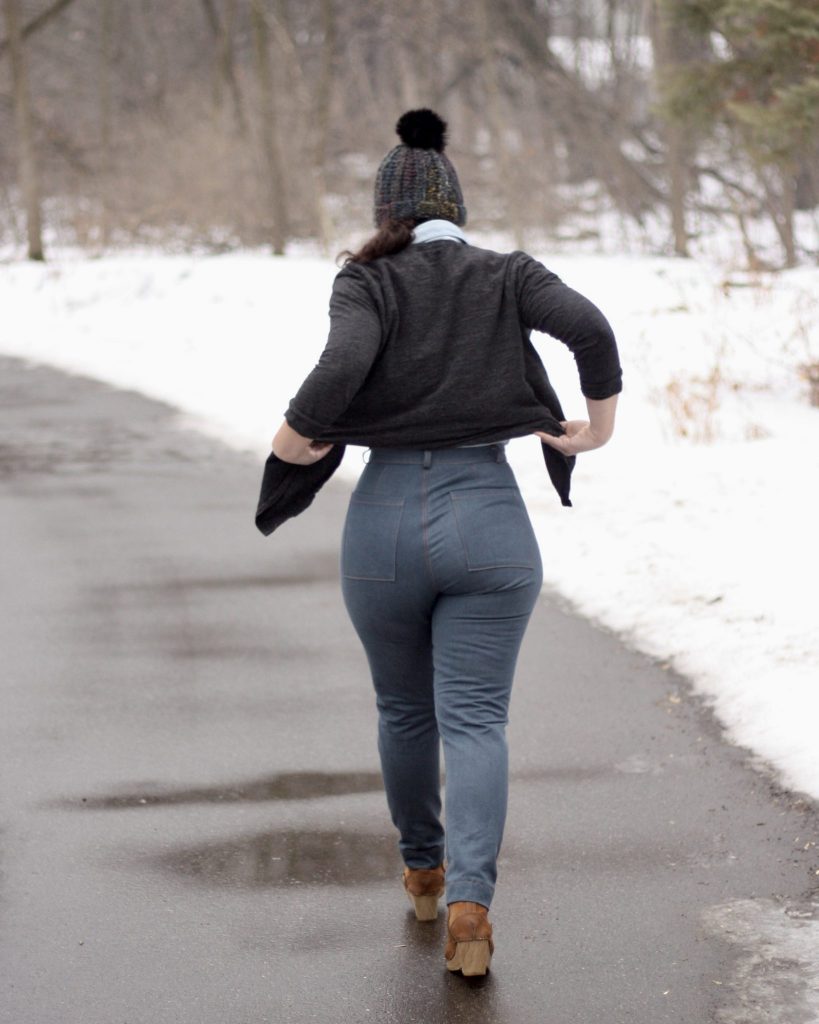
Round Two: Too Tight
This blue pair was my second pair using her updated draft to slim the leg down a bit. These ended up too tight for my comfort (if they were stretch denim they would be divine). I over-compensated in sizing down through the leg based on the first pair. I should have done a straight size and trusted her tapering in this second draft.
Don’t get me wrong: I still really like these. They are not comfortable for my body right now, but my size fluctuates here and there and I’ll hang on to these for when I happen to fluctuate on the slimmer end of my normal. I don’t hold judgement around changing sizes from time to time. Especially since I’ve started sewing for myself, I measure myself before each project and wow, do my measurements ebb and flow like whoa. I’m just building a little collection of clothing in a small range of sizes so I’ll always have *something* that fits. By the way, I’ll always post my measurements here in the blog at the Details section at the top of each post according to what they are at the time of making and photographing.
Also: check out how I refashioned a mens denim shirt into this Kalle-inspired shirt pictured below. I wear it more than anything else in my closet.

Early Muslin Adjustments
In my first muslin (pictured below in dark brown fabric), I had some pretty intense drag lines behind the knees pointing down and inward. This led me to look into a knock knee adjustment or a large inner thigh adjustment. I found an interesting blog post about this from Stitches and Seams and used the reference photos included below.
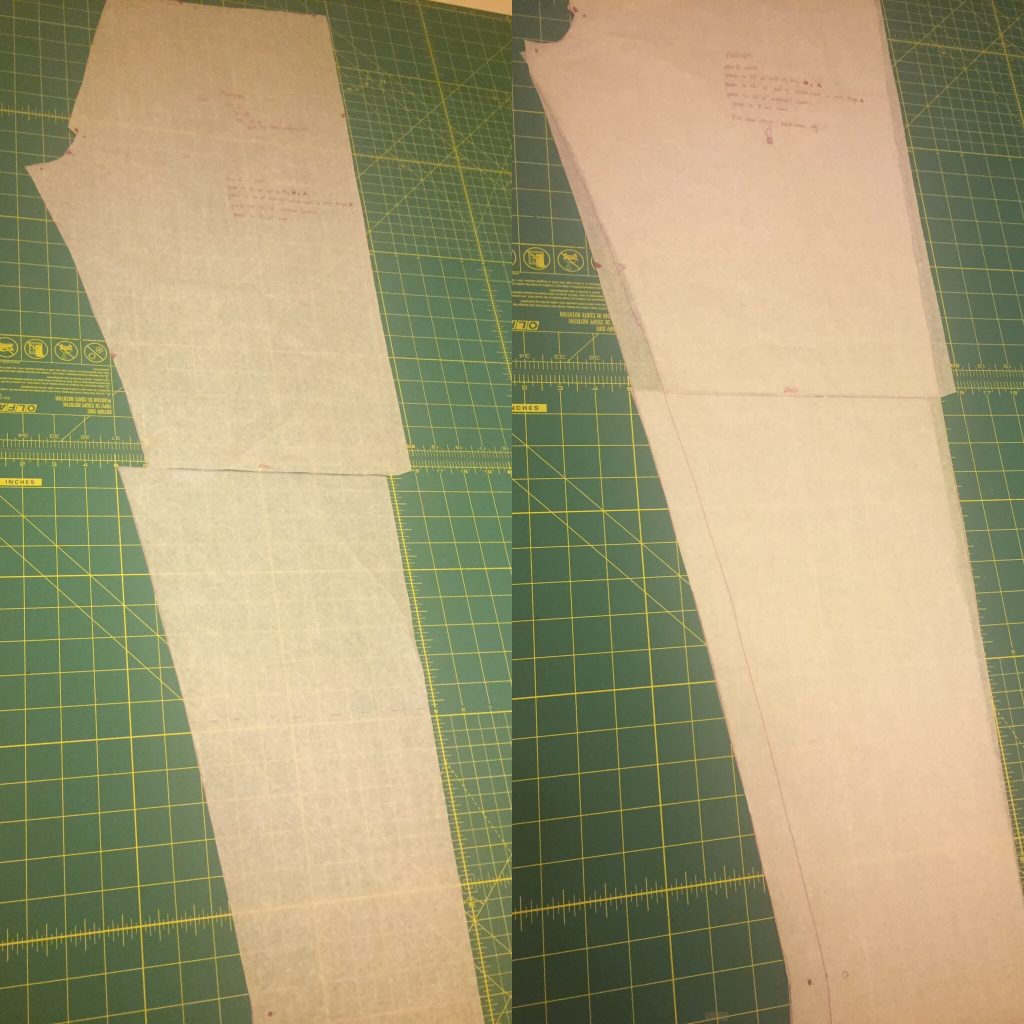
You can see my own pattern pieces on my cutting mats in the photo below as well. I slashed across the knee and shifted the lower leg about an inch towards the inseam. Then I cleaned up the curve of the new inseam and just took the center average of the out-seam while keeping a straight line. You can see how big of a difference this made in my second muslin below (in white fabric). I’m tugging up the center back to account for where the waist band will sit.
Anna, the pattern designer, put together a great guide for pants fitting adjustments which is included with the pattern. It includes some great illustrations for this knock knee adjustment as well as several others. Don’t skip reading this guide if you go for this pattern!
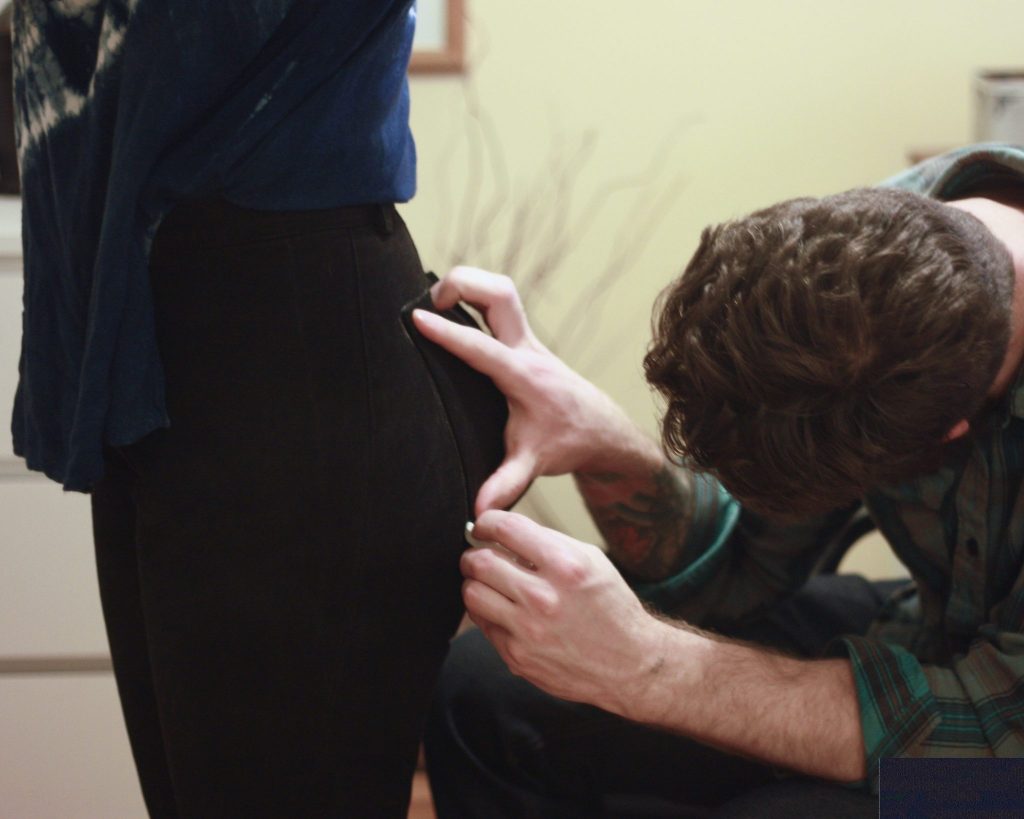
Pocket Placement
In the first muslin photo above (brown fabric), the pocket placement was according to the pattern. With my grading so many sizes, it was inevitable that the pocket placement for a size 8 (waist) or a size 16 (hip) would be off for me. It obviously was off in the muslin above. I’ve come to realize that the pocket placement for patterns doesn’t often work for my bum. And that’s ok!! You know why? Because I call on my husband-assistant to get it just right.
I could go on about how having him place pockets on me gives me those sexy vibes like that pottery scene from the movie ‘Ghost’. I’ll just say: You haven’t lived until you felt a little clicking tickle of a chalk wheel on ya butt.
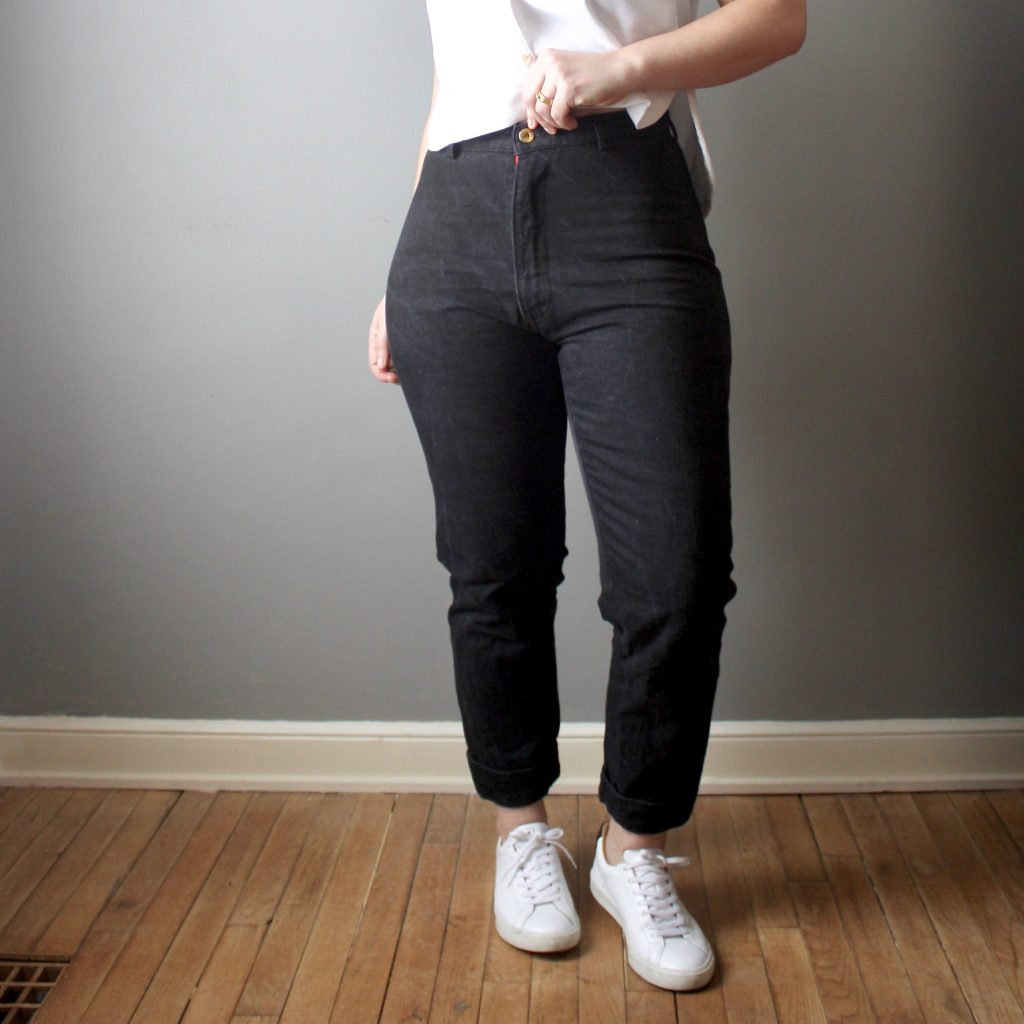
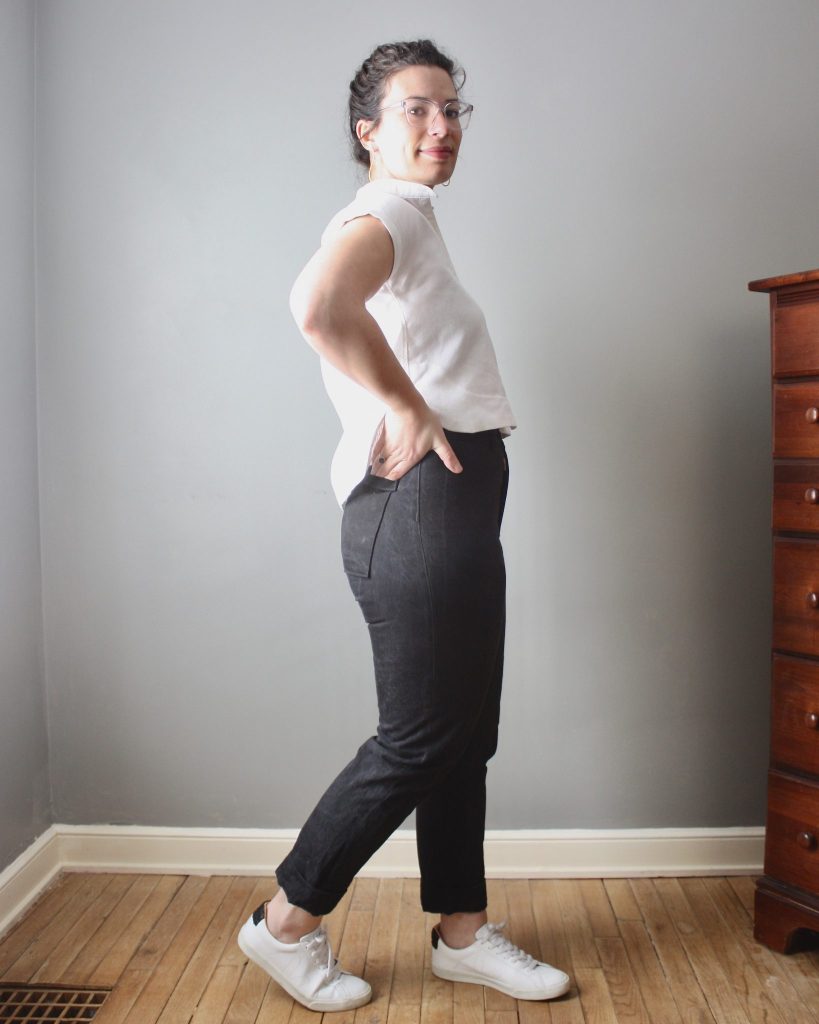
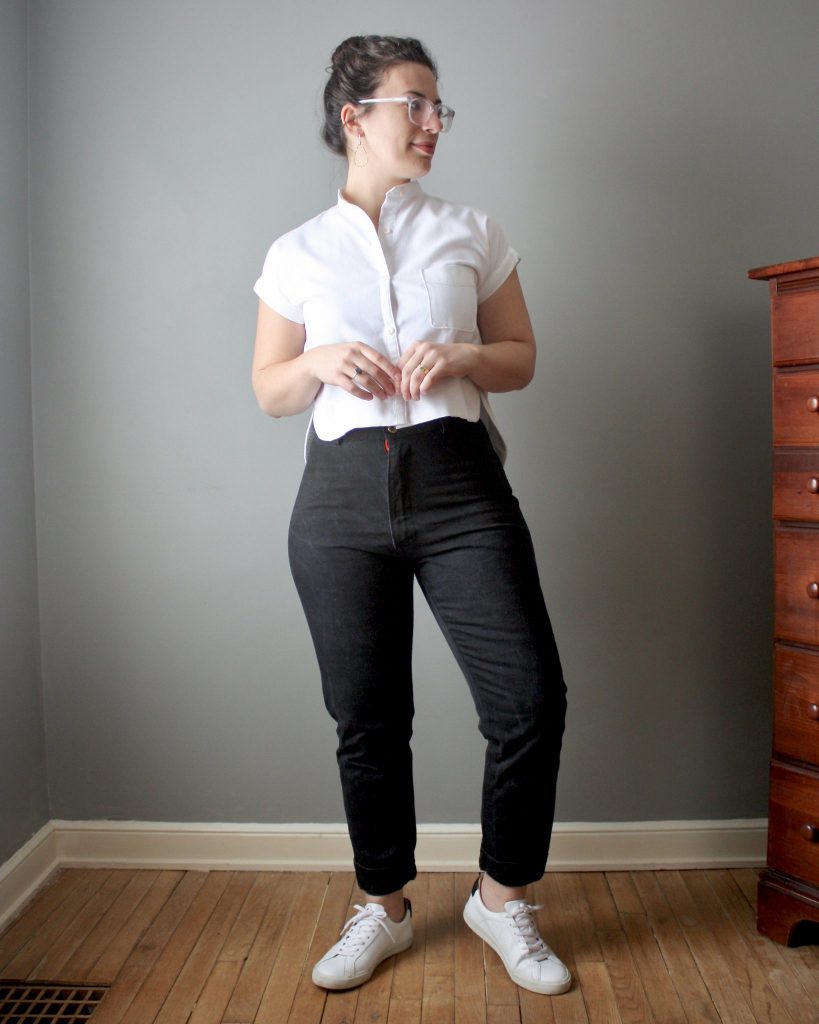
Goldilocks Version: Just Right
This black pair just fits the bill. I can’t remember the last time I had a pair of black jeans. They are really versatile and they just feel like me. I’m still figuring out my own personal style, but these seem like a staple. I gravitate toward solids, neutrals, no-frills. These tick all the boxes for me. Check out some other views of this most recent pair I made, notice I’ve got them folded at the cuff just once, and that’s likely how I’ll style them going forward. I like this length for spring and summer. Go enjoy this pattern!
Cone Mills Bull Denim 12oz 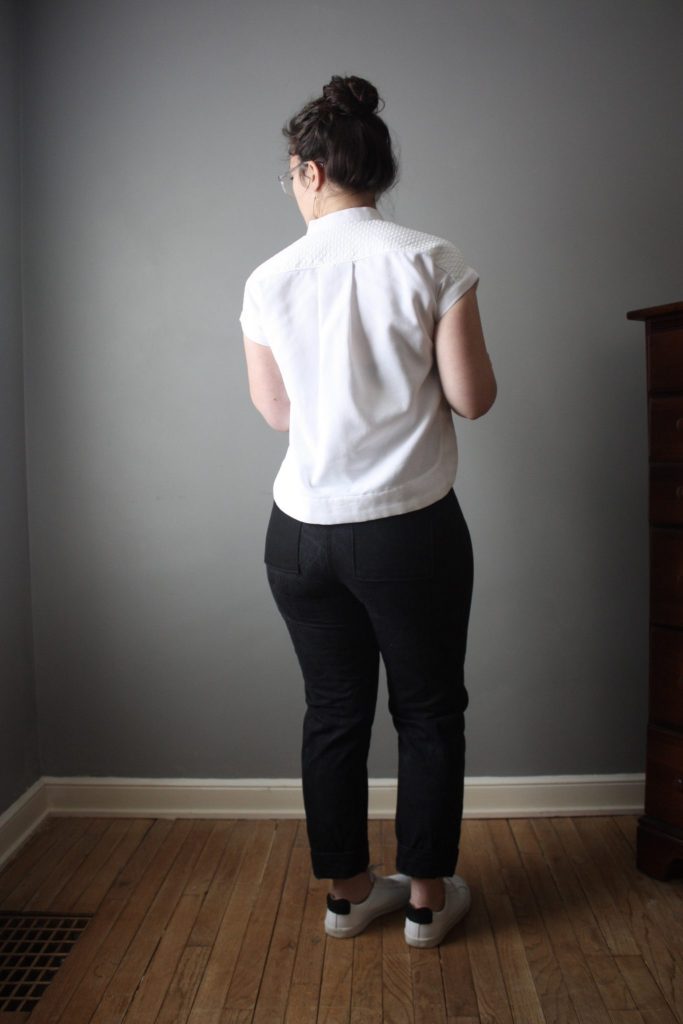
Button by Citron Jeans 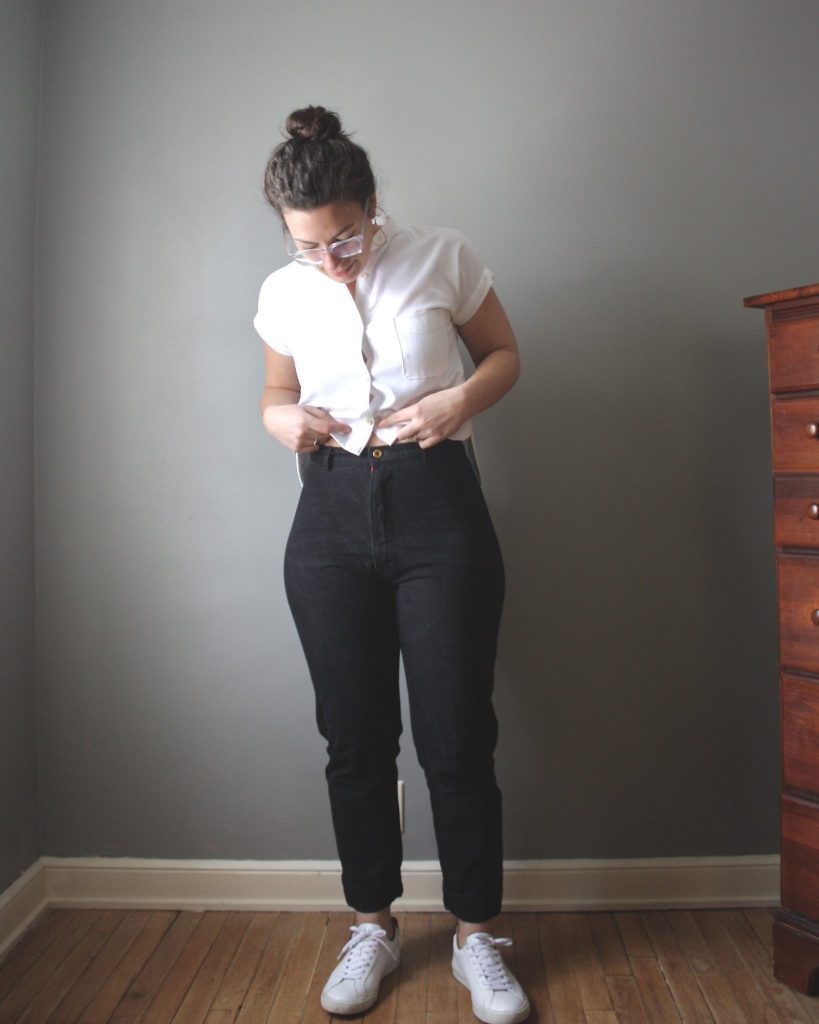
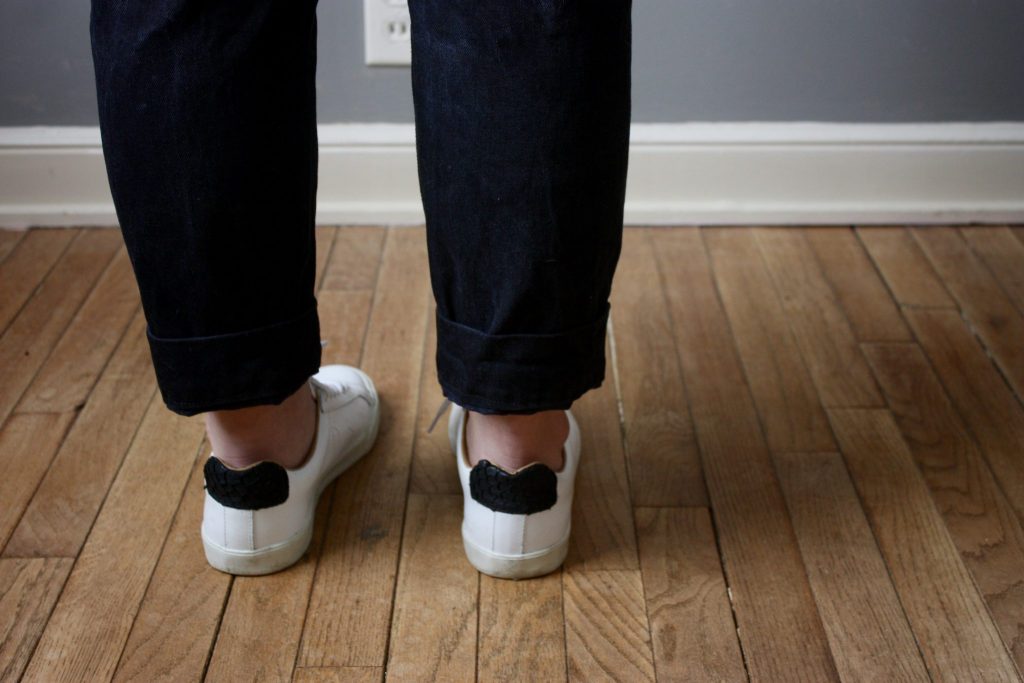
Esplar Tilapia Shoes by Veja 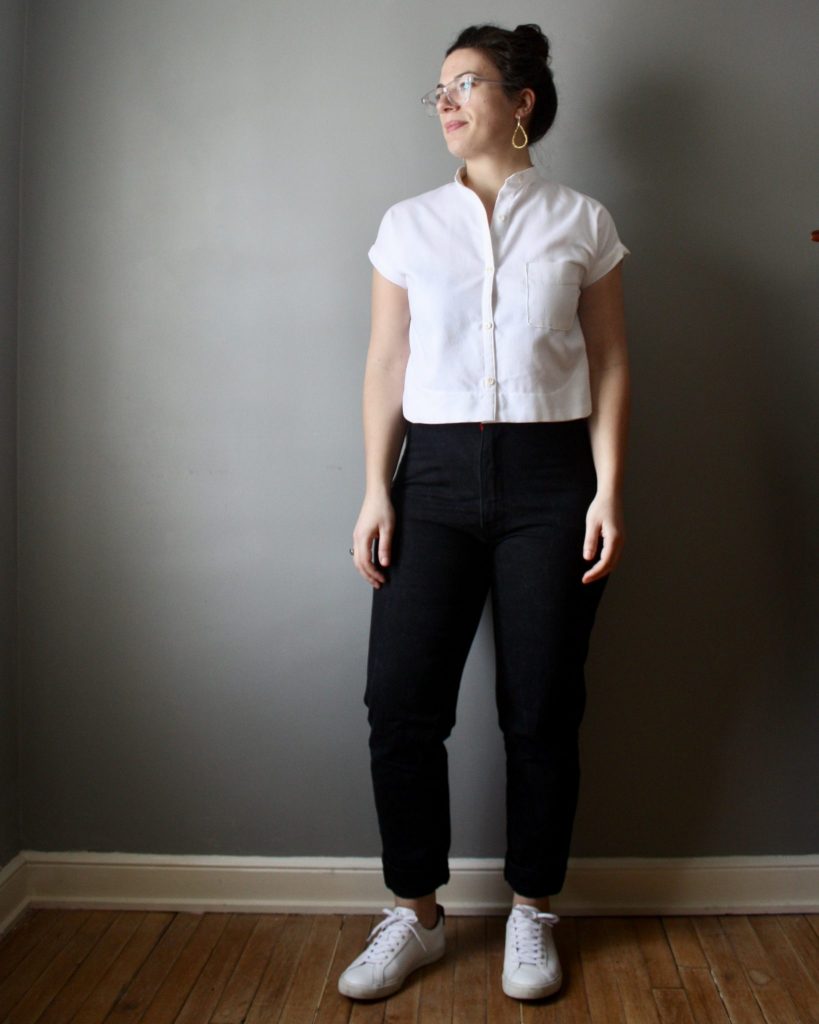
Wow! Love the detail of this post and seeing this amazing progression! Thank you!
Thanks! It was a long process with other projects sprinkled in between these pairs of pants, but I’m so glad to have the fit ready to go for future pairs!
Great info! Your pants turned out great! I’m getting inspired! 🙂
Thanks, Kim! I’m glad it’s helpful and I hope you give these a try!
Great post! And i love the flashy red zipper. Pants are one mountain I haven’t climbed yet, don’t know why but the process scares me. One of my goals though is to do the winslow culottes pattern from Helen’s Closet…. technically pants but there’s so much positive ease in he hips that fit won’t be an issue. Baby steps…
Thanks, Kate! I think that’s a great place to start too. One of my first pants projects was the Esther Pants by Victory Patterns and those have wonderful ease too. Easy to fit and very comfortable! I have to make the Winslows someday too…!
Great review, these tips will be helpful! These are printed out and at the top of my sewing queue. Ijust need to order the rose 8 wale cord from Stoffstil. I’m really enjoying my lander pants and having a more comfortable alternative to the skinny jean silhouette.
I just peeked at the Stoffstil site and I could really get lost in all their options – thanks!! 🙂 I’m with you on the Lander pants silhouette too – love them.
Wow I never thought about getting my honey to help me with back-pocket placement but I bet it would be right up his alley… thanks for the idea! Also the fitting tips 🙂
Pingback: Fennel Fanny Pack - SewNorth - Pattern Reviews
Thank you so much for this great post, has really helped me with some of my fit issues. Me vs pants seems endless, but this gives me hope for a finish line- they look awesome on you! Can I please ask…how much did you add when you did the full seat adjustment? You say that you do it in the final adjustment but I’m not sure if you mean that fancy slice and spread thing or you might just mean this as a summation of your grading adjustments. I have a similar waist-hip-leg ratio to you and have been going round in circles trying to enlarge for my bum without making the legs way too roomy 😊