The Cottesloe Swimsuit pattern can work as a really supportive sports bra, and it’s a nice alternative if you’re vain like me and like to avoid the same old racerback tan lines while doing outdoor activities. I’ll tell you about how I chose my fabric, adapted for a wider elastic band around the bust, and a silly mistake I made that turned out for the best.
The Details
- Pattern is Cottesloe Swimsuit by Megan Nielsen Patterns, available sizes 0-30
- View D, top only, fully lined, no cups
- I cut a straight size 8: I am 36″ bust, 29″ waist
- Modifications: 1.5″ (not 1″) wide elastic band across the under bust
- Main fuchsia fabric is Poly Lycra from SR Harris (local outlet), mid weight and good recovery. Lining in green is a lighter weight Poly Lycra scraps from my stash (originally from SR Harris)
- My mistake: I put the main fabric and the lining right sides together and sewed neckline elastic (instructions say wrong sides together). It worked out, promise.
The Fabrics and Elastics
I almost never browse the Lycra section of SR Harris, so taking some time to peek at their athletic knits was actually really fun. I found this fuchsia Poly Lycra that felt really durable and had good stretch and strong recovery. Most of all I love the color.
I had this green poly lycra knit in my stash already, but it was also from SR Harris. It has a lighter weight and more of a shine and slippery feel to it. The downside of getting fabric from this outlet is that you don’t get a lot of information about the fabric, but it is so inexpensive, it’s hard to resist.
The pattern calls for 1″ wide elastic for the under bust (same for the waist band if you’re making the bikini bottoms). I had 1.5″ elastic on hand from Amazon, so that’s what I used. The 1/4″ neck and arm elastic I was able to find at the outlet, but it’s the same as this one.
Cutting and Modifying the Band
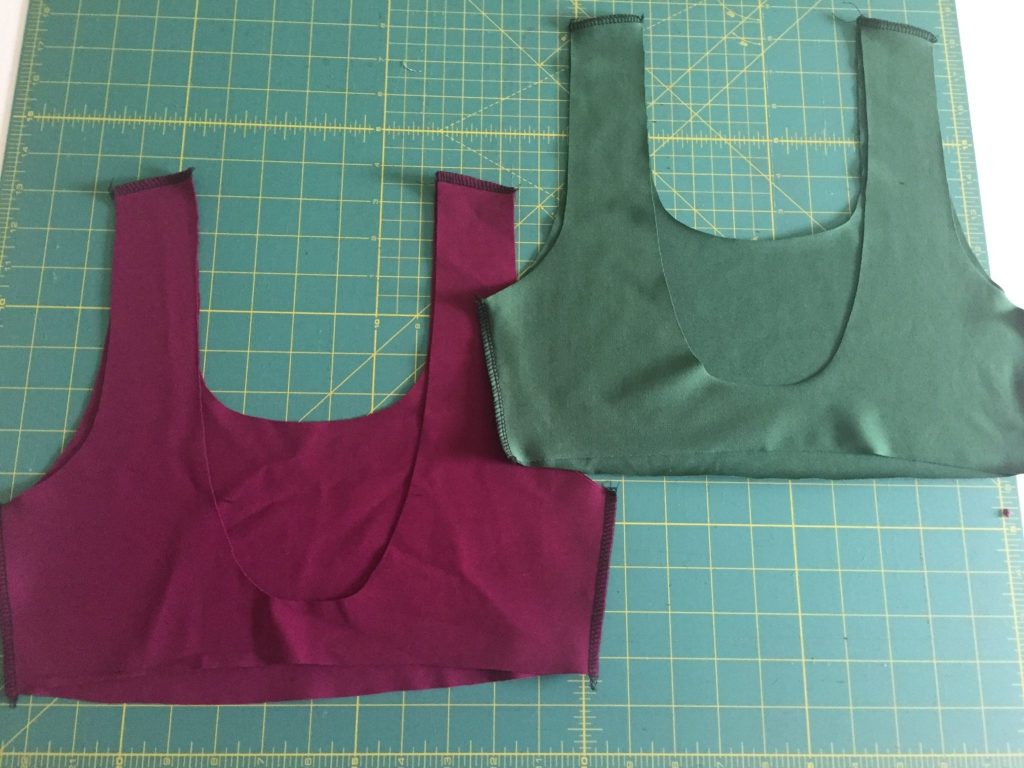
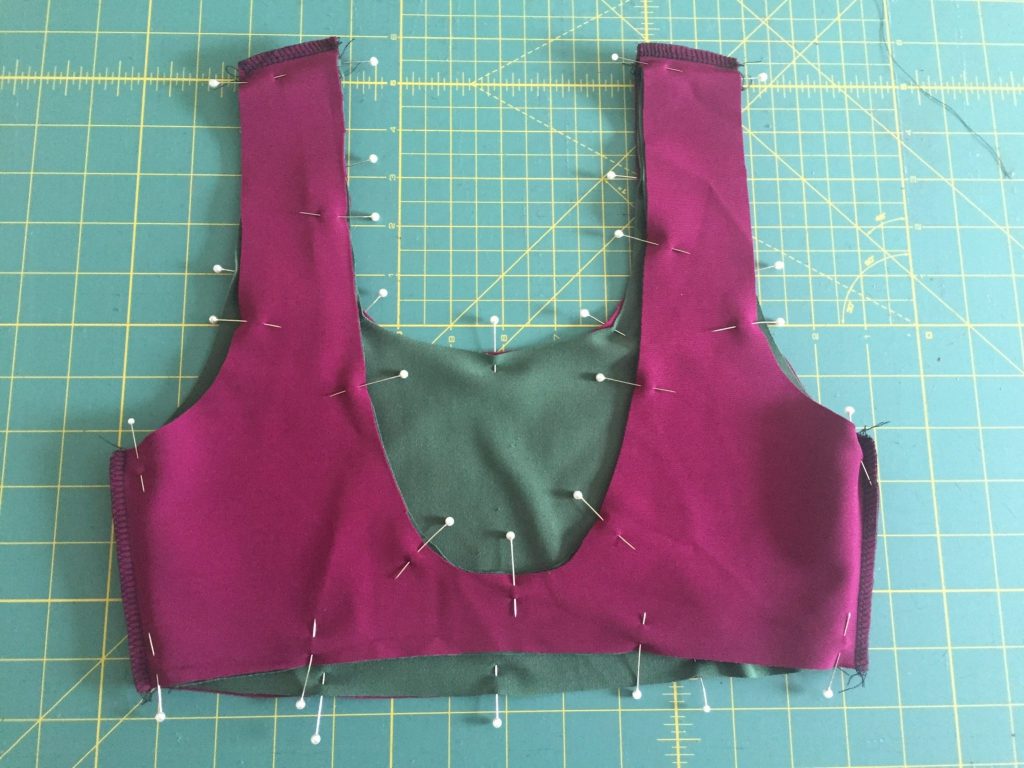
Just two simple pattern pieces, front and back. The fuchsia is the main outer layer, and the green is the lining. Here they are already serged together at the side seams and shoulders.
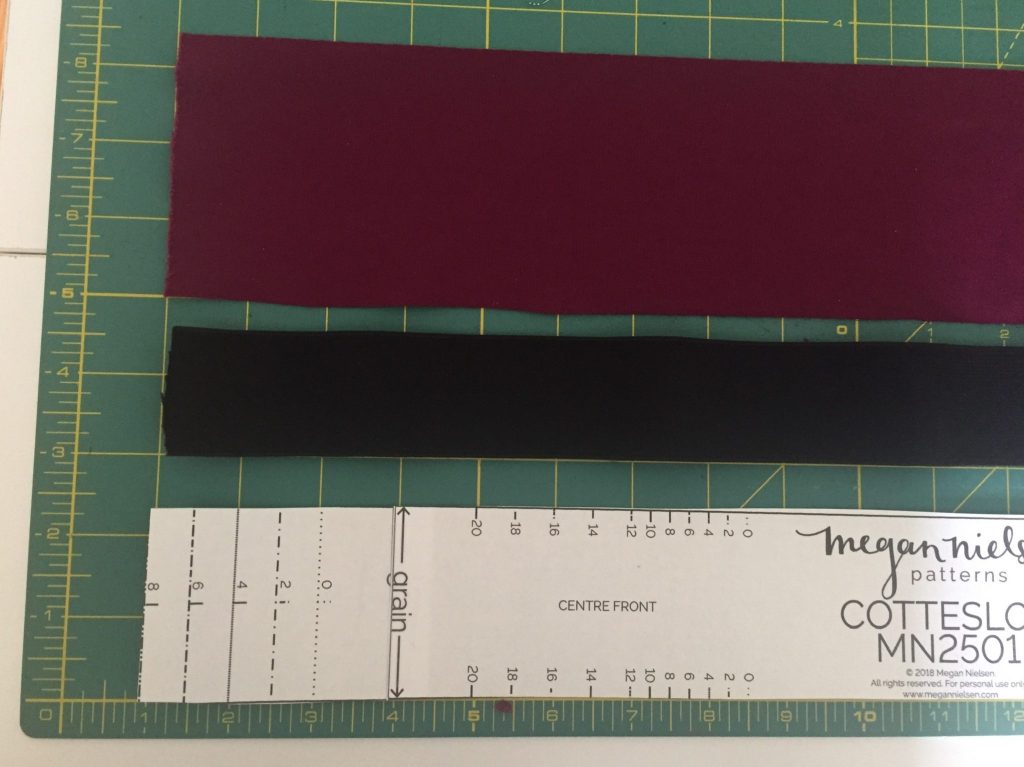
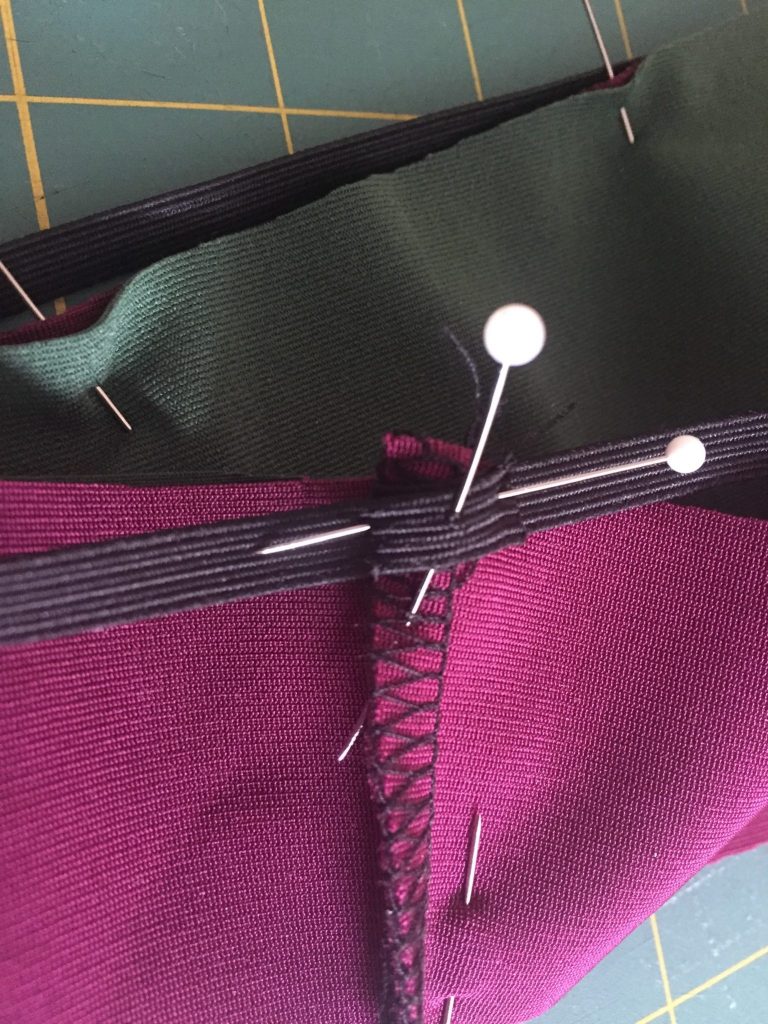
Black 1.5″ wide elastic (pattern calls for 1″ wide)
Fuchsia 3 3/8″ wide main fabric (modified to fit my elastic)
The pattern calls for 1″ elastic, and in the image above, the paper pattern piece is for cutting the main fabric that will encase the elastic band that goes around your under bust. It’s just over 2″ wide, and you fold it over the 1″ elastic. In other words, the pattern piece is double the width, and then some. So I did the same with my 1.5″ elastic. I doubled 1.5″ and added 3/8″. I cut the same length as a size 8, but I cut a width of 3 3/8″.
My Mistake
Here’s the beginning of where I messed up. The pattern instructions tell you to put your lining and main fabrics wrong sides together. Then you sew the neck and arm elastics to the edge along the lining side, then fold it to the inside of the garment. However! If you want your neck elastic totally encased and hidden between the layers, then do what I did, because this is how I made it work! I actually prefer it too.
As you can see in the picture above, I didn’t catch that wrong sides together thing. I only think “wrong sides together” when I’m doing French seams, and I guess it was just a habit. Eventually, I was thinking that you would turn it right side out. I pinned right sides together.
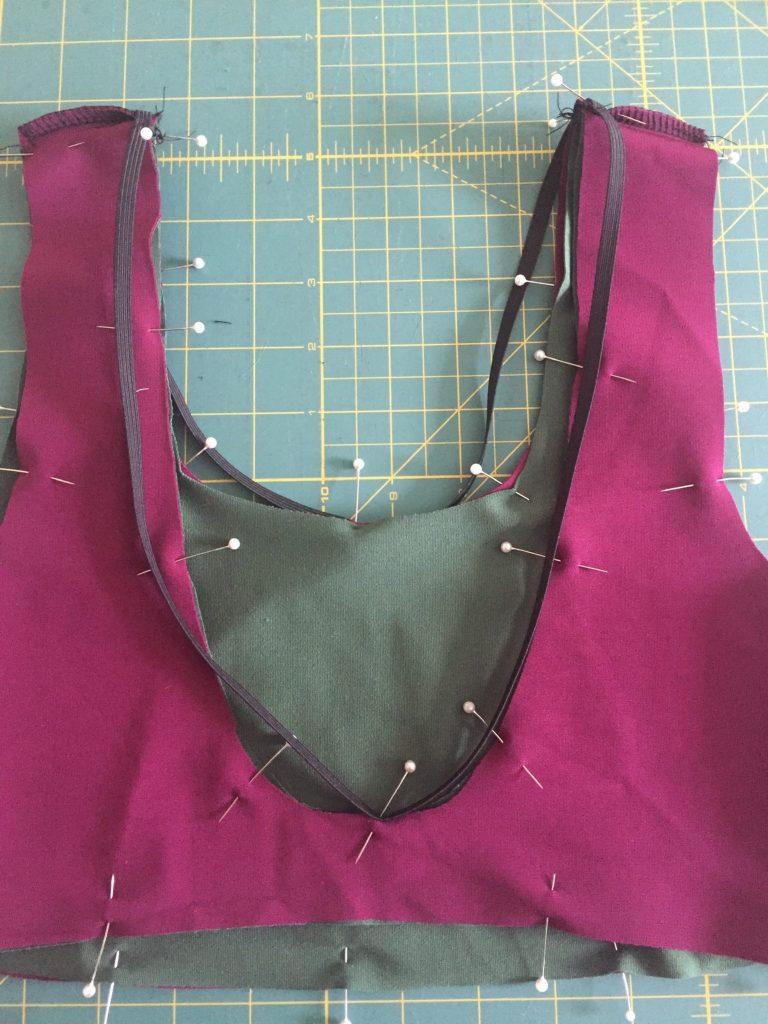
Then I attached the 1/4″ neck elastic in quarters to the shoulder and center front/back. You kind of tug the elastic a bit as you sew a zig zag around the entire neckline.
From Mistake to Success
If you want to copy my “mistake” and have your neck elastic hidden inside the garment, do not do what I did next! I continued on in the same way with the arm elastic, only then to realize that I wouldn’t be able to turn it inside out. I referred to the instructions and saw the whole “wrong sides together” from my last step. (Swear words and seam ripper were ever-present).
What you should do at this point, is turn your work right sides out, give the neckline a gentle press, and top stitch with a zig zag to keep the lining from peeking out. Now, you can continue as usual with the arm hole elastics. AND! Your neckline is nice and clean with no visible elastic even from the lining side.
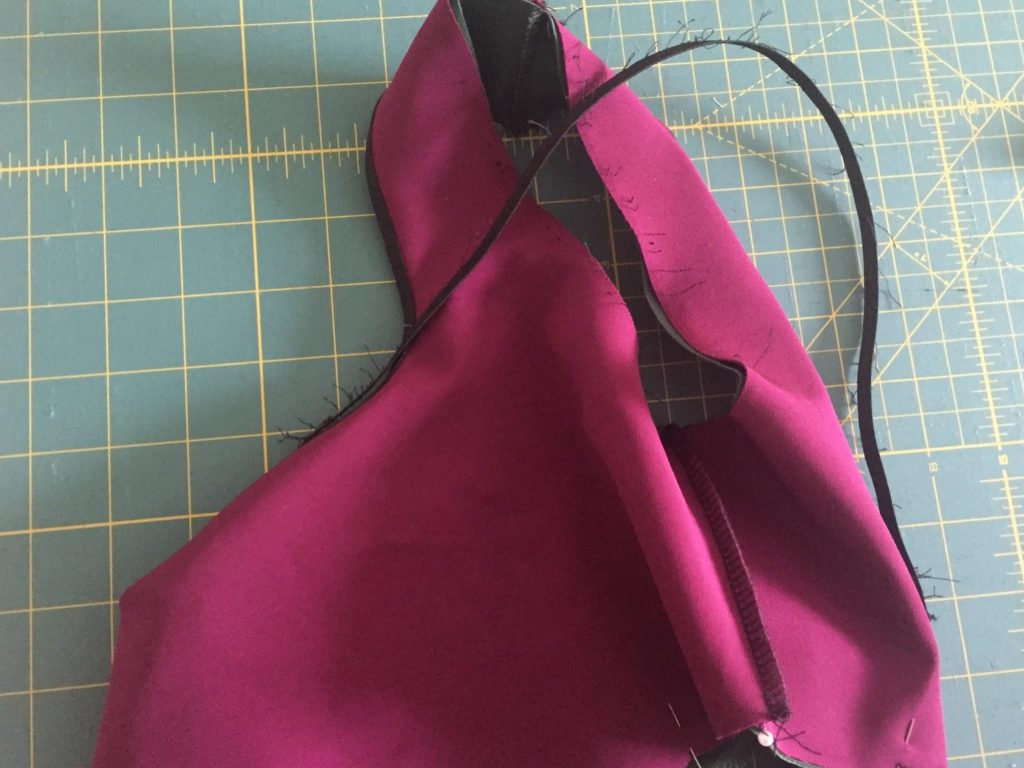
“Butterflying” the shoulder seams with extra pins 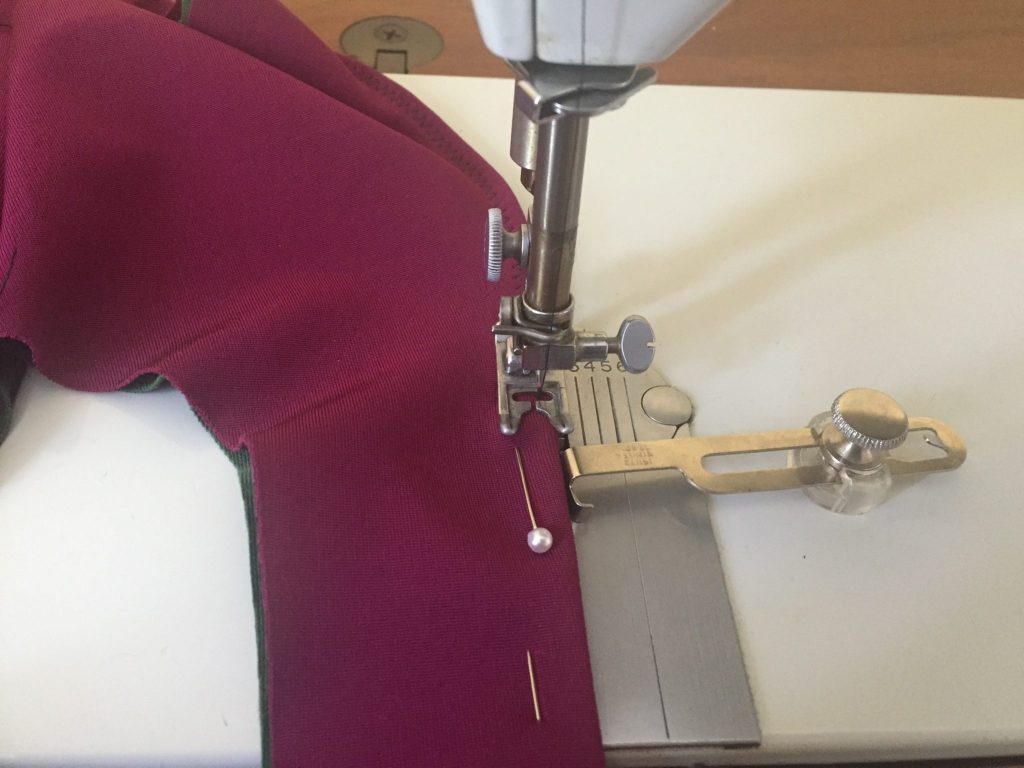
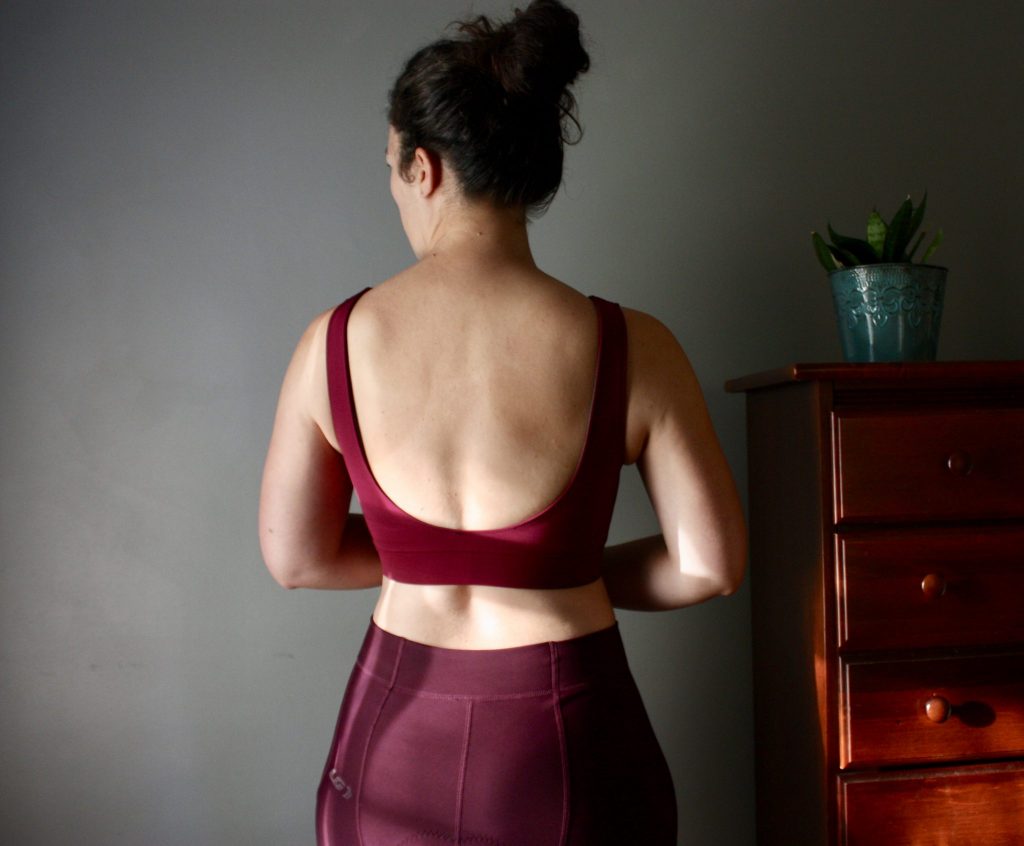
Top stitching the neckline. The elastic is sandwiched between the main and lining fabrics. Yay!
Extra Wide Band
Onward! Now I’ve got the modified neckline after realizing my mistake, and the arm holes are done as the instructions are intended. Next is my extra wide under bust band. It’s pretty straight forward to divide the main fabric and the elastic band into quarters with pins. There is something satisfying about wrapping the elastic with the fabric.
I definitely didn’t want any more blunders, so here’s what I did to make this last step stress free. 1. Baste the main fabric to the elastic band along the raw edge. 2. Baste the raw edges of the sports bra together. 3. Baste the left side seam of the sports bra to the side seam of the band so that seam lines up perfectly. I find when I try to only pin bulky things and take it directly to the serger, I’m often disappointed with how it never lines up well.
The last and most satisfying step is to serge the band to the sports bra. Voila! You have the option to top stitch the seam allowance, but I didn’t want to.
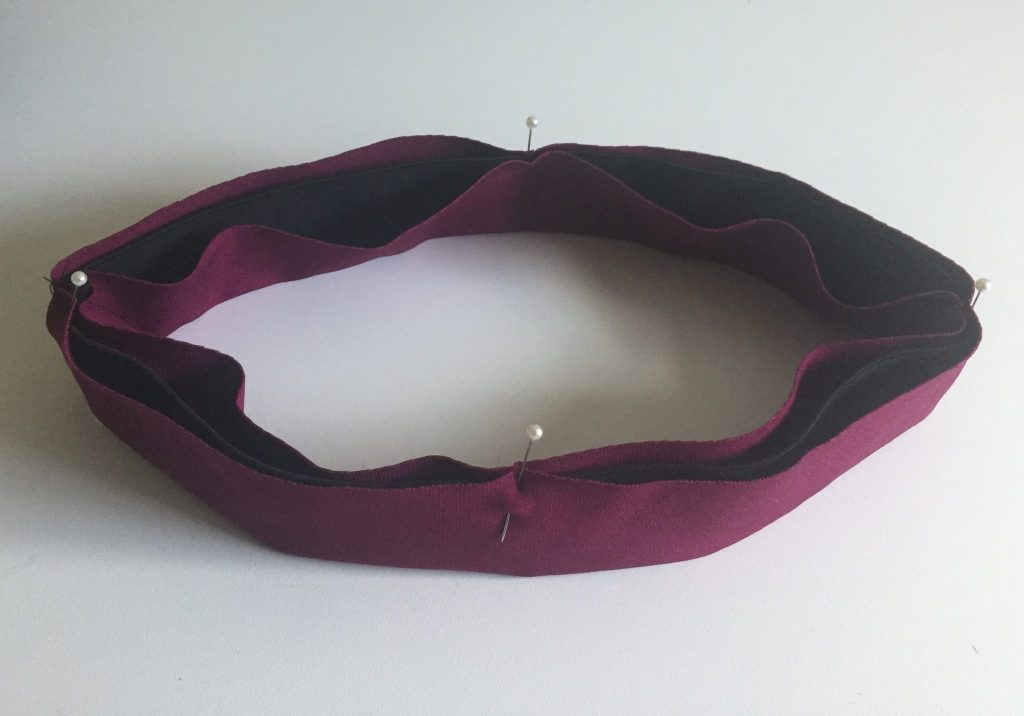
Extra wide elastic band with modified pattern piece to fit 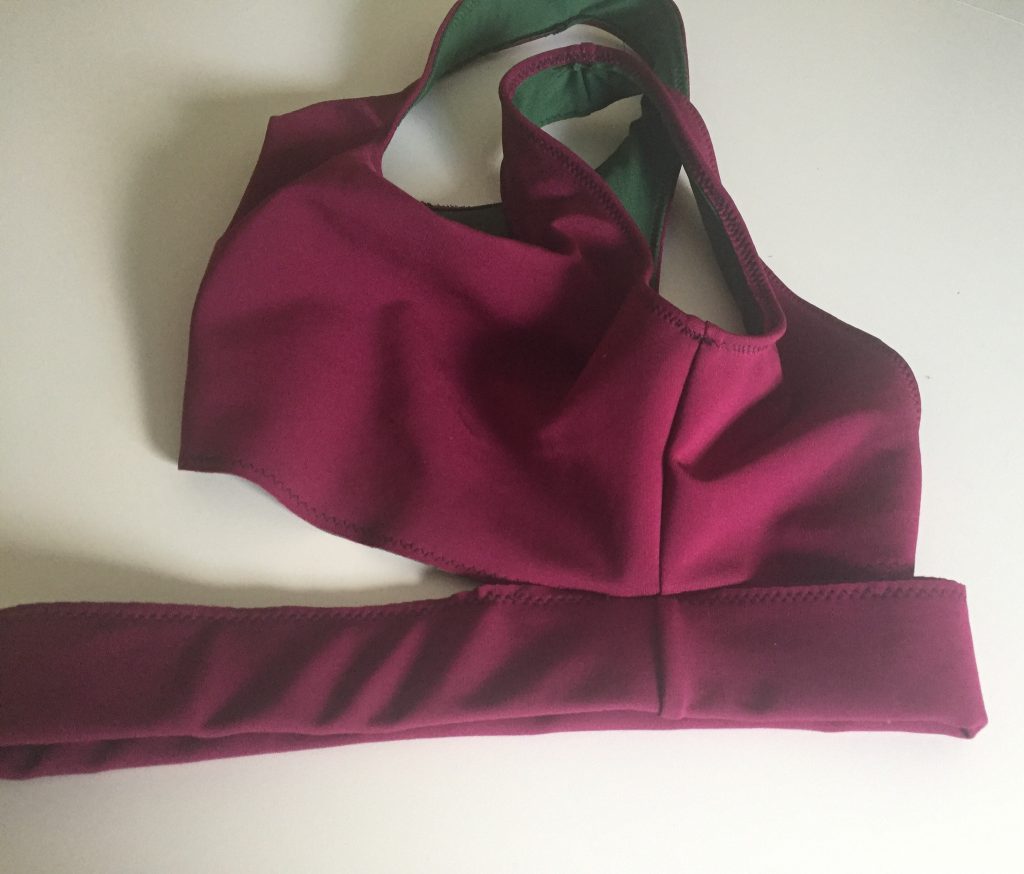
Baste raw edges closed and baste left side seams to line up perfectly together
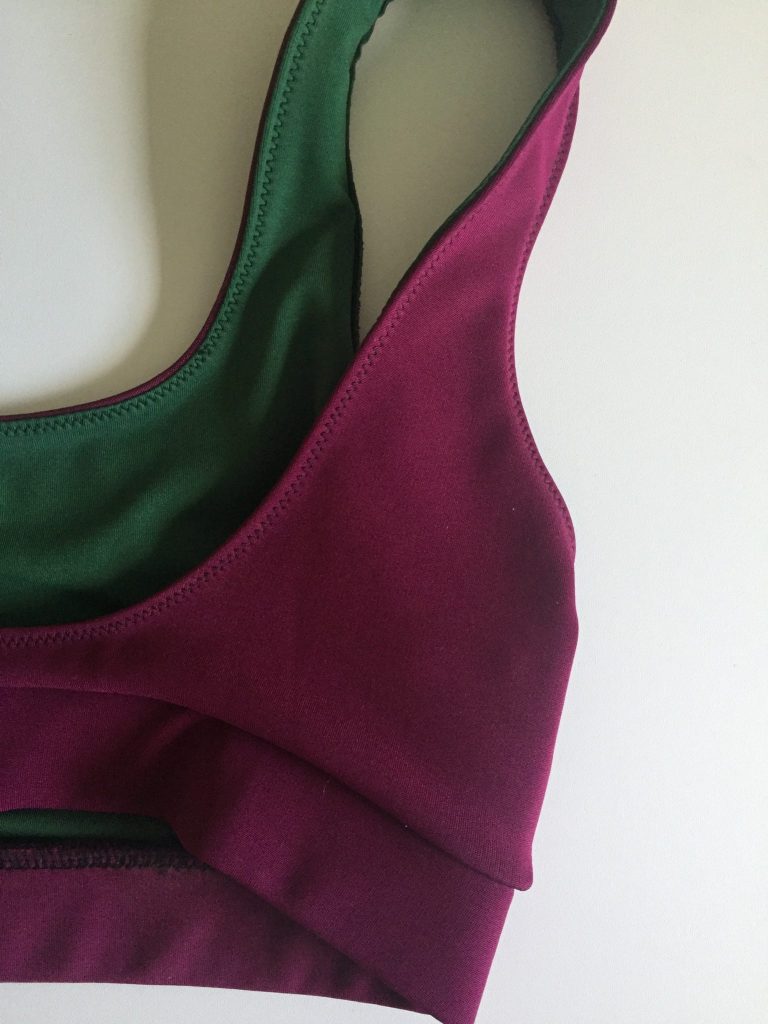
The Fit and Final Thoughts
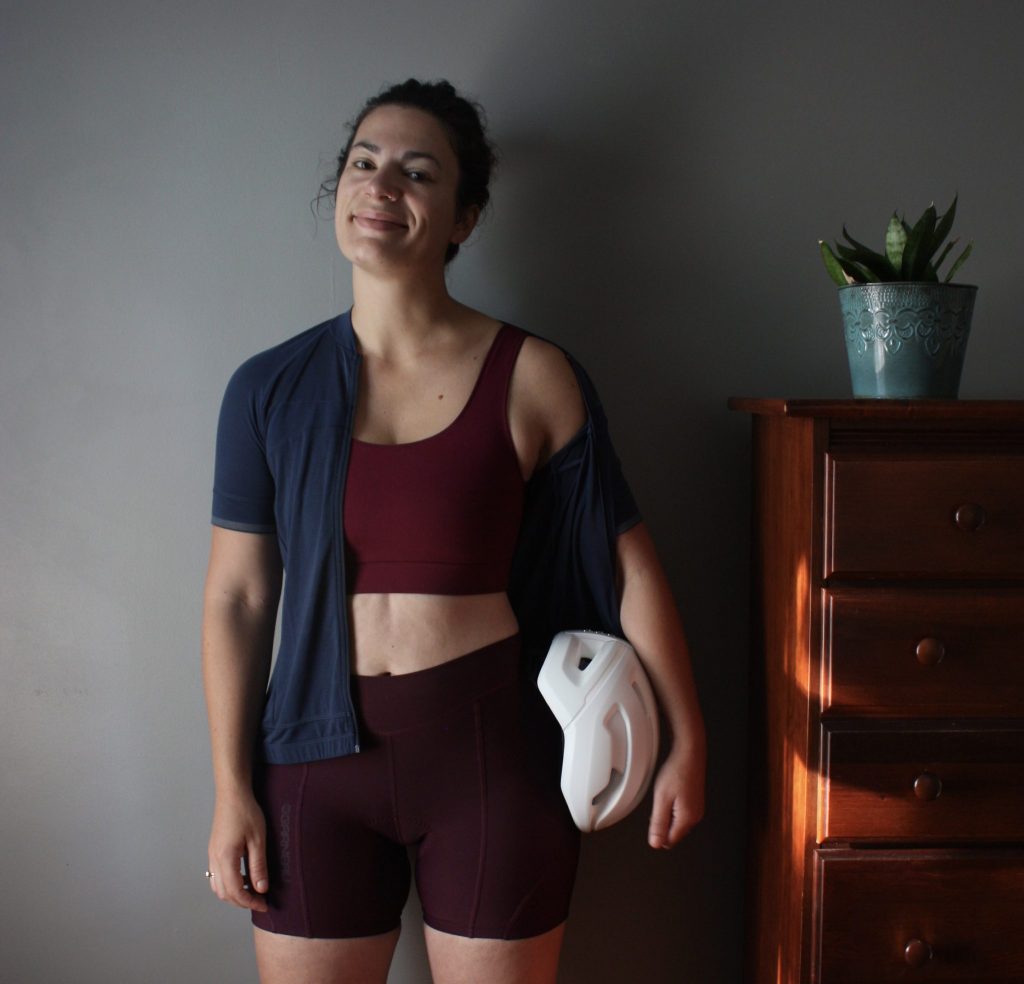
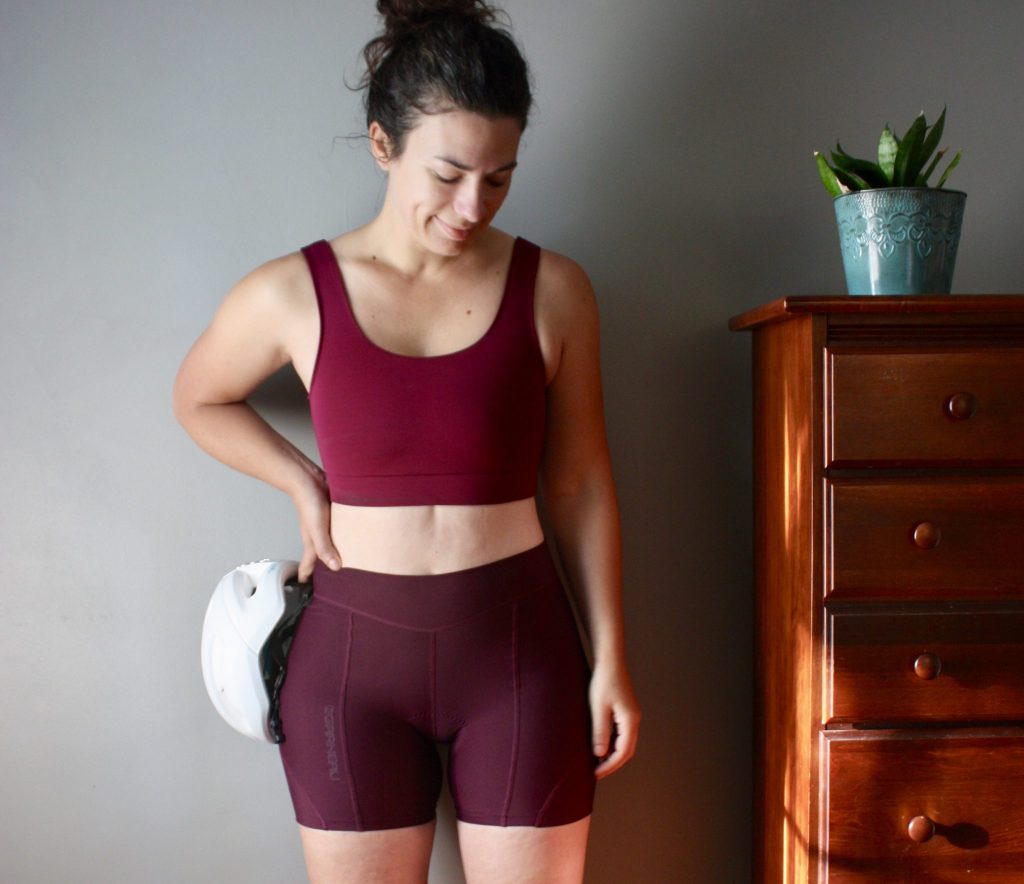
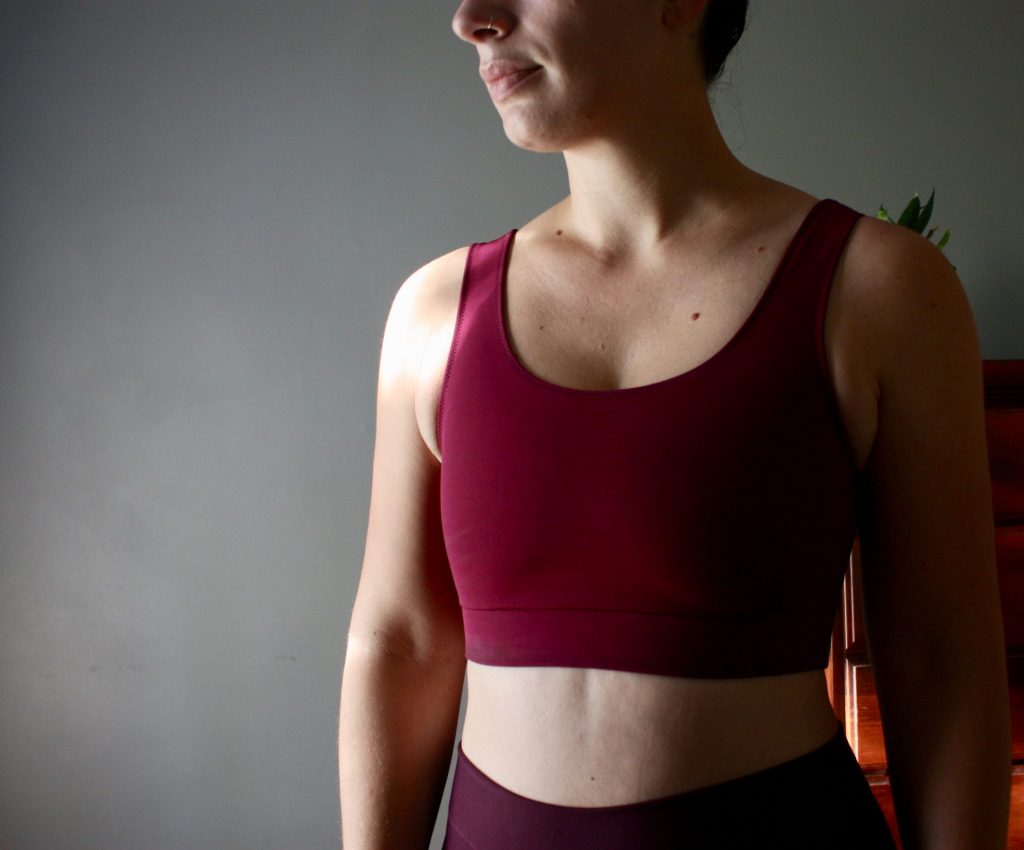
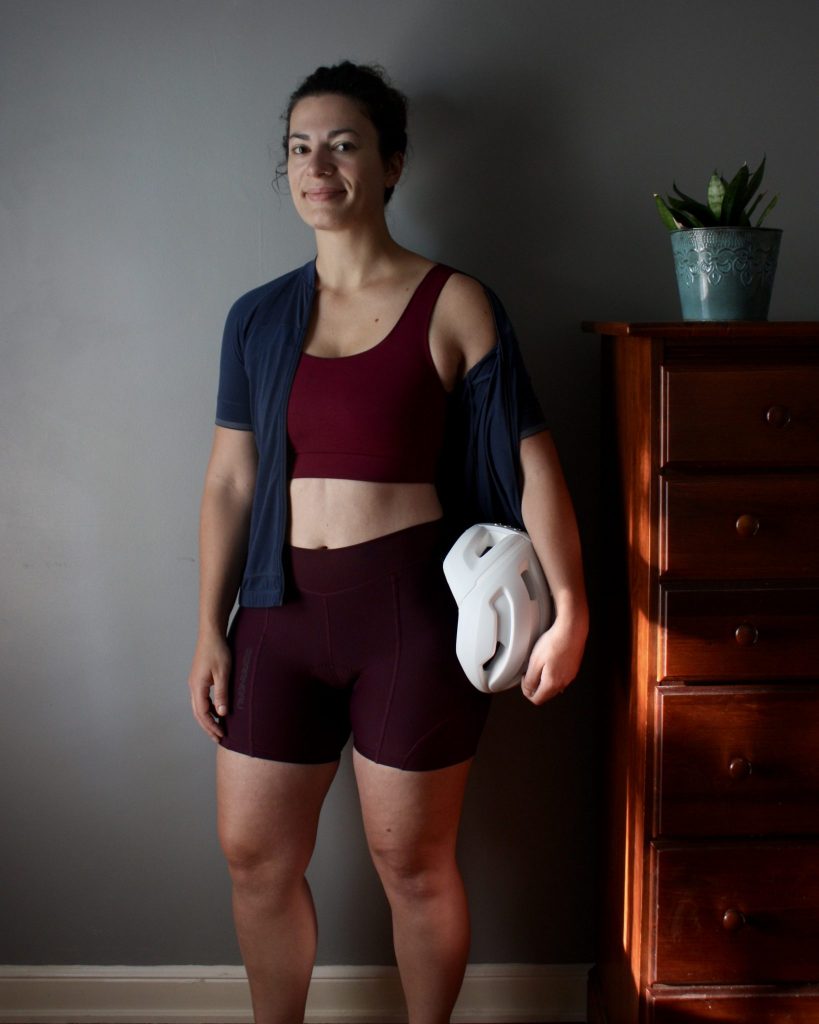
The fit is secure and snug! I’m sure the fit for others will depend a lot on the fabric, and how much support one prefers. This bra pushes everything into my body, which is what I prefer for athletic movement. I wear this biking, which doesn’t require a ton of support, but I love how this bra completes this trio of biking gear: such beautiful colors together. I would feel comfortable wearing this on its own because it has great coverage. I’d also feel good about running in this since it is so supportive. It doesn’t feel too tight in the upper shoulders like my other racerback sports bras do. Finally, I love that I can catch a little tan while exercising, and the tan lines will match with my future Cottesloe Swimsuit!
All in all, it’s a win! I love my happy mistake that makes the neckline nice and seamless. I also can’t wait to make this into a swimsuit!
I was just telling my friends how I needed a good sports bra pattern so I could chuck all my RTW bras. And I *just* bought the Cottesloe!!! Perfect timing. Now I just need to find some good supportive athletic Lycra to go see me about 4 of these!
Thanks!!
Awesome!! I’m so glad! I know we were talking biking earlier, and I just have to emphasize how great these straps are for biking. I’m not sure if I’ll go back to my racerback because they pull too much at my shoulders. I hope you find some good Lycra!
You have a nice sports bra now!
I love how versatile this pattern is! The scoop back is extra pretty showcased like that. Beautiful, functional piece.
Thanks, Lia! I love the scoop too. It’s proven to be so comfortable as I keep grabbing this one instead of my RTW bras lately.
Pingback: Cottesloe Swimsuit Color Blocking - SewNorth - Hacks
Love the fit, the color and the idea to use a swim pattern for sport ! As usual, I’m a fan 🙂
You are so kind, Mathilde!